 | ||
| Your browser is not supported. | ||
|
Please browse our site using any of the following options:
| ||
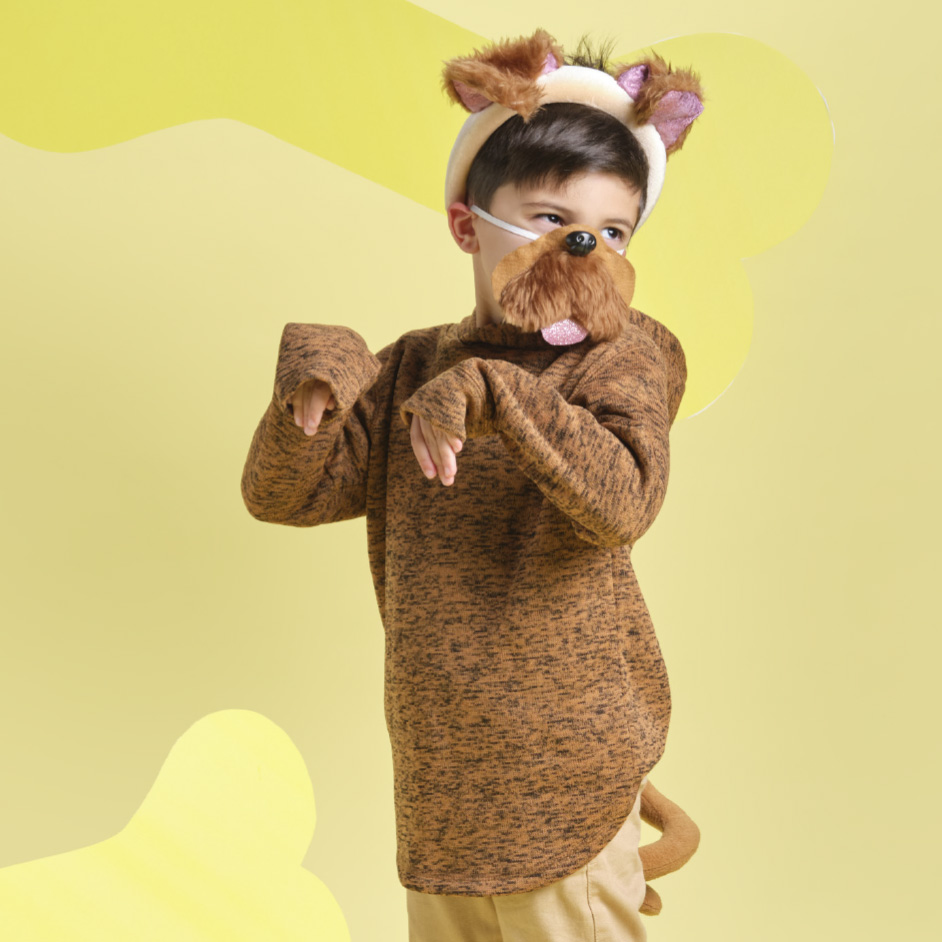
PUG COSTUME

Level: Intermediate
What You'll Need:
- Maria George Padded Velvet Headband
- Birch Braided Elastic White 3 mm
- Arbee Flock Dog Nose 4 Pack Black 18 mm
- Hobby Fill
- 0.20cm Furtex Plain 148 cm Faux Fun Fur Fabric Brown 148 cm
- 0.40cm Plain 148 cm Peak Polar Fleece
- 0.20cm Glitter 90 cm Polyester Felt Fabric Pink 90 cm
- Nuno Hello Strong Fabric Glue Clear
- Birch Braided Elastic Black 20 mm
INSTRUCTIONS
Headband
Step 1 - Using the template provided cut two inner earpieces and two fur earpieces. Lay both pieces right side facing and sew along the outer edge leaving the bottom straight cut open.
TIP- When sewing fur, ensure that you push all the hairs to the center of your work so that the open edge you are sewing is fur free. This allows you to have the maximum amount of fur on the outside of your project.
Step 2 - Turn out the ears. Pin them to desired position on the headband, and hand stitch to adhere to the headband.
Tail
Step 1 - Use the template provided to cut two spirals for the tail from the polar fleece.
Step 2 - Lay both tail pieces on top of each other with right sides face. Leaving the straight cut open, sew around the spiral starting at one opening corner and working your way around.
Step 3 - Turn out the tail and gently stuff the tail with a small amount of hobby fill. Too much hobby fill will make the tail too stiff and may lead to a deformed shape.
Tip - Gently push the small amounts of hobby fill down the tail with the back of a pen. Ensure that you start at the tip and only use small amounts to start with.
Step 4 - Cut a length of elastic to measure the child's waist and sew it closed to form a waist band. Attach the tail over the join.
Snout
Step 1 - Using the templates cut all required pieces for the mask.
Step 2 - Glue the puppy tongue glitter side up to the underside of the puppy snout. Align the tongue to be in the center. Glue the snout onto the right facing side of one of the puppy face pieces.
Step 3 - At the center top of the puppy face, make a small hole to insert the nose. Follow the instructions provided on the packaging to adhere the nose.
Step 4 - Sew the elastic to the sides of the face keeping the tail ends pointing towards the center of the snout. Use the glue to adhere this created layer to the secondary puppy face piece that was cut in step 1. This will sandwich the elastic ends and the nose back between two pieces of fabric.


