 | ||
| Your browser is not supported. | ||
|
Please browse our site using any of the following options:
| ||
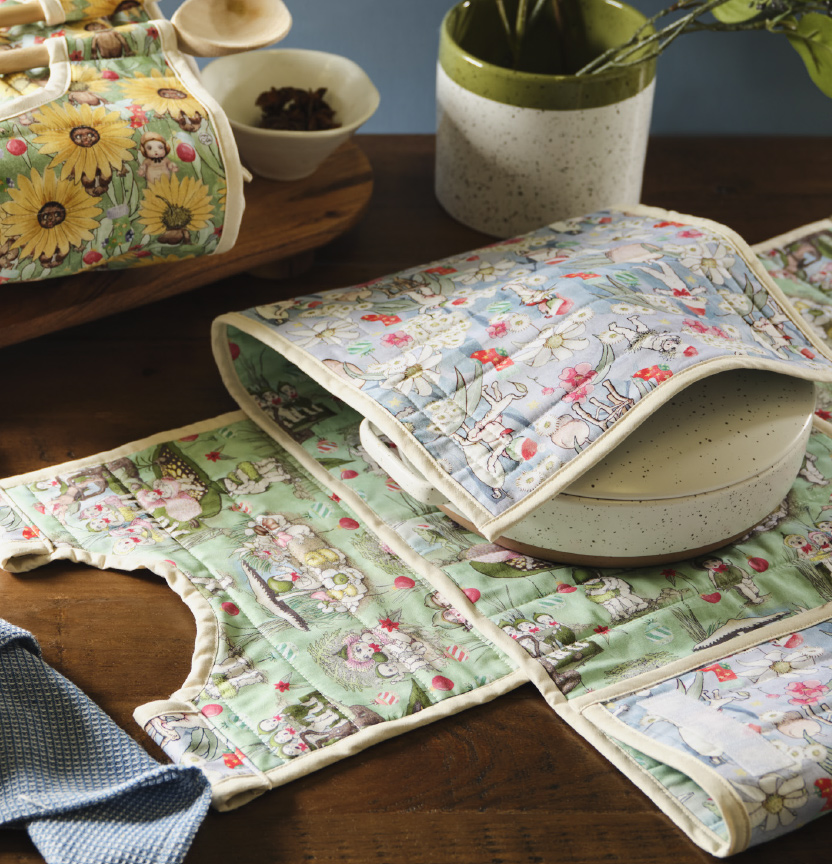
MAY GIBBS PIE CASSEROLE CARRIER

Level: Intermediate
What you'll need:
- Outer: Printed 112 cm May Gibbs Christmas Cotton fabric x 1m
- Inner: Printed 112 cm May Gibbs Christmas Cotton fabric x 1m
- Legacy Insulative Polyester Fleece Wadding 114 cm x .6m
- Birch Cotton Bias Binding 25mm x 5m
- Hook & Loop Tape 20mm x .4m
- Wooden spoons or dowel x 2
- Gutermann Sewing thread
- Scissors, Pins, Ruler/Tape measure, Washable pencil/marker
- Sewing machine
- Iron
Tips:
- Use pre-quilted fabrics instead of the 3 layers of outer, lining and fleece fabrics.
- Make your own bias binding from contrasting organic cotton fabric with a Birch Bias Tape Maker 25mm.
Instructions
Step 1- Cut two pieces with one measuring 1m high by 30cm wide and the 80cm high by 30cm wide from each of the printed cotton fabrics & insulative fleece.
Step 2- Layer fabrics by placing one of the printed cotton fabrics right side down, then the insulative fleece then the other printed cotton fabric on top with right side up. Pin all layers together. Repeat with other cut fabrics.
Step 3- With washable pencil/marker and a ruler, draw lines on the top fabric across the width 5cm apart. Quilt fabrics together by sewing along the marked lines through all layers.
Step 4- Lightly press open bias binding, keeping creases on bias intact. Align one of the raw edges of the bias binding with the raw outer edge of the longer quilted fabric piece, pin together. Sew binding to fabric along the first crease of the binding, mitering the tape at the corners. Trim & neaten seam.
Step 5- Press binding up away from stitching and fold over the fabric raw edge to other side. Pin the binding to the back fabric with raw edge of tape pressed under along the crease. Top stitch tape through all layers close to tape's edge.
Step 6- Cut Hook & Loop tape into 4x 10cm lengths, separate cut tape.
With the outer of the fabric facing down, pin one side of each of the cut tape to the left side of the fabric as per diagram's measurements. Sew tape in place through all layers.
Flip fabric over and repeat by placing the other side of the tape to fabric, same measurements as the diagram but to the right hand side of the fabric.
Step 6- Apply the binding to the other shorter piece of quilted fabric using the previous method but only to the two longer side edges.
Step 7- To mark the handle shape along the two shorter ends of the quilted fabric, mark the center and measure out 7.5cm to either side, making a total of 15cm. Using a washable pencil/marker from these points measure and mark down 3cm, then draw a semi-circle to join both sides. Cut out shape along markings.
Step 8- Attach bias binding to the curved cut raw handle edges as per previous method.
Lay fabric with the outer fabric face down. Fold and press under 8mm along the remaining shorter raw top edges between handle cut out outs. Press under another 2-3cm, adjusting this measurement to be able to fit and slide the wooden spoon handles or dowel through. Sew in place through all layers close to pressed folded edge.
Step 9- Putting all together: Measure and mark with pins the center of each of the two quilted fabric pieces. Lay the shorter quilted piece with handles outer side facing down flat. Place the longer piece on top of the other also with outer side facing down. Align the center of each piece together into a cross type shape. Pin the layers together along where the long edges of the shorter handle piece intersect with the longer piece. Sew together through all layers along the same stitching as the bias binding tape.
Optional: The edges where the other edges intersect together can also be sewn together or can be left open to allow heat or cool packs to be inserted carrier.


