 | ||
| Your browser is not supported. | ||
|
Please browse our site using any of the following options:
| ||
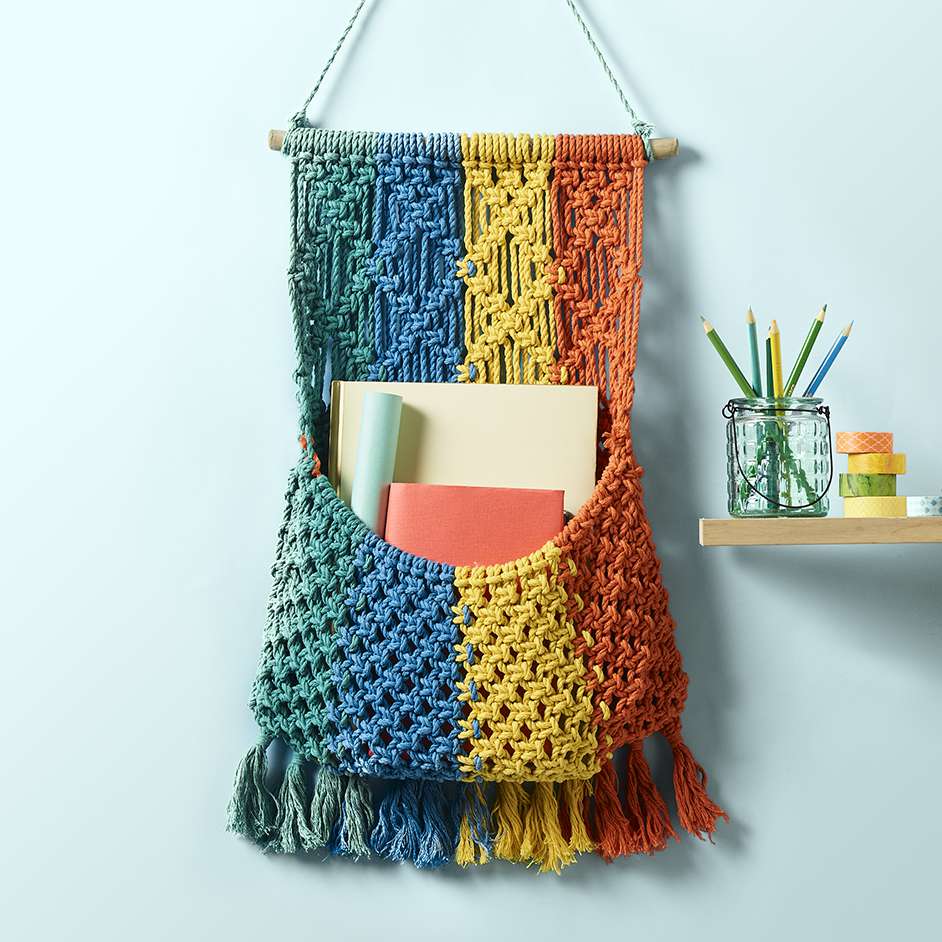
MACRAME WALL POCKET

Level: Intermediate
WHAT YOU'LL NEED:
- 4 x Semco Recycled Cotton Macrame Cord in Teal, Blue, Yellow and Orange
- Wooden dowel rod for hanging
- Scissors
- Measuring tape
- Chair or wall to hang piece on while working
- Fork
INSTRUCTIONS
Step 1 - Cut your macrame cord into the below measurements:
- Teal - 7 strands x 150cm
- Blue - 6 strands x 150cm
- Yellow - 6 strands x 150cm
- Orange - 7 strands x 150cm
Step 2 - Attach all the strands to the wooden dowel by folding in half and creating Larks Head Knots. We started with the Teal strands on the left, followed by Blue then Yellow and lastly Orange.
Step 3 - You can now start the first row of knots. Leave the first 2 strands and make a Square Knot out of the next 4 strands. Repeat this with the rest of the row but again leaving the last 2 strands free. You should have 12 Square Knots in this first row.
Step 4 - Working in each colour create a triangle of Square Knots. Under the first 3 Square Knots, create 2 more, leaving 4 strands free on either end. And lastly create 1 Square Knot on the next row leaving 6 strands free on either side. Repeat this across the 4 colours so you have 4 triangle shapes.
Step 5 - Continue tying Square Knots in a diamond pattern across the next 12 rows. The colours will intertwine where they meet in the middle Square Knots.
Step 6 - Now you can begin the pocket part of the macrame piece. Tie 12 rows of Square Knots to create a solid piece for the back side of the pocket. Leave the end pieces hanging you will come back to those in Step 11.
Step 7 - Cut more macrame cord into the below measurements for the front piece of your pocket:
- Teal - 7 strands x 120cm
- Blue - 6 strands x 120cm
- Yellow - 6 strands x 120cm
- Orange - 7 strands x 120cm
1 x 50cm in the colour of your choice to be the holding cord.
Step 8 - Attach all the strands to the holding piece by folding in half and creating Larks Head Knots. To match the back piece of your pocket, follow the same layout with colours - Teal followed by Blue then Yellow and lastly Orange.
Step 9 - Repeat Step 6 to create the front side of the pocket. You should end up with 12 rows of Square Knots. Again, leave the ends of each strand hanging free for use in Step 11.
Step 10 - Lay the front pocket piece onto the back with right sides facing in, ensure to line up the sides. Cut 2 x strands of cord and use it to tie the front and back sides of the pockets together by looping it through the big loop between each Square Knots, pull the cord gently to bring the 2 sides together. Weave the remaining cord through some of the knots until secure and cut off any excess. Turn the pocket right side out.
Step 11 - With the remaining cords from Step 6 and 9 you will create 13 Wrapped Knots to finish off the pocket. Cut 13 x 20cm working cords in any colour. Then to create the Wrapped Knot bundle the strands in groups and create a U shape with the working cord and lay it on top of your bundle. Taking the left end of the working cord and wrap it over and around the bundle including the U shape.
Wrap the cord firmly around the bundle until you have reached your desired length, make sure each wrap is underneath the previous one. To finish pass the end of the working cord through its remaining loop and pull the right end of the U cord up to slide the loop inside the wrapped area until it is half way through. Cut off the ends close to the knots. Repeat this step to create 13 wrapped knots along the bottom edge of the pocket.
Step 12 - To finish, use a fork to fray the ends of each wrapped knot. Then your pocket is ready to hang and fill!


