 | ||
| Your browser is not supported. | ||
|
Please browse our site using any of the following options:
| ||
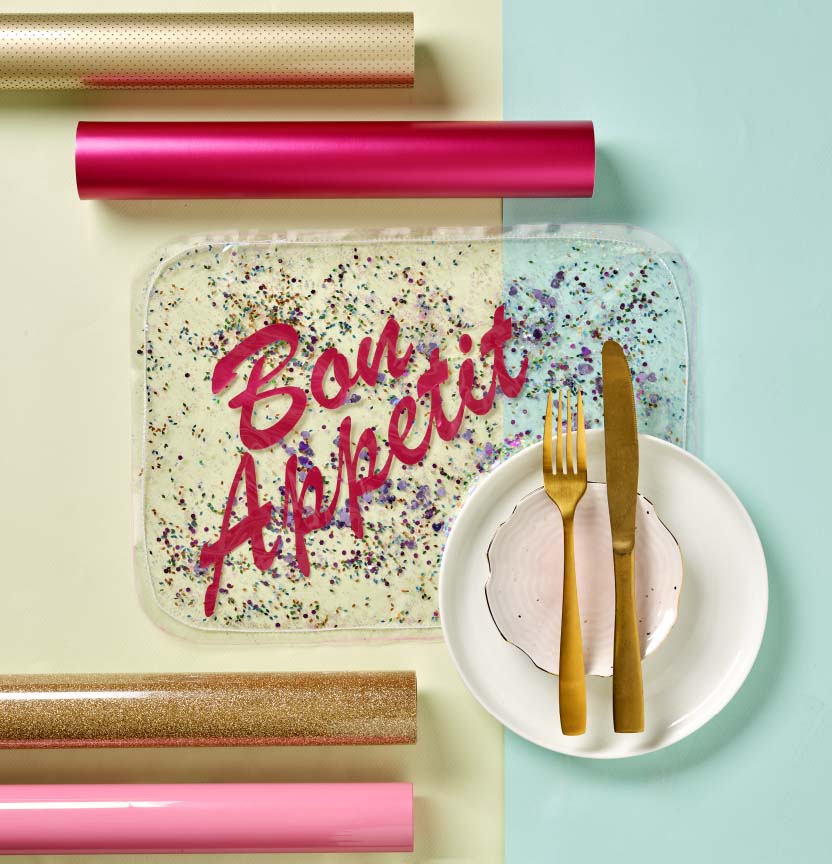
GLITTER PLACEMATS

Level: Easy
What you'll need:
- 2mm x 50cm ladelle clear plastic table tone
- Sewing machine
- Sewing thread (colour of your choice)
- A3 Paper for template
- Scissors
- Texta or whiteboard marker
- Cutting machine (Cricut, Silhouette or Brother) & mat
- Permanent vinyl
- Transfer tape
- Weeding tool
- Scraper tool
- Selection of glitters, flakes, fine glitter & glitter shapes
- Pegs, bulldog clips or paper clips
Instructions
Cut placemat shape
Create a paper template for your placemat. The template will need to be the finished size of your placemat, there is no seam allowance needed. An easy way to get an accurate rectangular shape with curved corners is to use word, create a new document and insert Rectangle with round corners. The size can be your choice, whichever is suitable for your table setting.
Step 1 - Print off paper template or draw template and cut out.
Step 2 - Lay out the plastic table tone and prepare for cutting, trace around your paper template using a whiteboard marker or texta which can be easily cleaned off the plastic. Carefully cut out three pieces.
Tip - Don't use needles to pin in place your template, this will leave holes in the plastic table tone.
Create the Glitter Layer
Step 1 - Thread up your sewing machine bobbin with your thread colour of choice and thread the machine ready for sewing. Make sure your stitch length is long, or on the longest setting, you don't want your stitches too close together, otherwise the plastic table tone may perforate and break.
Step 2 - Lay flat one placemat and gently sprinkle glitter into the centre (try not to let the glitter go to the edges, you need the edges clean for sewing later). Add different shapes and colour to create an even effect.
Step 3 - Lay flat a 2nd placemat gently over the first placemat so the edges line up and all your glitter is enclosed. Gently using your hands press down onto the placemat to smooth out any creases. It's important that these two layers sit flat and edges line up. Once you are happy with their position, gently peg the corners and sides to make sure they stay together (this is in place of pins, we don't want to put pin holes into the plastic).
Step 3 - Gently stitch around the edge of the placemat approx. 1cm in from the edge. As you sew, make sure none of the glitter pours out. If you do lose some glitter, you can add it back in, once you are 8cm away from the start of your stitching. When you have stitched all away around the edge, run your machine forwards and backwards and cut the loose threads.
Add your Vinyl
Step 1 - Add some extra colour to your placemat with a Vinyl Decal. Following your Cutting machines instructions for cutting permanent vinyl, cut a design of your choice, such as words or shapes.
Step 2 - Use transfer tape and transfer the design onto the 2nd layer of plastic table tone.
Finishing your placemat
Step 1 - Add the last layer of plastic table tone over the Vinyl layer, this is to protect it when in use. Sew around the edges, going over the previous stitching, run the machine back and forth and cut off loose ends.


