 | ||
| Your browser is not supported. | ||
|
Please browse our site using any of the following options:
| ||
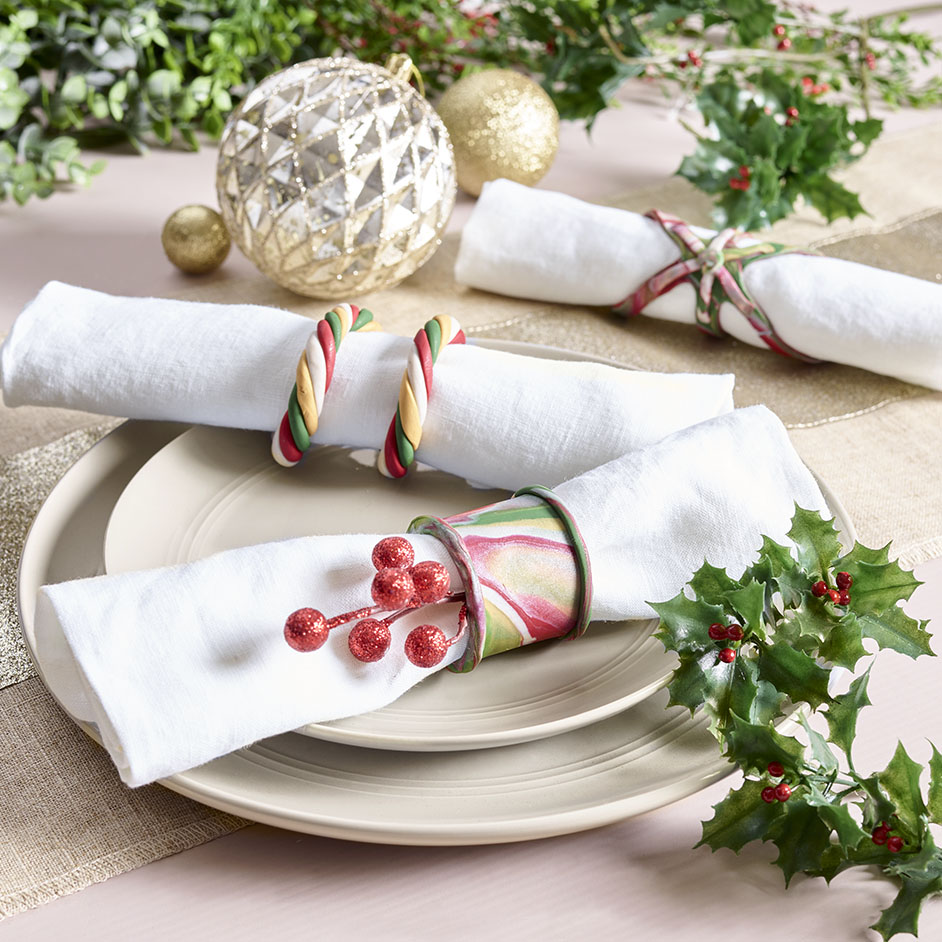
SCULPEY NAPKIN RINGS

LEVEL: EASY
WHAT YOU'LL NEED:
- Sculpey III Leaf Green x 1 block
- Sculpey III Deep Red Pearl x 1 block
- Sculpey III Pearl x 1 block
- Sculpey III Jewellery Gold x 1 block
- A minimum 2, but ideally 8 x Empty, clean glass spice jars (approx. 35mm in diameter eg. Masterfoods), with labels removed (or use the same 2 jars 4 times)
- Ruler
- Small rolling pin
- Sharp craft knife
- Baking Tray
- Oven
- Baking Paper
- PRE-HEAT OVEN TO 130
INSTRUCTIONS
Style #1: Coiled Rope Napkin Rings (Makes 8)
Step 1 - Protect your work surface.
Step 2 - Cut all four blocks into 4 equal pieces. Knead each piece in your hands to warm up and soften the clay.
Step 3 - Roll 1 piece of each colour into 4 separate long thin sausage shapes 45cm long. Keep the thickness as even as possible.
Step 4 - Lay the 4 sausages touching side by side.
Step 5 - Gently push together so they join to form on long flat strip but retain their rounded shape.
Step 6 - Gently twist the strip to form a rope approximately 60cm long.
Step 7 - Gently squeeze the rope along the length retaining as much of the rounded shape as possible.
Step 8 - Cut off each end of the rope to create smooth finish.
Step 9 - Cut the rope in evenly in half to form two pieces each approximately 28cm long.
Step 10 - Coil each piece around its own spice jar to shape the napkin ring.
Step 11 - After deciding which side of the ring is the top gently press the jar on a flat surface to flatten the base of the ring. This will prevent the ring form rolling in the oven and when it is in place on the table. If you only have 2 spice jars, jump to step 13.
Step 12 - Repeat with remaining blocks of clay until you have created 8 coiled rings.
Step 13 - Place the coil wrapped spice jars on a baking paper lined baking tray & bake in the oven for 30 minutes. Allow to cool in the oven before carefully removing the jars.
Style #2: Marbled Napkin Cuffs (Makes 8)
Step 1 - Protect your work surface.
Step 2 - Cut all four blocks into 4 equal pieces. Knead each piece in your hands to warm up and soften the clay.
Step 3 - Mix 1 piece of each of the 4 colours together until you are happy with the mix. Don't over work this mix. Remember the more you work the clay the more mixed the colours will be.
Step 4 - Roll the mixed piece flat to about 2mm thickness approximately 25x9cm.
Step 5 - Cut out 2 strips measuring 12x4cm.
Step 6 - Gently round the corners and edges of each strip with your fingers.
Step 7 - Using the cut off waste, roll into 4 thin sausages 4mm wide 13cm long.
Step 8 - Place the sausages along the two long edges of the flat strips. Gently press to adhere the sausages to the flat strip to join and smooth edges. Trim the ends of the sausages in line with the end of the edges of the strips and smooth any joins.
Step 9 - Gently wrap one strip around a spice jar.
Step 10 - With the cuff wrapped jar on a flat surface and the right way up gently press down to flatten the base. If you only have 2 spice jars, jump to step 12.
Step 11 - Repeat with remaining blocks of clay until you have created 8 cuffs.
Step 12 - Place the cuff wrapped spice jars on a baking paper lined baking tray & bake in the oven for 30 minutes. Allow to cool in the oven before carefully removing the jars.
Style #3: Asterisk Napkin Ring (Makes 8)
Step 1 - Protect your work surface.
Step 2 - Cut all four blocks into 4 equal pieces. Knead each piece in your hands to warm up and soften the clay.
Step 3 - Mix 1 piece of each of the 4 colours together until you are happy with the mix. Don't over work this mix. Remember the more you work the clay the more mixed the colours will be.
Step 4 - Roll the mixed piece flat to about 2mm thickness approximately 25x9cm.
Step 5 - Cut 6 strips each measuring 13x1cm.
Step 6 - Overlay 3 strips so they cross in middle forming an asterisk. Gently press in the centre, where the pieces cross, to join. Round and smooth the edges.
Step 7 - Repeat with the other 3 strips.
Step 8 - With the waste clay create embellishments to attach to the centre of the asterisks or leave unembellished if desired.
Step 9 - Gently wrap one asterisk around the spice jar to shape the ring.
Step 10 - Repeat with the other asterisk.
Step 11 - With the asterisk wrapped jar on a flat surface and the right way up gently press down to flatten the base. If you only have 2 spice jars, jump to step 13.
Step 12 - Repeat with remaining blocks of clay until you have created 8 asterisks.
Step 13 - Place the asterisk wrapped spice jars on a baking paper lined baking tray & bake in the oven for 30 minutes. Allow to cool in the oven before carefully removing the jars.


