 | ||
| Your browser is not supported. | ||
|
Please browse our site using any of the following options:
| ||
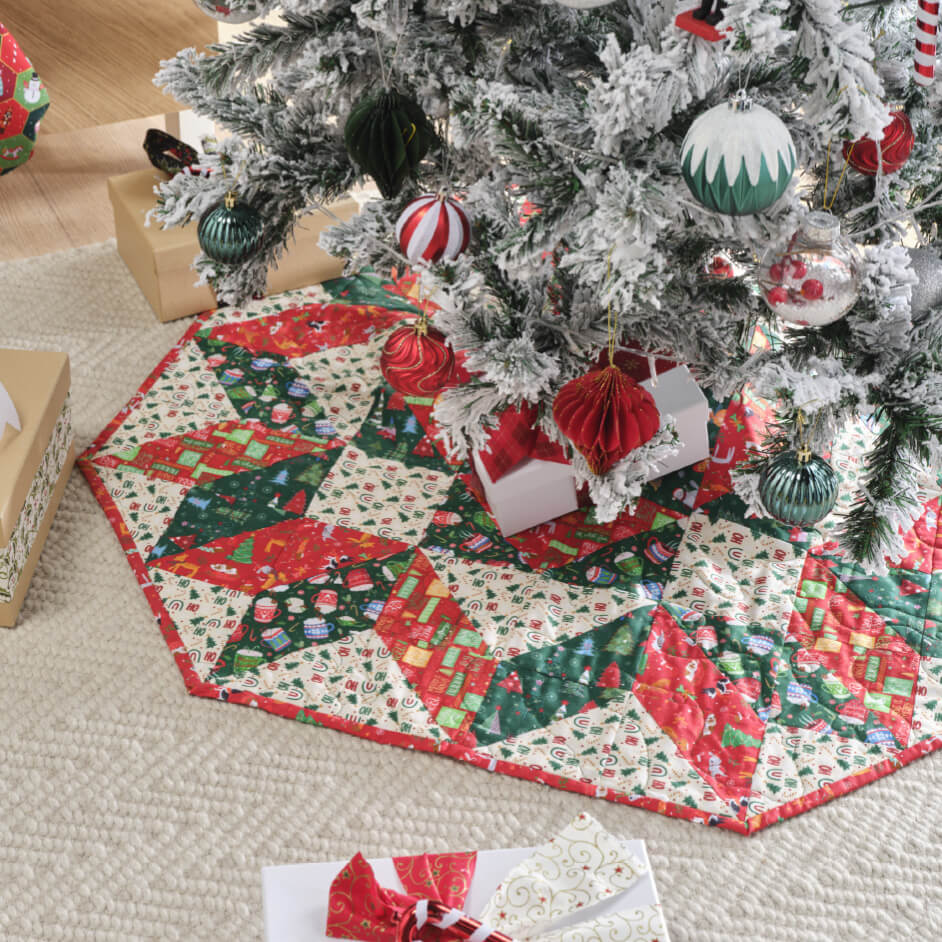
CHRISTMAS TREE SKIRT

Level: Beginner
What You'll Need:
- 45cm of cream fabric
- 55cm for binding and tie fabric
- 45cm of green fabric
- 45cm of red fabric
INSTRUCTIONS
Step 1 - Cream Fabric - Cut 16 - 5 ½ x 5 ½ inch squares, then crosscut each square to make 32 triangles. From the same cream fabric cut - 4 - 5x5 inch squares. Set aside.
Step 2 - Green Fabric - First Cut 1 - 10 x10 inch square. From two of the green fabrics Cut 5 - 5 ½ inch squares, then crosscut each square to make triangles - ending with 24 triangles. From the remaining green fabric cut 6 - 5 ½ x 5 ½ and crosscut each square ending with 12 triangles.
Step 3 - Red Fabric - From two of the red fabrics Cut 5 - 5 ½ inch squares, then crosscut each square to make triangles - ending with 24 triangles. From the remaining green fabric cut 6 - 5 ½ x 5 ½ and crosscut each square ending with 12 triangles.
Step 4 - Set 8 of the cream triangles aside as these will be added later onto the edges of the outer border of the tree skirt. Its best if you can layout the pattern of the tree skirt so you can see how you can sew it together. Place the large green square in the middle and the 4 cream squares at each corner of this. Refer to pattern photograph for reference to make laying out easier.
Step 5 - Begin by sewing each triangle to its matching triangle to make a full square which will measure 5x5 inches. You will end up with a total of 20 squares with a combination of red and green fabric and 24 squares with a combination of cream and green and red and cream squares.
Step 6 - Once all of the square have been sewn together start piecing one row at a time together adding the small triangles on the top 2 and bottom 2 rows on the edge to form the angled in edges of the tree skirt.
Step 7 - Once the tops of the tree skirt is all pieced together sandwich and quilt by placing your batting in between and your backing fabric on the back. These are always oversized and trimmed once quilted to allow for a neat finish.
Step 8 - Once you have finished quilting place your circle template in the centre of the tree skirt and mark around it and then cut the circle out.
Step 9 - Once the circle has been cut you can then cut up the seam of your tree skirt to make the opening so your tree skirt can wrap around your tree.
Step 10 - Cut a 2.5 inch strip on the bias - this is for the inner binding of the circle and will make it easier to maneuver around the circle for a neat bound finish. Fold this in half with the good side facing out. Sew this binding on first and finish it fully by folding over and sewing down on the back as well.
Step 11 - Cut 3 inch lengths of binding strips from your binding fabric. Fold in half to attach as binding.
Step 12 - The last step is to sew a binding all around the edge of the tree skirt. You will need to allow for this binding to have a tie on the end that you can tie the tree skirt together with. Leave a 40cm additional piece on the end before you begin sewing your binding down. You will start sewing your binding at the first side of the cut seam where the circle binding ends. Sew all the way around the outer edge of the quilt ending on the opposite side of the cut seam with another additional 40 cm piece that will be the second piece of the tie.
Step 13 - Fold the binding under and hand sew your binding down on the back and finish off neatly. Do the same for the tie so you have a nice secure neat finish.


