 | ||
| Your browser is not supported. | ||
|
Please browse our site using any of the following options:
| ||
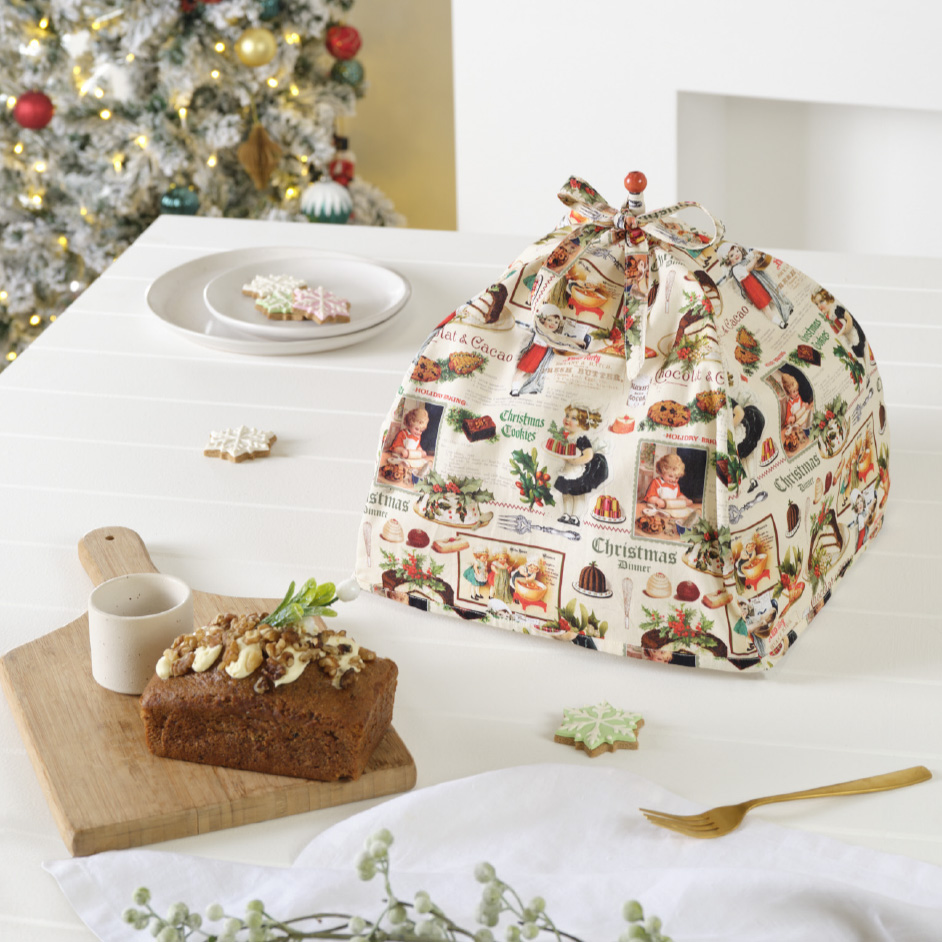
CHRISTMAS FABRIC CLOCHE

Level: Intermediate
What You'll Need:
- 1m Xmas Holiday Baking Fabric
- 1m Birch Shape to Create Fusible Woven Interfacing, Medium
- Matching Gutermann 100% cotton thread
- Pins, tape measure
- Scissors, seam ripper
- Frixion marker
- Hand needle
- Sewing machine
- 1 pk Vivaldi Floral Stem Wire 18 gauge, white
- Vivaldi Florist Wire 28 gauge
- Vivaldi Needle Nose Floral Craft Cutter
- 4 small wooden beads
- 1 large wooden bead
- 40cm Square of Cardboard for template
- Pencil
- Paper scissors
- Clear sticky tape
- Clear craft glue
Read all instructions carefully before commencing the project.
INSTRUCTIONS
Reference the downloadable project sheet for project pattern diagrams.Step 1 - Create Template: Trace template provided into cardboard and cut out.
Step 2 - Press fabric. Place cardboard template onto wrong side of fabric and using Frixion marker trace around edge. Cut out on the line.
Step 3 - Using template cut out a shape from woven fusible interfacing and fuse to wrong side of fabric shape. Press short top edge under 5mm to the wrong side and stitch. This makes one side section.
Step 4 - Repeat Steps 2 and 3 to make a total of 4 side sections.
Step 5 - Binding: Cut 2 x 3cm wide strips across the width of fabric and cut into 4 x 40cm lengths. Cut
4 strips of woven fusible interfacing 3cm x 40cm and fuse to wrong side of fabric strips.
Step 6 - Take one strip and fold one long edge under 5mm and press. Take one side section (Step 3) and place flat edge of strip right side down onto wrong side of bottom edge and pin. Sew using 6mm seam allowance. Press towards the seam, fold over edge to the right side and pin. Stitch in place close to the pressed edge. Repeat for remaining 3 side sections. Trim excess fabric from side edges.
Step 7 - Join Sections: Place 2 side sections together with wrong sides facing and sew together using a 5mm seam allowance. Press well. Fold along the seam bringing right sides together and pin. Sew together using a 1cm seam allowance to create the channel for wire. Press well.
Step 8 - Repeat Step 6 to join the other 2 sections together. Sew remaining 2 seams together in the same way to create the cloche shape.
Step 9 - Wires: Take 2 floral Stem Wires and holding them side by side wrap together with sticky tape starting 15mm from the bottom. Thread a small bead onto the bottom (untaped) end of the wires. Using the needle-nosed pliers bend each wire up around the bead one at a time. This prevents the wires from disappearing up the channel and gives a small foot to rest on the table. Repeat to make 4 sets.
Step 10- Threading: Take the fabric cloche and a wire set and holding the beaded end thread through the channel starting at the bottom. Shape wire as you go until wires come out the top of the channel. Repeat for all 4 wire sets.
Step 11 - Shape the wires in the channels to create the slightly domed shape holding the wires together at the top. Placing the cloche over a large bowl helps. When happy with the shape, hold all 4 wire sets together and wrap firmly with 28 gauge florist wire. This will keep them together. Thread a large bead over the top then use wire cutters to cut off any excess wire protruding out the top. Squeeze some craft glue into the hole in the top of the bed taking care not get any on your fabric. Leave to set.
Step 12 - Tie: Cut 1 x 5cm wide strip across the width of fabric and trim to 90cm. Fold in half lengthways and press. Draw a diagonal across each end with the point on the fold. Starting at one end and using 6mm seam allowance sew together from the point and down the side stopping 5cm from the centre. Backstitch and cut thread. Starting at the other end sew together from the point again stopping 5cm from the centre. Trim ends and turn right side out through opening. Press well. Topstitch around all sides close to the edge enclosing opening within the stitching.
Step 13 - To Finish: Wrap the tie around the top just below the bead and stitch together to hold in place. Tie in a bow.


