 | ||
| Your browser is not supported. | ||
|
Please browse our site using any of the following options:
| ||
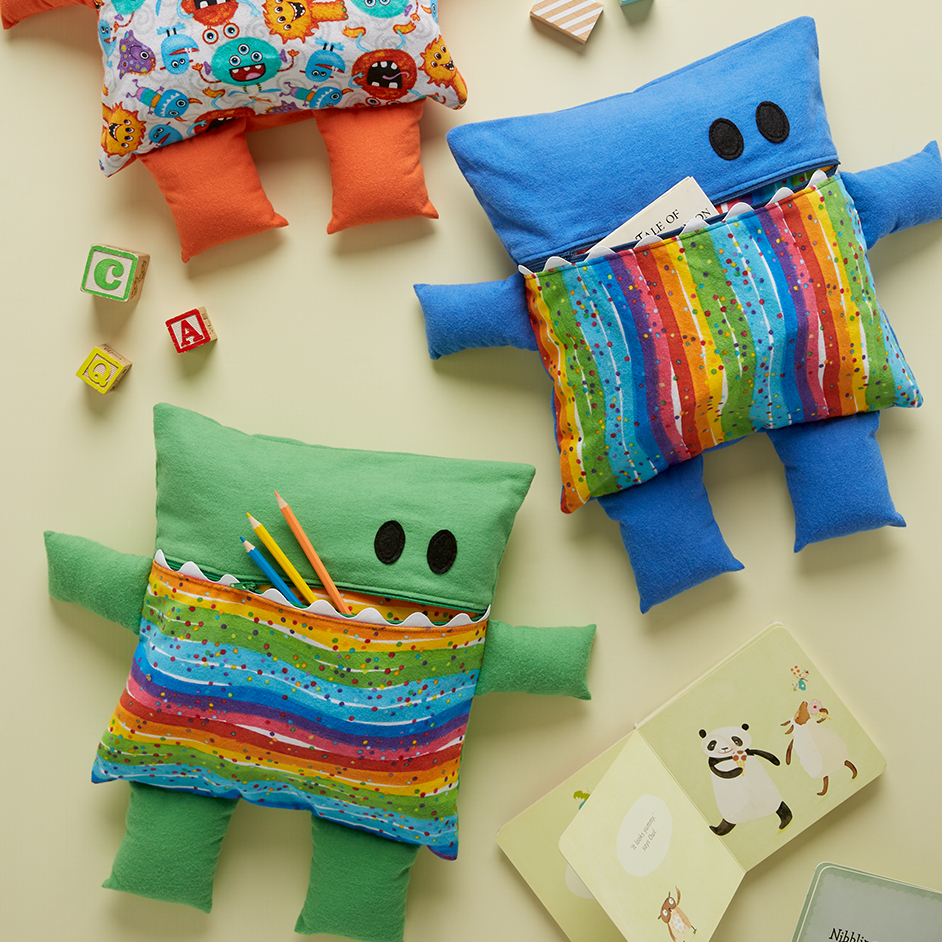
MONSTER TOY ORGANISER

Level: Intermediate
What you'll need:
- 112 cm printed flannelette x .4m
- Plain premium flannelette x .4m
- 35cm zipper
- 35cm white jumbo rick rack trim x .35m
- 5 x 8cm scrap of black felt or flannelette
- 5 x 8cm scrap of vliesofix
- Hobby fill stuffing
- Gutermann sewing thread
- Sewing machine
- Scissors
- Pins
- Ruler/tape measure
- Pencil
- Iron
Instructions
Front
Step 1 Cut one piece from printed flannelette fabric measuring 35cm wide by 24cm high- lower piece.
Cut one piece from plain flannelette fabric measuring 35cm wide by 15cm high - upper piece.
Cut one piece from plain flannelette fabric measuring 35cm wide by 37cm high - back.
Step 2 -With the right side of the lower piece of flannelette facing up, pin jumbo rick rack trim along the top edge of the fabric with the middle of trim 1cm in from the top edge of fabric. Sew trim to fabric through the middle of trim.
Step 3 - Open zip and lay face down, with one side of the zipper over the top of the middle of the rick rack trim. Using a zipper foot, sew zipper to trim and fabric. Turn right side over and press fabric and trim away from zipper. Top stitch fabric to zipper.
Step 4 - With right sides facing, pin the other side of the zipper to the base edge of the upper piece of flannelette. Using a zipper foot, sew zipper to fabric. Turn right side over and press fabric away from zipper. Top stitch fabric to zipper.
Step 5 - Fuse vliesofix to the back of the scrap piece of black felt. Using template provided, trace two eye shapes onto the backing paper. Cut out shapes. Peel off backing paper and place eyes, glue side down on to the right side of the upper piece of flannelette above the zipper in preferred location. Using iron, fuse eyes to fabric. Top stitch around the outer edges.
Step 6 - To make arms, cut out two pieces from plain flannelette, each measuring 24cm long by 9cm wide. With right side facing, fold pieces in half, aligning short ends. Pin each of the long sides together, sew with a 1cm seam allowance leaving the short ends open. Clip corners and turn right way out, press flat.
Step 7 - Lightly stuff arms with hobby fill to desired fullness. Baste open ends closed. Line up the basted raw edges of arms on the right side of pillow front on each side just below the base of the zip. Pin and baste in place.
Step 8 - To make legs, cut out two pieces from plain flannelette, each measuring 25cm long by 12cm wide. With right side facing, fold pieces in half, aligning short ends. Pin each of the long sides together, sew with a 1cm seam allowance leaving the short ends open. Clip corners and turn right way out, press flat.
Step 9 - Lightly stuff legs with hobby fill to desired fullness. Baste open ends closed. Line up the basted raw edges of legs on the right side of pillow front along the base edge 4.5cm in from each side edge. Pin and baste in place.
Step 10 - With right side facing, pin the back piece to the front pieces of pillow aligning all outer edges and ensuring that the arms and legs are to the inside of the fabrics. Unzip the zipper half the way to allow turning out of pillow cover. Sew together along all outer edges. Clip corners and turn pillow cover right way out through the open zipper. Press side seams flat.
Optional pillow inserts
Step 9 - Cut two 35cm squares from printed flannelette fabric. With right sides facing, pin then sew squares together with a 1cm seam allowance leaving a 10cm gap along one seam for turning out. Clip corners and turn cover right way out, press flat. Fill cover with Hobby Fill to desired fullness. Hand or machine sew opening closed.


