 | ||
| Your browser is not supported. | ||
|
Please browse our site using any of the following options:
| ||
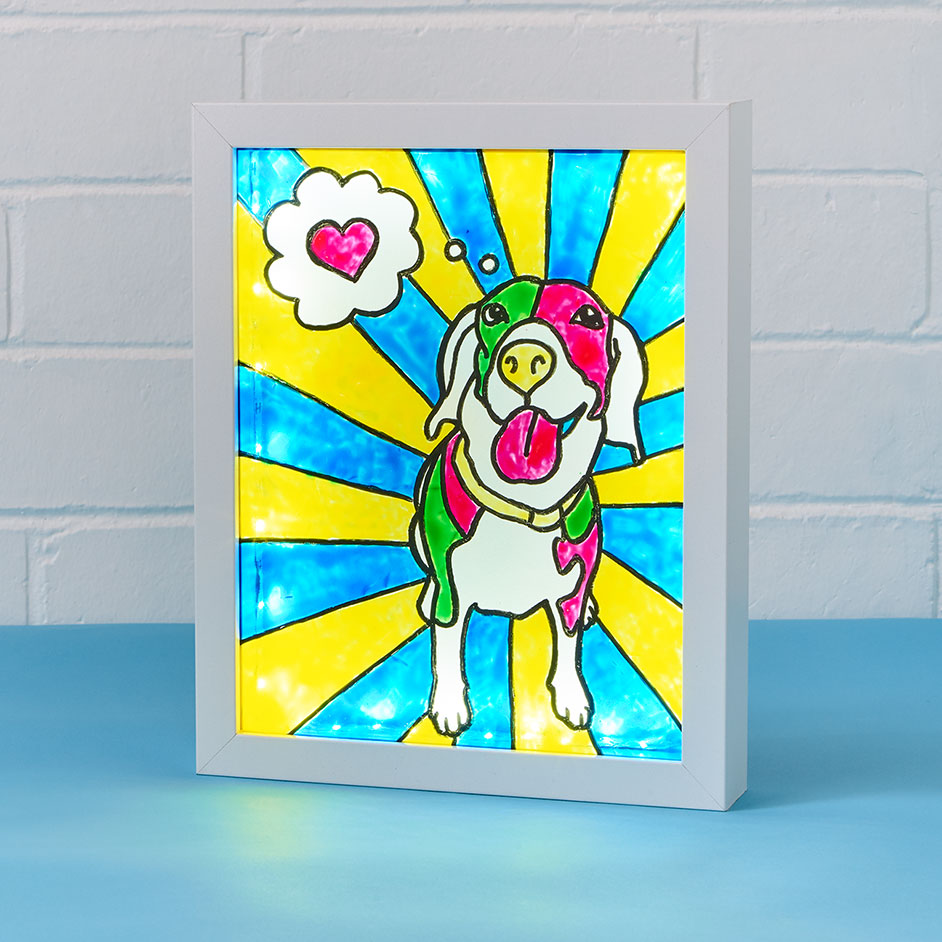
FAUX LED LIGHT PET PORTRAIT

LEVEL: EASY
WHAT YOU'LL NEED:
- A printed photo of your pet
- Liquid food colouring x 3-5 colours
- Shadowbox frame
- Mod Podge - gloss
- Paintbrushes - one for each colour
- 1.8mm-2.5mm black Posca pen
- Muffin tin covered in a layer of cling wrap
- Toothpick or pin
- Glue gun
Optional:
- UHU glue stick or double-sided tape
- Battery powered LED strip lights
- Piece of white paper/card slightly larger than the shadowbox frame you have chosen
INSTRUCTIONS
Transfer your image onto the glass frame
Step 1 - Open the picture frame and remove the glass panel. Place it on top of the photo of your pet.
Step 2 - Using your 1.8mm-2.5mm black Posca pen, draw an outline of your pet.
Step 3 - Add the interior details of your pet - eyes, mouth and collar. Don't feel like you need to outline every detail though - keeping it simple works best.
Step 4 - Add some fun to your pet with geometric lines or experiment with speech bubbles, hearts, or even add a hat!
Step 5 - Finally, use your Posca pen to thicken the outline of your pet. This will make them stand out from the background.
Step 6 - Leave the frame to dry for 10 minutes.
Mix your faux-glass paint
Step 1 - Scoop out two tablespoons of Matte Mod Podge gloss into as many containers as required depending on the number of colours used.
Tip - If you don't have many containers or want to avoid lots of washing up, use a muffin tray lined with cling wrap!
Step 2 - To each container of Mod Podge, add one tablespoon of liquid food colouring. Mix well to avoid lumps. The end result should be a runny consistency. Test the paint on a corner of your frame - if you can see brush marks, add a bit more colouring.
Apply your faux-glass paint
Step 1 - Now the fun part. Place a white piece of paper under your glass panel so you can see what you are doing. Ensure that your frame is on a perfectly flat surface so the paint doesn't drip.
Step 2 - Dip your paint brush into the lightest colour and start painting within the black lines you've marked on your glass panel. Don't worry if the paint sits on top of the black line - once the paint dries it won't be obvious. Try to get a thin coat of paint on the glass, pushing the colour into the corners with your brush. Pop any bubbles with a toothpick while the paint is still wet.
Tip 1 - Accidentally painted outside the lines? Just wipe it away with a damp piece of towelling paper.
Tip 2 - Don't feel like you must colour in every shape - uncoloured areas will show up white on the finished portrait.
Tip 3 - Don't feel constrained by your pet's actual colour. Food colouring is usually sold in bright, limited colours - perfect for creating a striking pop-art piece. Have fun trying different colours in unexpected places.
Step 3 - Leave the glass panel somewhere safe to dry overnight. Keep your containers of paint closed or cover with cling wrap to keep the paint from drying out and don't forget to clean your brushes.
Step 4 - The paint is dry once it is completely see-through. Carefully lift your glass panel up to the light. It may look splotchy so simply add a thin second layer of glass paint and leave it to dry once more. This will achieve the desired bolder colour.
Touching up your lines & assembly
Step 1 - Once your glass panel is dry, carefully retrace all the black lines with your Posca pen. Hold the frame up to the light to double check the lines until you're happy. This step is essential to ensure the bold, thick lines that give stained glass their signature look.
Step 2 - Speaking of signatures - take this moment to sign yours in a corner.
Step 3 - Using your glue gun, spread a thin layer of glue on the interior lip of the shadow box. Insert the glass panel and press down firmly.
Optional: Add a backlight
Step 1 - Place the backing board of the frame on top of the white card/paper. Trace around the card/paper with a pencil and cut the page to size. Stick the page to the backing board with glue or double-sided tape.
Step 2 - Peel the tape from the LED lights and line the interior of the shadow frame.
Step 3 - Assemble the shadowbox, first placing the glass panel, then the spacer and then the back of the frame. Ensure the power cord and battery box for your lights are sitting outside of the frame.
Step 4 - Using a glue gun, apply a layer of glue to the back of the battery box, and press to the back or side of the frame.
Tip - This technique will work on any glass objects - vases, tea light holders or glass bottles.


