 | ||
| Your browser is not supported. | ||
|
Please browse our site using any of the following options:
| ||
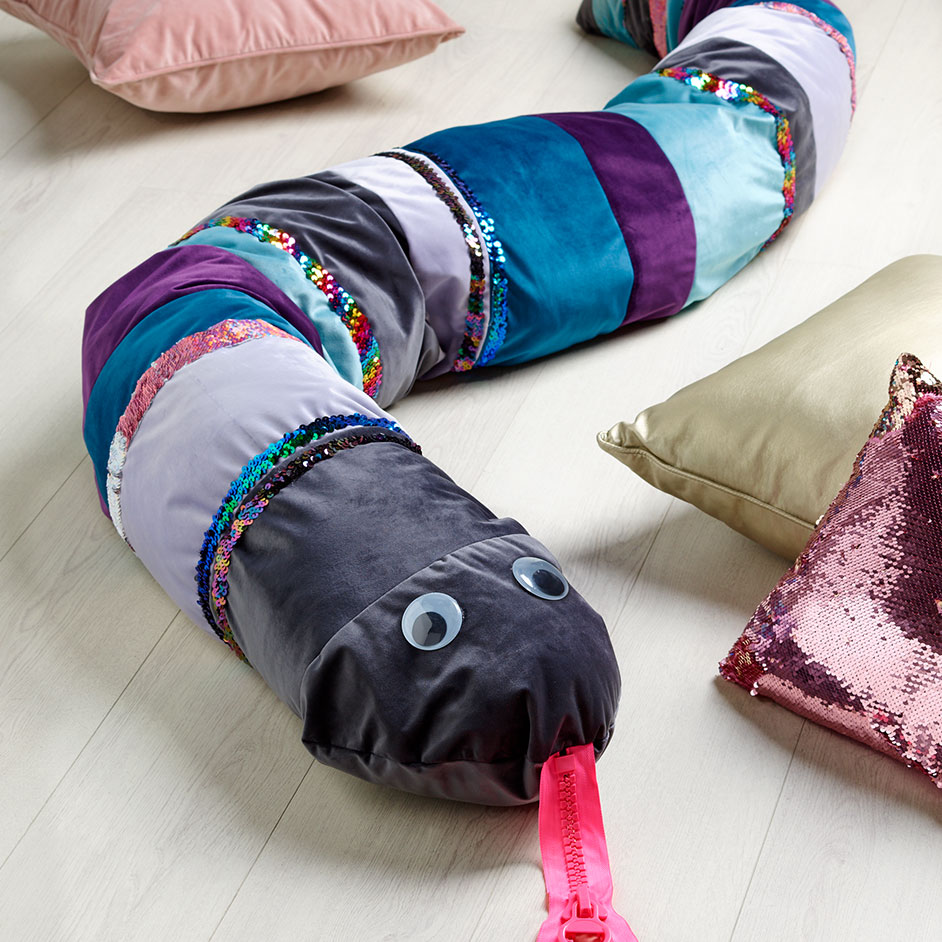
CUDDLY SNAKE PILLOW

LEVEL: INTERMEDIATE
WHAT YOU'LL NEED:
- 80cm Aqua Galena Velvet (150cm wide)
- 80cm Teal Galena Velvet (150cm wide)
- 80cm Lilac Galena Velvet (150cm wide)
- 80cm Purple Galena Velvet (150cm wide)
- 80cm Charcoal Galena Velvet (150cm wide)
- Thread to match coloured fabrics
- Chunky zipper, pink 26cm x 1
- Variety of sequin elastic ribbons
- Joggle eyes, two pack, black 50mm x 1
- 1kg Hobby Fill foam
- Meter length ruler
- Scissors
- Dress pins
- Glue gun and glue sticks
- Sewing machine
- Pencil and paper
INSTRUCTIONS
Creating the template
Step 1 - Create two paper templates for the fabric strips - 120mm x 800mm and 220mm x 800mm
Step 2 - Lay out your 5 fabrics and cut out 2 of each of the template's sizes from each colour. Choose which colour fabric you want to use for the head and cut an extra piece of fabric from the 220mm template, set aside for now.
Step 3 - Lay out all your strips of fabric. Have fun with choosing how you alternate between the colours and the width of each cut strip to create an interesting design.
Step 4 - Once you are happy with your fabric placement, pin the pieces with right sides together for sewing.
Assembling the body
Step 1 - Sew all the pinned strips together with a 10mm seam allowance to create a single piece of fabric 800mm wide and 2400mm long. This will be the body of the snake.
Step 2 - Create the shape of the snake by folding the fabric in half so the width of the body is now 400mm wide. Measure 1500mm from the head and begin to taper the tail end of the body down by gradually cutting away up to 200mm of the width on the end panels.
Step 3 - With right sides together, pin the folded fabric in place along the raw edges, ensuring all the seams of the fabric panels are lined up neatly.
Step 4 - Starting at the tail end, stich the end of the fabrics to enclose and create the tail point. Then continue to stitch along the tube of the body, stopping halfway up on a 220mm panel, and back stitch to finish. Leave a gap of approximately 100mm on this panel for stuffing the snake with hobby fill later, then continue to stitch along the edge of the snake.
Attaching the head
Step 1 - Take the additional 220mm piece that was put aside for the head and fold the ends together with right sides facing in. Pin and sew together with a 1cm seam allowance.
Step 2 - Lay the fabric down with the stitched seam in the centre and draw a curve along the top to create the shape of the snake's head. Cut the fabric along the curve.
Step 3 - Attach the zip by placing it at the top of the curve between the layers of fabric facing inwards. Back stitch in place.
Step 4 - Now stitch the curved ends of the head together.
Step 5 - Stitch the head to the body of the snake, again ensuring all seams are in line.
Step 6 - Turn the entire length of the snake right side out though the opening that you left previously.
Stuffing the snake
Step 1 - Stuff wadding inside the body of the snake through the gap left in the side seam. Continue pushing the wadding in until the body is nice and full.
Step 2 - When you have finished filling, use a needle and thread to hand stitch the opening shut.
Decorate!
Step 1 - To add some features to the snake, cut lengths of elastic sequin trim to fit around the width of the body and attach to the snake with a hot glue gun. Take your time with this to make sure it is neat and tidy.
Step 2 - Glue the joggle eyes onto the head of the snake with the glue gun to finish.


