 | ||
| Your browser is not supported. | ||
|
Please browse our site using any of the following options:
| ||
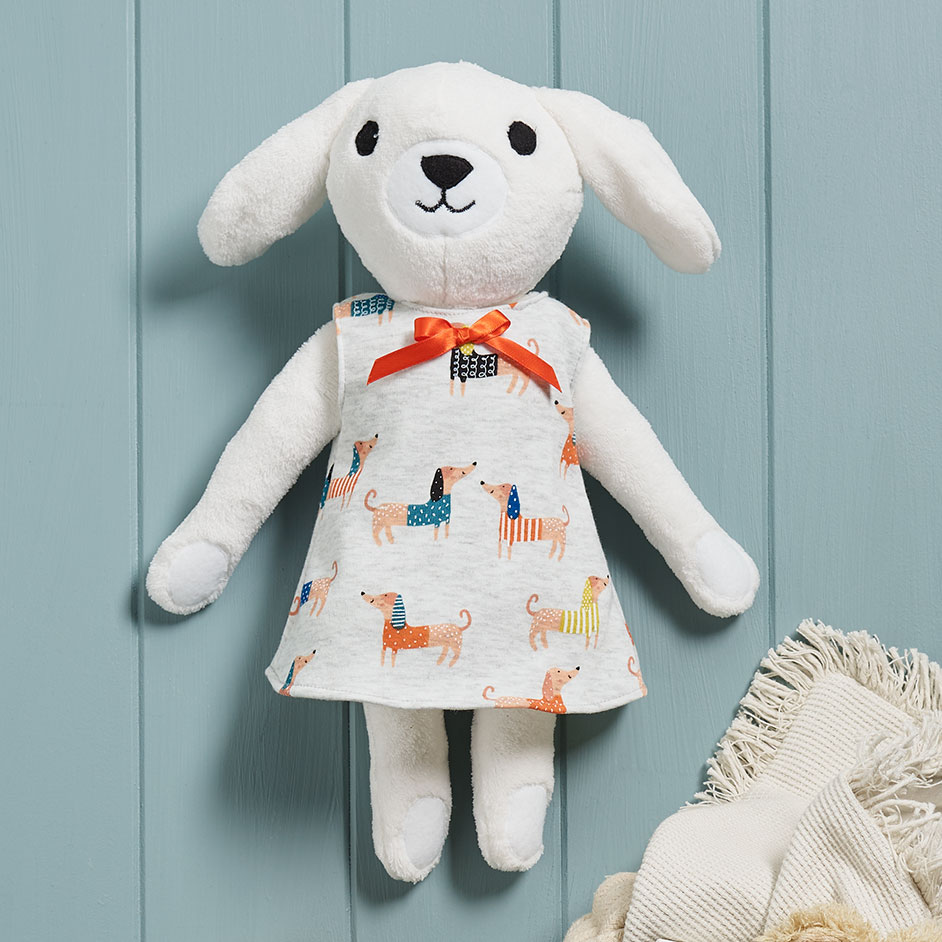
FLEECY DOGGIE DOLL

LEVEL: EASY
WHAT YOU'LL NEED:
- Cream fleece - 25cm
- Iron-on Interfacing - 50cm
- Printed Fleece - 25cm
- White fleece - 10cm
- Black fleece - 10cm
- Heat n Bond - 10cm
- Ribbon - 25cm
- Matching thread
- Velcro - 3cm
- 200gm bag Hobbyfill
INSTRUCTIONS
Step 1 - Using the cream fleece, cut out all doggie doll pattern pieces (not including dress pieces). Apply interfacing to all pieces.
Step 2 - Cut 1 x 10cm square of Heat n Bond and apply to the back of the white fleece. Cut 1 x 10cm x 15cm piece of Heat n Bond and apply to the back of the black fleece.
Step 3 - On the Heat n Bond paper at the back of the white fleece, draw 1 round snout and 4 oval paw pads. On the Heat n Bond paper at the back of the black fleece, draw 2 eyes and 1 nose.
Step 4 - Cut out all face pieces, remove paper and iron on to the doggie doll face, arms and legs in the appropriate places.
Step 5 - Satin stitch around each piece with matching thread.
Step 6 - Sew the 4 darts in the head front.
Step 7 - With right sides facing, stitch 2 ear pieces together around the curved edge, leaving the short edge open. Turn right side out. Repeat for the other ear, and pin ears to head front.
Step 8 - With right sides together, stitch centre seam of head back. Attach head front to head back, right sides together,
leaving neck edge open. Turn and stuff with hobbyfill.
Step 9 - With right sides together, stitch outer edges of arm and leg pairs, leaving the short straight edge open. Turn right side out, stuff and zig zag stitch the opening closed. Repeat for each arm and leg.
Step 10 - Stitch an arm to each side of the body front 1cm down from the top edge.
Step 11 - With right sides together, stitch the centre seam of body back, leaving a 7cm opening in the middle of the seam line. Stitch back piece to front piece across the shoulders, leaving a 4cm gap for the neck.
Step 12 - Stitch down body sides. Fold over 1 cm of the bottom edge of body (like a hem). Turn right side out.
Step 13 - Pin legs in place inside the bottom edge and then topstitch across the bottom edge, securing the ends. Stuff the body through the opening in the back, then hand stitch the opening closed.
Step 14 - Pin the head to the body at the neck and hand stitch in place.
Step 15 - Cut out the dress pieces from the printed fleece. Place the back pieces on the front pieces, right sides together, then pin and stitch the shoulder seams. Fold over 3mm hem on arms and neck edge and stitch in place. Join side seams. Narrow hem all raw edges.
Step 16 - Cut velcro in half lengthwise (use only one half).
Step 17 - Attach hook section to the top of the back opening of dress, and the loop section to the underneath of the other back opening.
Step 18 - Make a ribbon bow and hand stitch to the front of the dress. Put dress on doggie doll.
The information on this project sheet is presented in good faith, but no warranty is given, nor results guaranteed. Quantities and selections may vary at each store. Copyright Spotlight 2020.
Note - This template has been scaled. You will need to print this template at actual size and blow it up by 200% to make it full size.


