 | ||
| Your browser is not supported. | ||
|
Please browse our site using any of the following options:
| ||
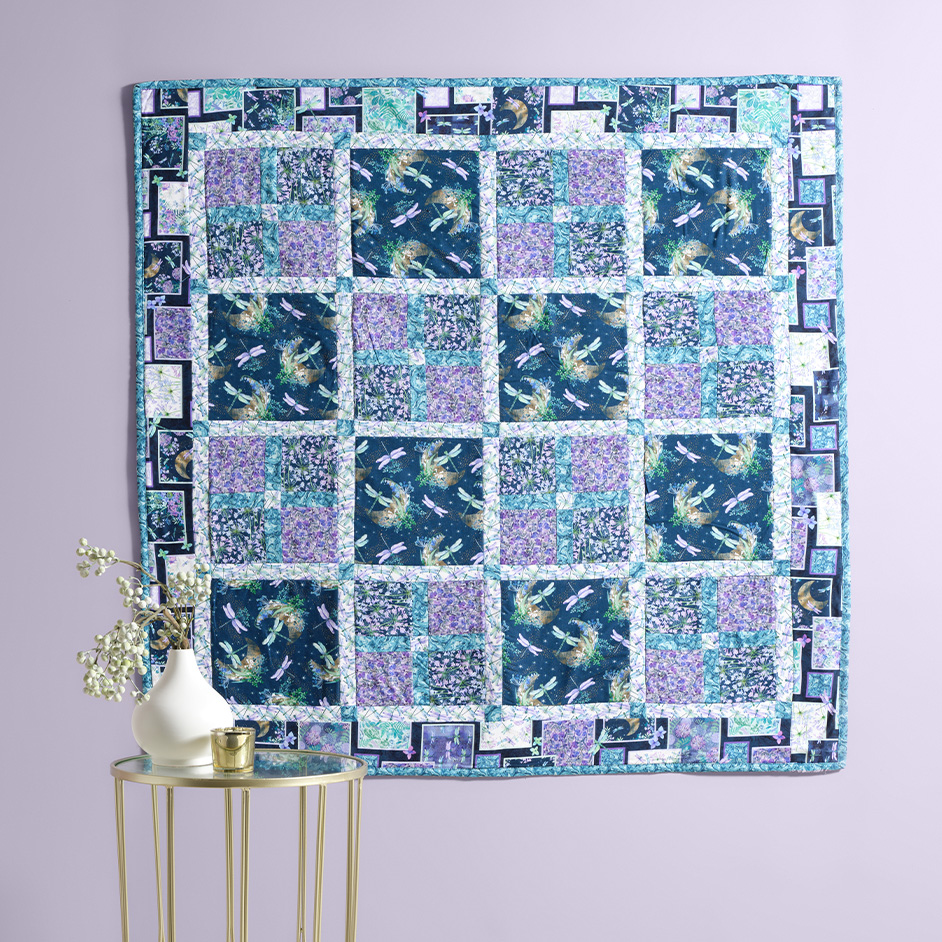
GYPSY FLUTTER QUILT

Level: Intermediate
What you'll need:
- 0.3m Gypsy Flutter Fabric A (For 4-patch blocks in Strip Set 1)
- 0.3m Fabric B (For 4-patch blocks in Strip Set 1)
- 0.5m Fabric C (For 4-patch blocks in Strip Set 1, middle sashing, and additional sashing)
- 0.5m Fabric D (For 1.5-inch strips in Strip Set 2, middle sashing, and additional sashing)
- 0.5m Fabric E (For 8.5-inch squares)
- 0.5m Fabric F (For the 3-inch border)
- Coordinating thread
- Rotary cutter and cutting mat
- Quilting ruler
- Sewing machine
- Iron and ironing board
- Quilt batting
- Quilt backing fabric
- Quilting pins or clips
Instructions
Note:
- Always press seams after sewing for a neat and accurate finish.
- Use a scant 1/4-inch seam allowance for accurate piecing.
- Finished quilt is approx 44" square
Cutting Fabric
- Cut 8.5-inch squares from Fabric E (you'll need 8 of these).
- Cut 2, 4-inch x WOF strips from each Fabric A and Fabric B for Strip Set 1.
- Cut 2, 1.5-inch x WOF strips from Fabric C for Strip Set 1.
- Cut 1.5-inch x WOF strips from Fabric D for Strip Set 2
- Cut 2, 4-inch x WOF strips from Fabric C for Strip Set 2
- Cut 40, 1.5" x 8.5" strips from Fabric D for middle sashing.
- Cut 25, 1.5" x 1.5" squares from Fabric C for middle sashing.
- Cut 5 3-inch strips from Fabric F for the border.
Assembling Strip Sets
- Sew Fabric A, Fabric C (1.5"), and Fabric B together to form Strip Set 1. (you will need two of these for this quilt)
- Sew Fabric C, Fabric D, and Fabric C together to form Strip Set 2.
- Both strip sets should measure 8.5" wide
Creating 4-Patch Blocks
- Cross-cut Strip Set 1 into 4-inch segments. (you will need sixteen 4" x 8.5" pieces)
- Cross-cut Strip Set 2 into 1.5-inch segments. (you will need eight 1.5" x 8.5" pieces)
- Assemble 4-patch blocks by selecting two pieces from Strip Set 1 (e.g. A1 and B1) and one piece from Strip Set 2 (e.g., C2). (ensure B1 is flipped around so that the same fabrics are diagonal to each other)
- Repeat this process to create 8 blocks.
Adding Sashing
- Take 20 of the 1.5" x 8.5" strips from Fabric D.
- Sew these strips between the 8.5-inch squares (Fabric E) and the 4-patch blocks on each row. Ensuring to start and end with a sashing strip from Fabric D on each row.
- Repeat until you have 4 rows. Ensuring to alternate the plain 8.5" squares and the 4 patch blocks each row
Creating Additional Sashing Rows
- Take the remaining 20 Fabric D strips and the 25 Fabric C squares
- Assemble sashing rows by sewing Fabric D on the short end to a 1.5" square of Fabric C, repeat in this order CDCDCDCD.
- Repeat this process to create 5 sashing rows.
Joining Quilt Top
- Take the 4 rows of 8.5-inch squares and 4-patch blocks with sashing.
- Begin with a sashing row and sew it to the first row of blocks.
- Continue alternating between the sashing rows and the rows of blocks.
- Press and square up your quilt top.
Adding the Border
- Cut 3-inch strips from Fabric F. The length should match the width of your quilt - you may need to join two strips together to get a long enough piece.
- Sew these strips to the sides of the quilt first. Press the seams.
- Cut additional 3-inch strips and sew them to the top and bottom of the quilt. Press the seams.
Quilting and Binding
- Layer your quilt top, batting, and backing to create a quilt sandwich.
- Baste the layers together using quilting pins or clips.
- Quilt as desired, then trim excess batting and backing.
- Bind the edges of your quilt using your preferred binding method


