 | ||
| Your browser is not supported. | ||
|
Please browse our site using any of the following options:
| ||
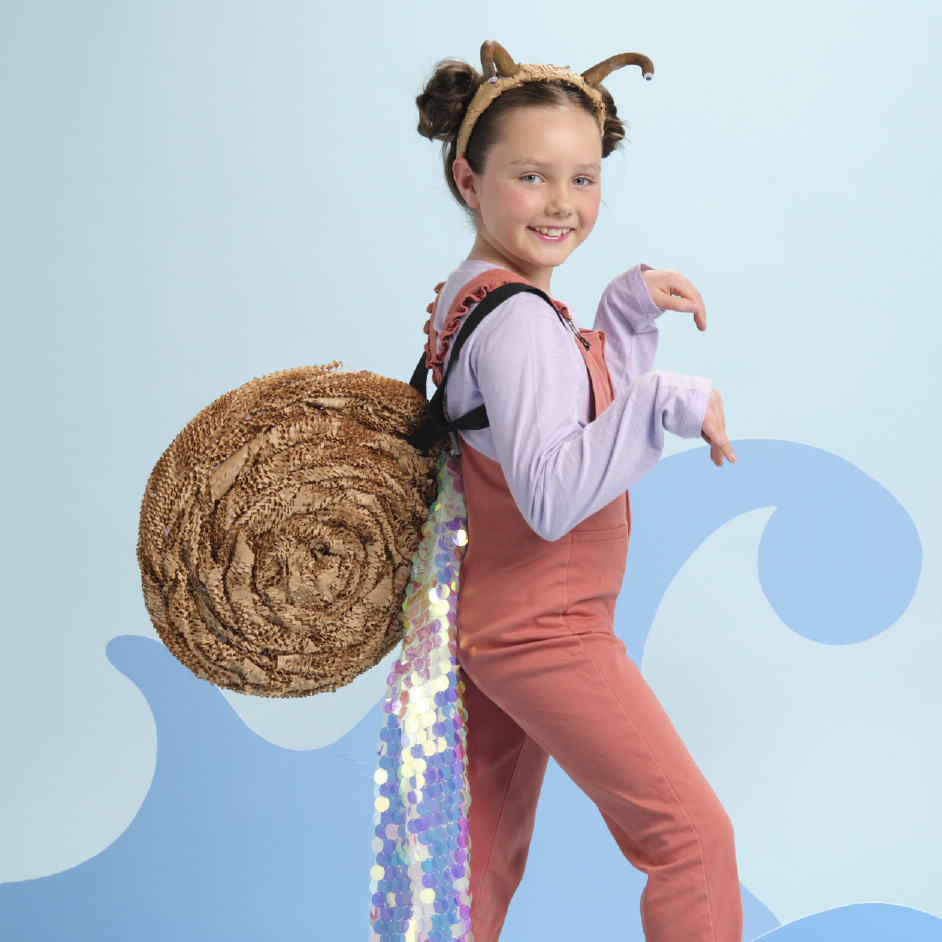
SNAIL COSTUME

Level: Intermediate
What You'll Need:
- Semco 500 mm x 5 m Honeycomb Protective Packaging Roll Brown 500 mm x 5 m
- Hot glue gun
- 1 m x Birch High Density Elastic Black
- Joggly Eyes
- Maria George Self Cover Headband White
- 0.40cm x Plain 120 cm Shine Sequin Fabric Pearl 120 cm
- Crayola Model Magic Black 113 g
- Acrylic Paint
- Scissors
- Sewing machine
INSTRUCTIONS
Shell
Step 1 - Begin by creating the back straps for the shell to be worn. Using the High-Density Elastic measure the child's back between the shoulder blades. Then measure the loops required to go around their arm and meet back to the strap. You should have three pieces of elastic that will create the below structure:
Use a sewing machine to join all these pieces. The center strap will be used to wrap the shell around in the following steps.
Step 2 - Unroll long strips of protective packing and stretch out the cut outs. Scrunch the packaging together to begin to create a rope like structure. Take the hot glue gun and squeeze a blob of glue at the end of one strip of packing - begin to roll up. Every few centimeters continue to zig zag a section of glue while you twist and roll the paper to form a spiral. Continue this process until it is reaching your desired size.
Step 3 - Lay the center strap across the width of the spiral with the shoulder straps laying on each side of the shell. Using smaller pieces of protective packaging begin to glue in place the strap. Begin by putting glue under the strap and then begin to layer strips over the top and wrapped back over the length of the shell. Your final length should wrap all the way over the elastic and around the whole shell. It must be secure to be worn.
Step 4 - Using your scissors, cut a long triangle from the Shine sequin Fabric. Using the hot glue gun adhere to the shell where the back strap is positioned.
Headband
Step 1 - Using the honeycomb protective packaging, tear a 20cm piece of paper. Stretch out the packaging paper to open the cut outs and slightly scrunch.
Step 2 - Starting with one side of the headband, take the hot glue gun and apply a small amount of glue to the tip, apply one corner of the paper. Working your way over the headband begin wrapping the paper around the band and applying small blobs of glue as you go. CAUTION: THE GLUE WILL BE HOT AND CAN CAUSE BURNING, PLEASE USE CAREFULLY AND FOLLOW SAFETY INSTRUCTIONS ON THE PACKAGING.
Step 3 - Take the Crayola Model Magic and split it into two balls. Roll the model magic into two tubes trying to shape one end narrower than the other. Take the wider end and press it down on a flat surface to create the base. Using your finger gently flatten the tip of the narrow end.
Step 4 - Drape the antennae over a curved surface (a cardboard tube, a cup etc) and allow it to dry. It needs to rest on the curved surface while drying so that it keeps the shape. Follow the drying instructions on the package.
Step 5 - Once the antennae are completely dry begin to dry brush a combination of brown and yellow acrylic paint to add texture and details
Tip - The painting step can be avoided by selecting to start with a brown model magic - there will be no painting required if this option is selected.
Step 6 - Once the paint is dry, use the hot glue gun to adhere joggly eyes to the narrow tips of the antennae and to adhere the wider flat end to the headband.


