 | ||
| Your browser is not supported. | ||
|
Please browse our site using any of the following options:
| ||
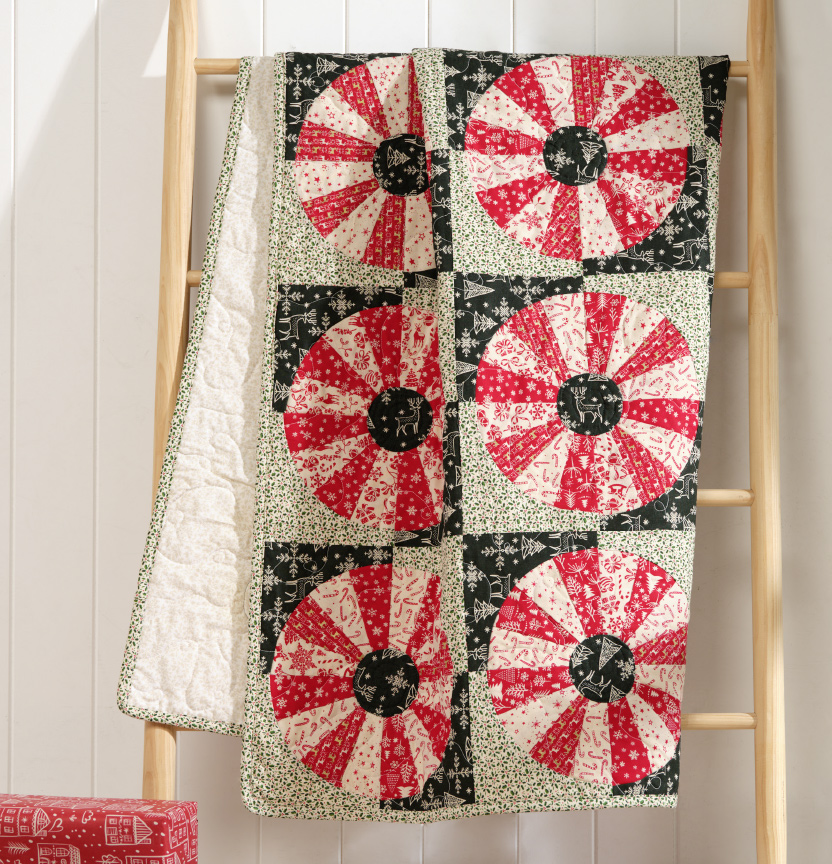
SCANDI CHRISTMAS QUILT

Level: Intermediate
What you'll need:
- Photocopy paper and printer (for foundation paper piecing prints)
- A small amount of Vlisofix
- 4x 40cm of red Christmas scandi fabrics
- 4x 40cm of cream Christmas scandi fabrics
- 1m of dark green Christmas scandi fabric to contrast
- 75cm of light green Christmas scandi fabric to contrast
Instructions:
Step 1- Print out template 1 and 2. Cut out each piece on the outer bold line as these will be your templates for your foundation paper piecing. They are a generous size so they will overlap and need trimming as you go. Print 64 of the full 6.5" square for your foundation paper piecing blocks.
Step 2- From your 3.5" strips you will need to cut out 32 pieces of each red and cream fabric from template 1 and 2.
Step 3- Assemble the foundation paper piecing blocks together following the lines on template 3, one piece at a time. Start from one end and make sure to trim back to your quarter inch for each piece as you go. You will need 64 blocks in total.
Step 4- Once all foundation paper pieced blocks have been assembled remove paper and cut out your curve with your curved drunkards path template and set aside.
Step 5- Cut out your remaining template piece for your drunkards path block in the dark and light green fabrics. You will need 32 of the dark green and 32 pieces of the light green.
Step 6- Sew the 2 drunkards path pieces together with your 1/4 inch foot. Trim carefully so all blocks are the same (line up with your ruler so that the outer edge and inner edge measure the same on all trimmed blocks). The finished block size should be 6.5 x 6.5 inches.
Step 7- Assemble the blocks together slowly into larger blocks of 4 and then join them altogether in rows of 4.
Step 8- Once all the blocks have been sewn together sandwich your quilt and quilt it. The circles will be attached once the quilt is secured and quilted together. This will make it easier for the circles to sit neatly.
Step 9- Using a piece of cardboard, (this can be from your cereal box) cut out the circle from Template 7 - Cut 1 of the larger (outer bold line circle) with a piece of cardboard (this circle is for your fabric cut), and then cut out the inner bold line of the circle (your inner template circle), and set aside.
Step 10- Sew a small tacking stitch around the circle roughly a 1/4 of an inch from the edge. With the extra thread and needle still attached place your smaller inner template circle on the wrong side of the fabric circle inside and pull the thread so that the tacking thread pulls in and surrounds the cardboard circle neatly. Press this with a hot iron to firmly mark and keep the shape of the circle. Gently loosen in one section and pull the cardboard circle out and then gently pull the thread again to neatly put the circle back in place and press again.
Place a small square of Vlisoflex and fuse to the back of the circle and set aside. Repeat this 15 more times.
Step 11- Once quilt has been quilted. Iron on the circles. You can decide to either needle turn the circle onto the quilt in its correct place or quilt over the top of the circle to secure it into place.
Bind and enjoy!
Tip: If you haven't sewn curves together before to practice with a scrap piece of fabric first.
When working with curves there is always excess fabric leftover. Why not use this excess fabric to make a Christmas sack or Christmas decorations!


