 | ||
| Your browser is not supported. | ||
|
Please browse our site using any of the following options:
| ||
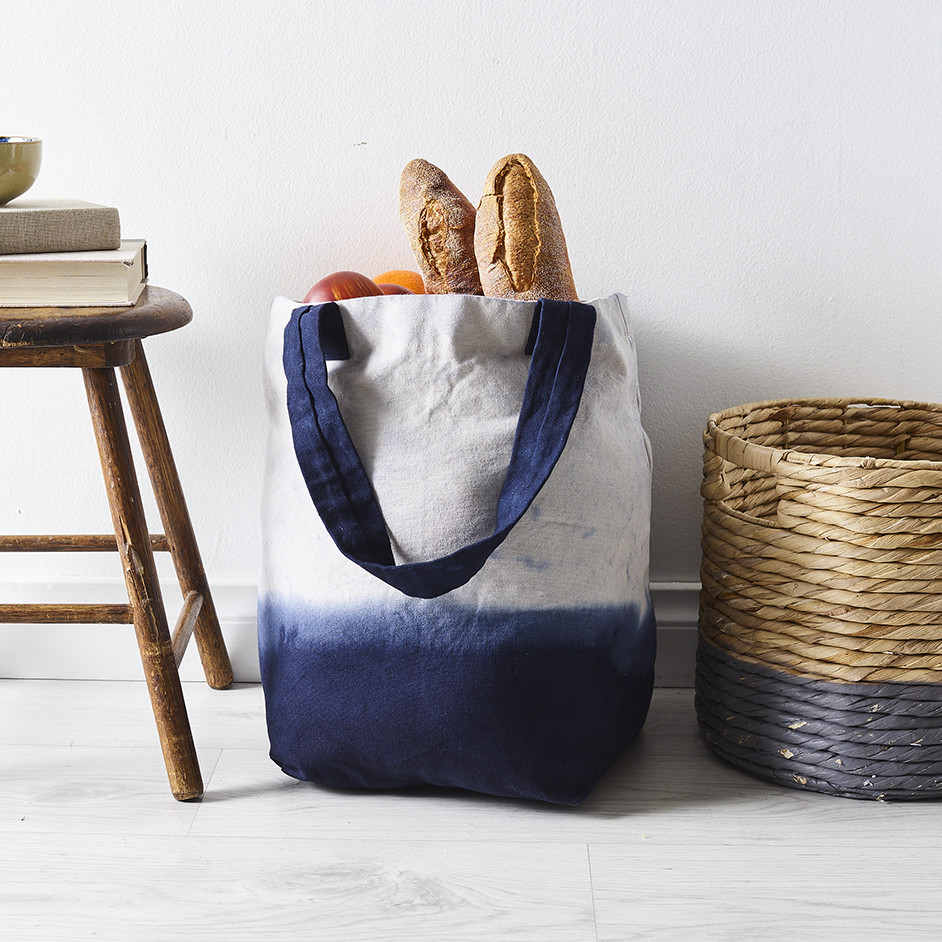
DIP DYED CANVAS TOTE

LEVEL: INTERMEDIATE
WHAT YOU'LL NEED
- 2m of Brighton Cotton Canvas in Linen colour
- Sewing machine and thread
- Pins
- Scissors
- Tape Measure
- Iron & Ironing board
- Navy Dye
- Large bucket or sink for dying
- Clothes rack and pegs
Note - the finished bag will be 35cm x 30cm x 10cm deep.
INSTRUCTIONS
Step 1 - Start by cutting out your pieces, these measurements include your seam allowance.
- 84cm x 42cm piece for the main of the body
- 2 x 10cm x 50cm pieces for the handle.
Step 2 - Fold and Press a 2cm hem on both the short ends of your main body piece. Stitch along the edge, using the sewing machine. These 2 edges will be the opening of your finished bag.
Step 3 - Fold the main body in half and pin along both sides with right sides facing together. Sew a 1cm seam along each side.
Step 4 - To make the square corners of the bag, flatten the base of the bag out and measure in 5cm from the corner tip and pin through both layers of fabric. Sew a straight line across the corner, your stitch line should follow and go through the 5cm marked position. This will create a triangle shape. The sewn line should be 10cm in length. Repeat on the other side. This will create 10cm base width to your bag.
Step 5 - Once both corners have been sewn, turn bag inside out and push out the corners neatly. If you prefer you can stitch the triangle shapes down to the base of the bag or you can cut the excess fabric off and over lock or zigzag the seam allowance. Your bag is now ready to be dyed!
Step 6 - Choose your dye colour, we used Dylon dye in Jeans Blue. Mix the dye according to the directions on the package in a large plastic bucket or sink. You may want to set up a clothes drying rack to hold the rest of the bag while the base is hanging in the dye.
Step 7 - Decide on where you would like the dye line to come up to on the bag and mark lightly with a pencil. If you want to create ombre look, you can gradually move the bag out of the dye at 15 minutes intervals. Otherwise leave the bag dipped at the same level for 60 minutes.
Step 8 - Once the 60 minutes is up, rinse the dyed portion of the bag and the completely dyed straps in another bucket of plain cold water. Be careful to avoid the dye running onto the rest of the bag.
Step 9 - Hang the bag and straps to dry, making sure that the undyed/ white part of the bag is kept away from the dyed base or straps.
Step 10 - Once it is fully dried you can attach and assemble your straps. Trifold & press the 10x50cm panels along the length. Using a double stitch, sew along the length of the handle. Attach these handles on the hem you just made of the inside of the main body. These will be your bag handles. Top stitch onto the bag to secure in place.
Step 11 - Your bag is now finished and ready to be used.


