 | ||
| Your browser is not supported. | ||
|
Please browse our site using any of the following options:
| ||
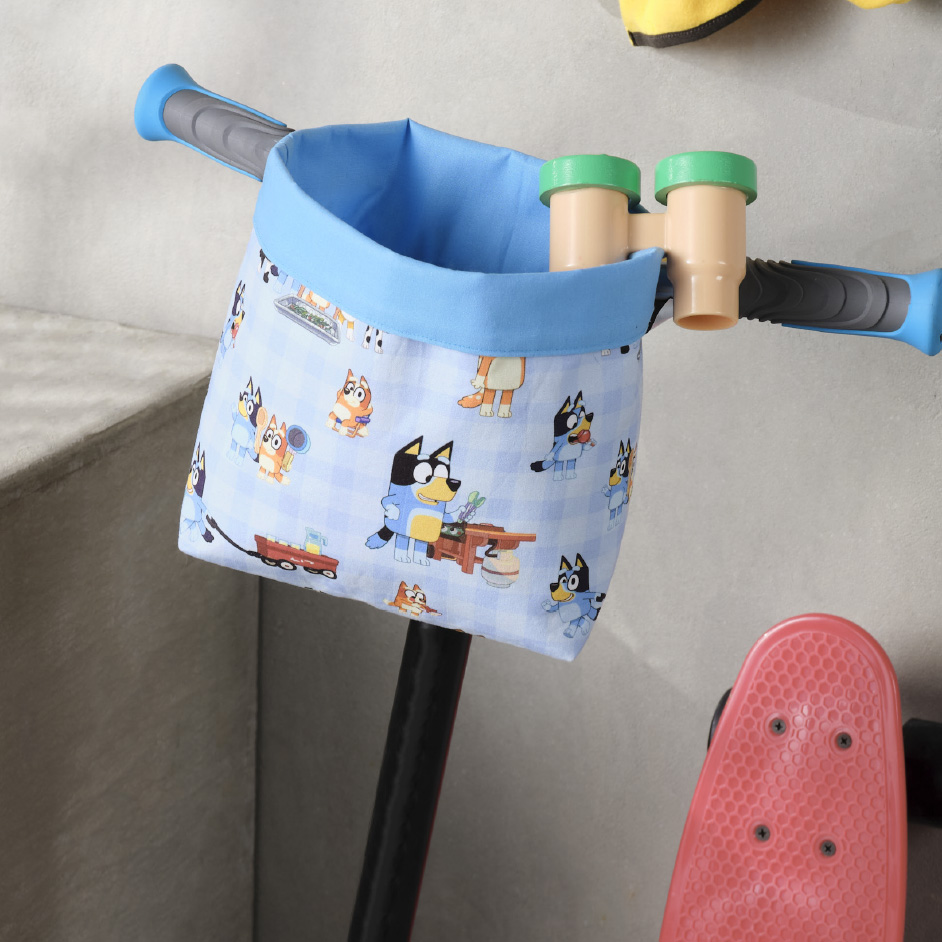
BLUEY SCOOTER HANDLE BAR BAG

Level: Beginner
What you'll need:
- 40cm Bluey Gingham Print Fabric
- 40cm Lining fabric
- 40cm Medium weight iron-on interfacing
- Matching Gutermann thread
- 10cm Velcro
- Pins
- Sew Easy Quilters Holding Clips or Clover Wonder Clips
- Tape measure, scissors, seam ripper
- Cutting mat, quilters ruler
- Sewing machine
- Iron
Note : Read all instructions carefully before commencing the project.
Instructions
Reference the downloadable project sheet for project pattern diagrams.
Step 1 - Cut two of each from Bluey fabric, Iron on interfacing and Lining fabric
30cm wide x 34cm high. Cut 2 strips of 20cm x 10cm for handlebar tabs.
Step 2 - Iron the medium-weight interfacing to wrong side of the outer Bluey fabric. (according to manufacturer's instructions).
Step 3 - With the Bluey fabric pin right sides together.
Step 4 - Sew down both sides and across bottom, using a 1cm seam allowance. Back stitch about 5cm from base, to reinforce where corners will be cut.
Step 5 - Cut a 5cm x 5cm square from bottom corners (see diagram).
Step 6 -Press seams open.
Step 7 - To create the base of the bag, open out the bag. Match the side seam with the bottom seam. Sew together using a 1cm seam allowance across bottom corner. Trim seam allowance to 5mm. Turn right sides out. Push corners out well.
Step 8 - Repeat the sewing process for the lining fabric however leave an opening at the base. (For turning.)
Step 9 - Iron the handlebar tab pieces lengthways in half. Open out then fold each edge into the middle. Press. With outside of fabric back-to-back sew across ends of straps then fold strap in, lining up edges. Press again to form the strap pieces. Topstitch down both sides.
Step 10 - Attach one side of Velcro to front of strap at the end and the other side of Velcro the back of strap at the end.
Step 11 - Measure down 8cm from top of outer bag on right side of fabric and 8cm from side seams on both sides to mark placement position for straps.
Step 12 - Attach straps by stitching 4cm down and across the width of the strap, up and across. Reinforcing at top and bottom of stitching line for both strap pieces.
Step 13 - With lining inside out put the bag with right sides together and side seams matching, inside, making sure handlebar tabs are in between the outer bag and lining.
Step 14 - Sew all around the top edge. Turn the bag through the opening in the lining.
Pin the opening closed and either slip stitch or machine stitch closed.
Step 15 - Push the lining into the main bag and well into the corners. Press the bag. Top stitch around the top of the bag close to edge.
Step 16 - Fold down top edge to show lining contrast.


