 | ||
| Your browser is not supported. | ||
|
Please browse our site using any of the following options:
| ||
LUNAR NEW YEAR PAPER ENVELOPES

What you'll need:
- Cricut Maker or Explore Machine
- Machine mat
- Weeding tools
- Vinyls in reds, black and gold
- Transfer tape
- Cardstock 12 inches x 12 inches, in reds and gold colours
- Spray adhesive
Instructions:
Cutting Your Designs
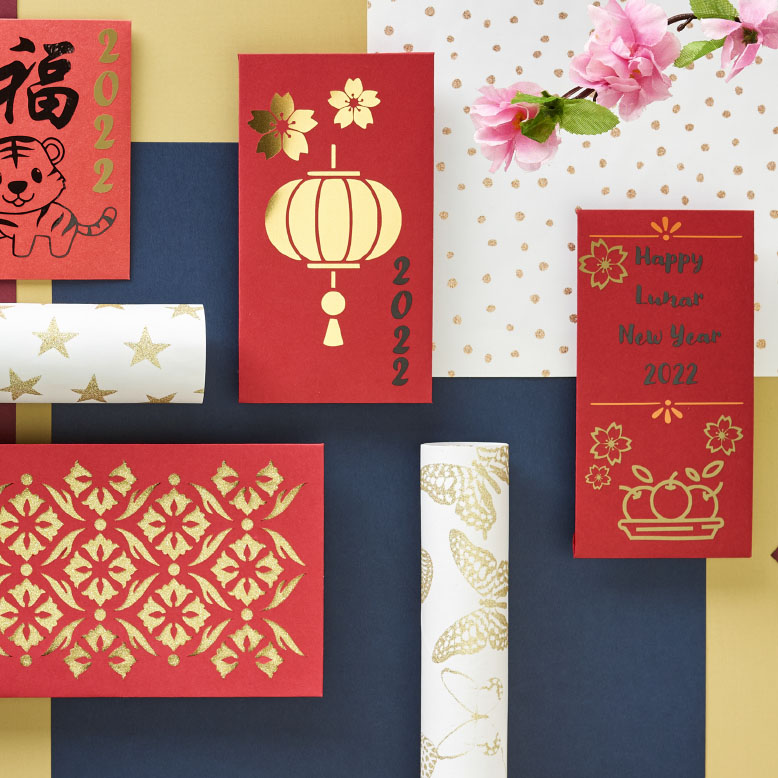
Step 1 - Choose an envelope design from the below list, each design has an envelope template and additional shapes and words for you to use to decorate your envelope and customize. Open the design in the Cricut Design Space App and click 'Customize' to edit the size and shapes of the envelope and decorations.
Envelope with Scales & lantern decoration
https://design.cricut.com/landing/project-detail/6195d42e9e42390f6d5addd5
Envelope with Lantern & Blossom cut out
https://design.cricut.com/landing/project-detail/6195d477776771ede1a001f8
Envelope with Mandarin & Blossom decoration
https://design.cricut.com/landing/project-detail/6195d7871a796f70f34586d5
Envelope with Tiger & Symbol
https://design.cricut.com/landing/project-detail/6195d8bc776771ede1a002e7
Step 2 - Select the materials to use for your envelope and decorations. We used 12 inch x 12 inch cardstock for the envelopes and coloured vinyls for the decorations.
The Envelope with Lantern & Blossom cut out uses only cardstock, the inside of the envelope was lined with metallic cardstock.
Step 3 - Begin with cutting out your envelope, load the cardstock onto the Cricut cutting mat. This shape is the largest and can be cut separately to the decorations on the canvas. Follow the prompts in Design Space to cut the envelope first.
Step 4 - Arrange the decorations on the canvas and select a shape to cut out in Vinyl, you may like to cut out the vinyl decorations in the same colours or varied colours. Cut out accordingly, following the prompts in Design Space.
Assembly
Step 1 - Fold the sides of the envelope into the center, making sure to align them correctly. Overlap the long side over the short side. Using spray adhesive, spray the short side of the envelope and stick the long side, making sure it is secure. Then fold top and bottom of the envelope, gluing the base and leaving the top open.
If you are making the 'Envelope with Lantern & Blossom cut out' design, before you glue your envelope closed, cut out a piece of metallic cardstock (to fit behind the cut out), spray the inside of the envelope only where the cut out is with Spray adhesive and then stick the cardstock, shiny side facing the inside of the envelope. Glue and close the envelope as described above.
Decorate
Step 1 - Once your envelope has been assembled, you can begin decorating the front side of your envelope. Transfer the Vinyl cut out shapes onto transfer tape and carefully apply to the front side of your envelope. Gently remove the transfer tape leaving the design onto the envelope.


