 | ||
| Your browser is not supported. | ||
|
Please browse our site using any of the following options:
| ||
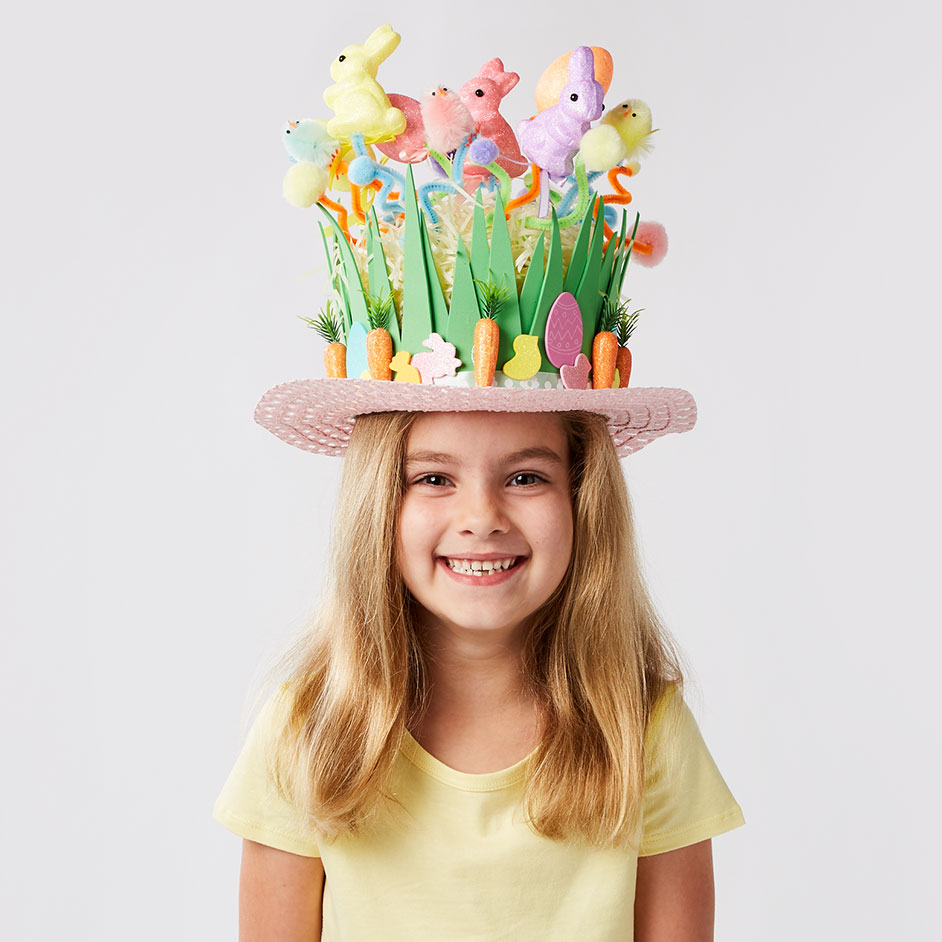
3D EASTER BONNET

Level: Easy
WHAT YOU'LL NEED:
- Easter Bonnet
- Easter Ribbons
- Glitter Picks Eggs 6pk
- Glitter Picks Bunny 6pk
- DIY Foam Stickers
- Foam Sheets Green
- Chenille Chicks 4pk Pastel
- Small Chenille Chicks 12pk Pastel
- Glitter Carrot Packs
- Chenille Sticks
- Pastel pom pom packs
- Hot glue gun and glue sticks
- Paper shred
- Pliers optional
INSTRUCTIONS
Step 1 - Lay out all your materials on a clean work surface so you can see everything you have to work with.
Step 2 - Replace metal sticks on picks with chenille sticks. Remove the metal sticks from the bunny and egg picks, either just by
pulling or using pliers to pull them out. Then using the hot glue gun, place a small bit of glue on the end of a chenille stick and place the chenille stick in the bottom of the pick. Repeat this process on a bunch of the egg and bunny picks.
Step 3 - Use the hot glue gun to glue some pom poms and chenille chicks onto more chenille sticks and set aside for later.
Step 4 - Take the chenille sticks created in step 1 and 2 and thread them through the top of the hat and secure by twisting back around itself. Repeat this with all the chenille sticks to cover the entire top of the hat. You can add a bit of fun and make the chenille sticks twirly by wrapping them around your finger or a pen.
Step 5 - Take the green foam sheets and cut out triangles/spikes to create grass, 4 sheets should be enough to cover the circumference of the hat. Use the hot glue gun to secure the grass felt onto the crown of the hat.
Step 6 - Take the ribbon and cut a piece long enough to go around the crown of the hat. Glue in place with the hot glue gun. Then use the foam shapes and carrots to decorate the outside of the crown of the hat, gluing in place.
Step 7 - To finish, add paper shred to the top of the crown, to cover the chenille sticks. Carefully glue in place with the hot glue gun.


