 | ||
| Your browser is not supported. | ||
|
Please browse our site using any of the following options:
| ||
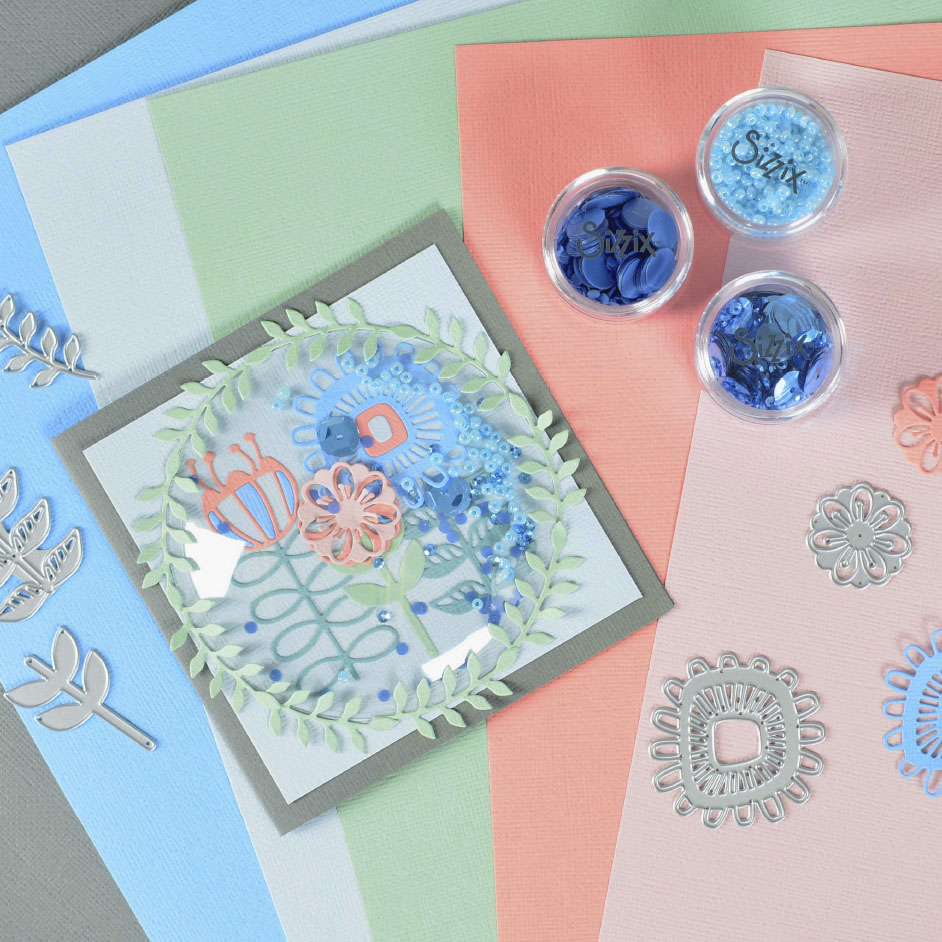
FLORAL SHAKER DOME CARD

LEVEL: INTERMEDIATE
WHAT YOU'LL NEED:
- Sizzix® Big Shot® Machine
- Sizzix® Thinlits® Die Set - Geo Floral Frame, 12 pack
- Sizzix® Thinlits® Die Set- Stackable Florals, 13 pack
- Sizzix™ Making Essential - Shaker Domes, 3 1/2", 4 pack
- Sizzix™ Making Essential - Sequins & Beads, Bluebell, 5 pack
- 8 1/4" x 11 ¾ Sizzix Surfacez™ Cardstock, ", 20 Assorted Colors, 80 Sheets
- Double-Sided Adhesive
- Liquid Adhesive
- Paper Trimmer
- Pencil
INSTRUCTIONS
Step 1 - Cut a 4 1/2" x 8 1/2" panel of Cobblestone cardstock and fold in half to create card base. Cut a 4 1/4" x 4 1/4" panel of Arctic Blue cardstock.
Step 2 - Die-cut out of green tea cardstock a minimum of 9 leaf sprigs from the Geo Floral Frame die set. Additionally, die-cut of out Arctic Sky, Agave, Ballet Slipper, Bluebell, Green Tea and Sorbet cardstock a desired variety of flowers and flower stems to create three flower stems from the Stackable Flowers die set.
Step 3 - Centre a 3 1/2" Shaker Dome on the Arctic Sky panel on the card front, with a pencil draw a faint line around the edge of the dome. This will create a designated space to assemble the scene for inside of the dome.
Step 4 - Arrange the various flower and flower stems elements die cut in Step 3 inside the perimeter of the drawn circle. Before adhering any of the elements down, set the dome on top of the scene to make sure that all elements fit within the adhesive line of the dome.
Step 5 - Adhere the flowers and their matching stems to the inside of the drawn circle with liquid adhesive. Place a pile of desired Bluebell sequins and beads in the centre of the flower scene.
Note: If dimension is not preferred, the elements could be cut with Adhesive Sheets backed on the cardstock, to allow for easy adhering when assembling the card.
Step 6 - Remove the protective backing on the Shaker Dome and adhere the dome around the flower scene, making sure to push the adhesive firmly into the cardstock for a tight seal.
Step 7 - Adhere the Green Tea Leaf sprig die cuts around the perimeter of the shaker dome with liquid adhesive only applied down the centre of the stems. Pull the leaves up and away from the stems to create additional dimension.
Step 8 - Centre and adhere the shaker panel to the front of the card base with double-sided adhesive.


