 | ||
| Your browser is not supported. | ||
|
Please browse our site using any of the following options:
| ||
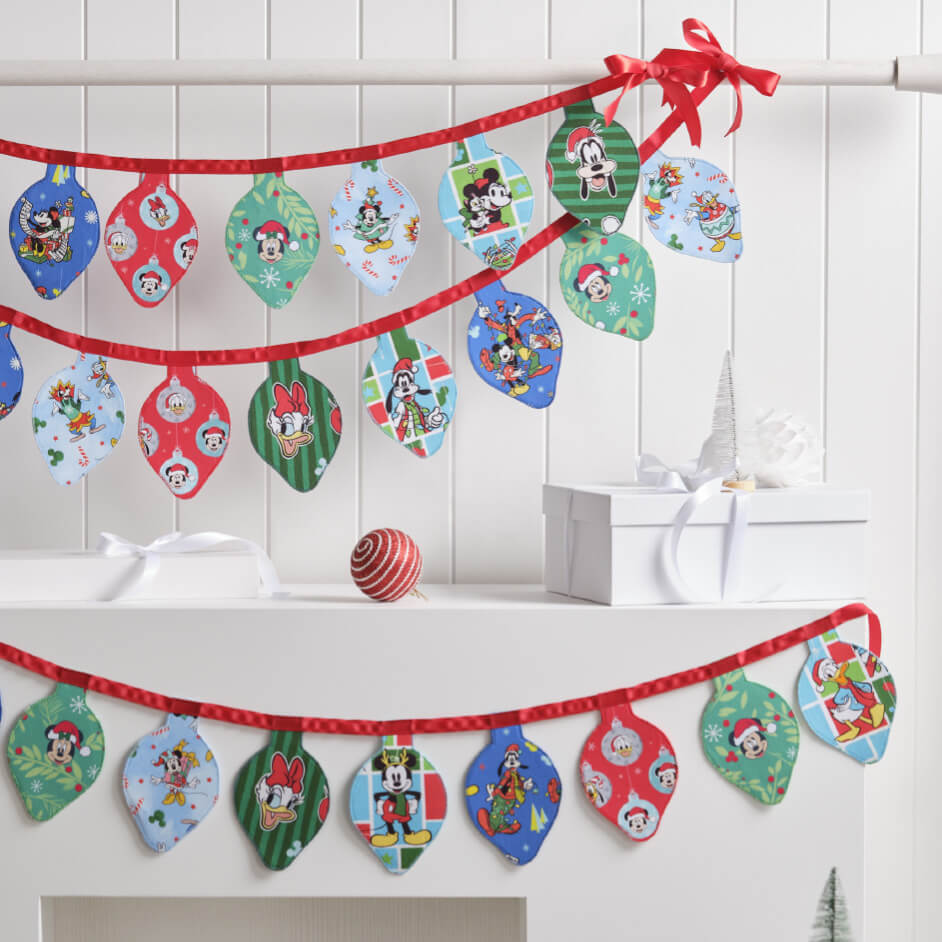
MICKEY & FRIENDS FAIRY LIGHTS GARLAND

Level: Beginner
What You'll Need:
- Fabrics are from 'Mickey & Friends Christmas' range
- 40cm Xmas Baubles, Aqua
- 40cm Ornaments, Red
- 40cm Xmas Blocks, Multi
- 40cm Carolling, Blue
- 40cm Mickey & Minnie Heads, Green
- 40cm Stripe, Green
- 1m (L-926) Legacy Extra Firm Stabilizer
- 4m Heat 'N' Bond Lite Iron On Interfacing
- 6m x 16mm Grosgrain ribbon
- Matching Gutermann thread
- 12cm x 20cm Cardboard for template
- Pencil
- Pins, tape measure
- Scissors , small sharp scissors
- Sewing machine
Read all instructions carefully before commencing the project.
INSTRUCTIONS
Step 1 - Create Template Trace template provided into cardboard and cut out.
Step 2 - Place cardboard template onto paper side of Heat 'N' Bond Lite and trace around edge leaving a space around each. You will need two for each fairy light. You should be able to make 30 fairy lights. Cut out each fairy light leaving a 5-10mm border around each. Do not cut on the line.
Step 3 - Fabrics Press fabrics and allow to cool. Turn fabric to wrong side and position fairy light over desired design with paper side face up. Fuse to fabric as per manufacturer's instructions. When cool carefully cut out fairy lights on the line and remove backing paper.
Step 4 - Stabilizer Place half of the cut out fairy lights fusible side down (fabric side up) onto stabilizer and fuse in place. Allow to cool before carefully cutting out along the fabric edge.
Step 5 - Backing Take fairy lights with stabilizer and place on ironing board with stabilizer side face up. Place one of the remaining fabric fairy lights on top with fusible side face down on top. Align all edges and fuse in place. Repeat for all fairy lights.
Step 6 -Lay out fairy lights in desired order into 1, 2 or 3 sets. Stack set in order with left-hand end light on top.
Step 7 - Ribbon To attach to ribbon, place first fairy light on machine with desired side face up and point facing to the left. Leave a 15cm tail at the start of the ribbon and place on top edge of fairy light aligning top edge of ribbon with top edge of light. Sew across the top edge of the ribbon securing light in place.
Step 8 - Continue sewing across top edge of ribbon placing next light under the ribbon allowing 1-2cm between rounded side edge of previous light. Sew across top edge of ribbon securing light in place.
Step 9 - Continue in this manner until all fairy lights are sewn to the ribbon. Leaving a tail the same as at the start trim off any excess ribbon.
Step 10 - Starting back the first light sew across the bottom edge of the ribbon through all lights.


