 | ||
| Your browser is not supported. | ||
|
Please browse our site using any of the following options:
| ||
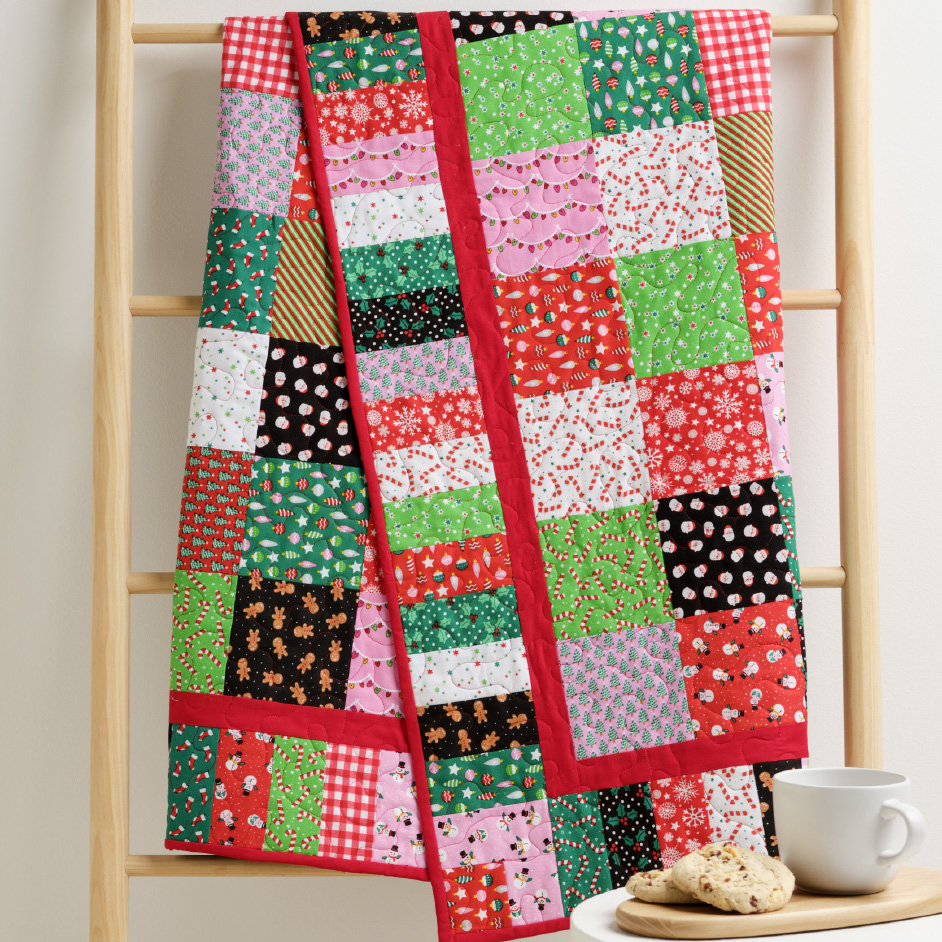
CHRISTMAS CHARM PACKS QUILT

Level: Beginner
What You'll Need:
- 1 Layer Cake Xmas pack 10 x 10 inches
- Border Fabric
- A 240cm cut of wide backing fabric for the back of your quilt or the equivalent of a 240 x 240cm square of fabric for your backing fabric.
Your border fabric will need to have a repeat of 4 of the same border in the 112cm length of your fabric in order for a 240cm cut to work correctly around all edges of your border quilt to enable the mitred corners and all 4 sides to be the same.
If your border fabric only has a repeat of 3, you will need to purchase an additional 240cm length to make certain that your quilt will finish the same on all sides.
Measurements
Finished size: 210 x 210cm
INSTRUCTIONS
Important before you begin cutting set aside four 5 x 10 inch cuts. Do not cut these in half.
These will be used for the corner border.
Step 1 - Cut your large layer cake squares into quarters all measuring 5 inches square.
Step 2 - Set aside 144 - 5 inch squares
Step 3 - With the remaining squares cut in half once more so you have 2.5 x 5 inch strips (116) for the border.
Step 4 - Cut 1.5 inch strips of the red inner border strip and piece together so that the 4 strips are 165 cm in length, this allows some overlap for a neat finish on each corner.
Step 5 - Using your 1/4 inch foot join together the 5 x 5 inch squares in rows of 12
Step 6 - Once all rows have been constructed, join each row together until you have all 144 squares joined in a 12 x 12 rows.
Step 7 - With your 1 1/2 inch red strips join to the top and bottom first press out gently and trim.
Step 8 - Join the remaining 2 red strips to the outer edges and again press out gently and neatly trim for a neat square on each corner and set aside.
Step 9 - Begin joining the strips together pressing gently as you go you should need approximately 29 strips for each side of the square. Once strips are assembled set aside.
Step 10 - Assemble the corner squares of the border. From each strip of 5 x 10 inch fabric cut one 2.5 x 5 inch strip and two 3 x 3 inch squares
Step 11 - Set aside in 4 groups 1 - 2.5 x 5 inch strip with the matching fabric in a 3 x 3 inch square and 1 contrasting fabric 3 x 3 inch square
Step 12 - Piece together the 3 x 3 inches to each other press neatly and then add the 2.5 x 5 inch strip to complete your 5 x 5 inch corner for each corner of the quilt border.
Step 13 - With 2 of the border strips join these first to the top and bottom of the quilt.
Step 14 - With the remaining strip border join the corner blocks to each end of the strip and neatly pin the border in place so it sits neatly on each corner.
Tip: If for some reason you have trouble getting your strip to fit perfectly in place to the corner, before adding your border squares check and trim if need be. They should fit right, but if some stretch has occurred while ironing you may find this. Be careful to never stretch your piecing when ironing, just press.
Step 15 - Once quilt is assembled you can sandwich your quilt in preparation for quilting.


