 | ||
| Your browser is not supported. | ||
|
Please browse our site using any of the following options:
| ||
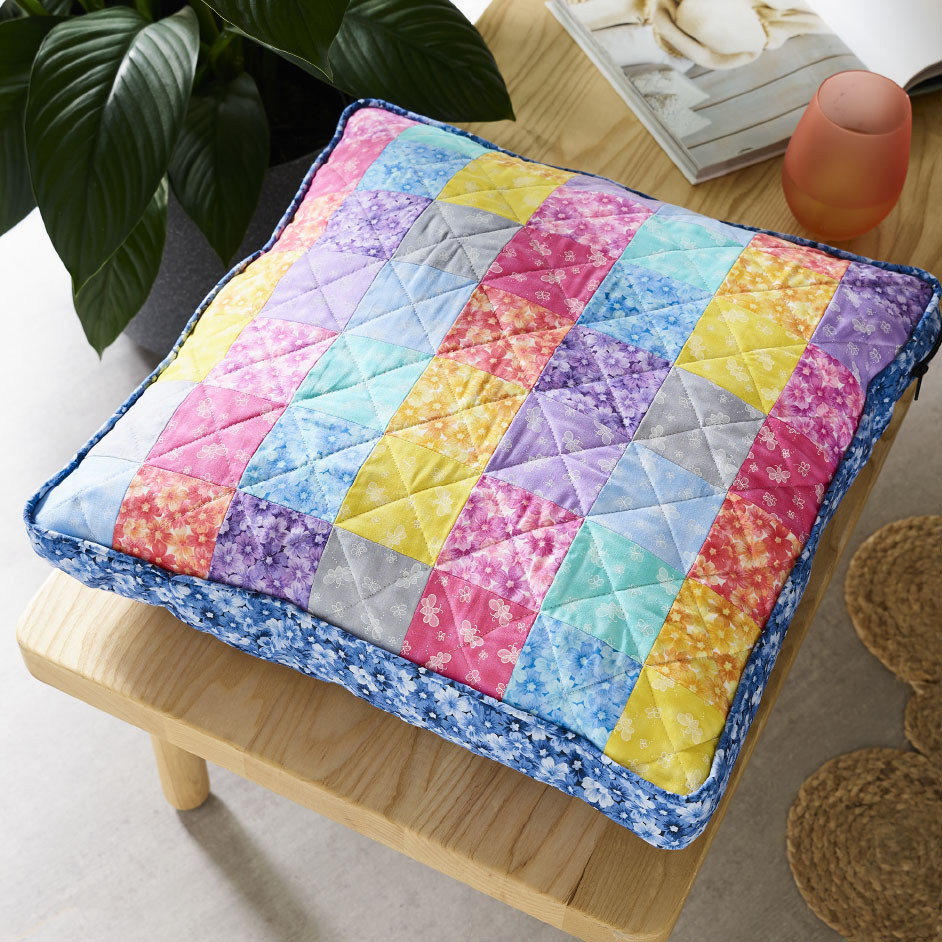
BLENDERS CUSHION

LEVEL: INTERMEDIATE
WHAT YOU'LL NEED:
- Navy Daisy Blender - 1.7m
- 11 Daisy & Bee Blender fabrics - 10cm of each
- Lining - 65cm
- Wadding - 55cm square
- 4mm Piping rope
- 62cm zip
- 1kg Hobbyfill
- Quilting safety pins
- Matching Thread
INSTRUCTIONS
Step 1 - Patchwork top:
Cut one 8cm x 100cm strip from each of the 11 Daisy & Bee Blender fabrics. Stitch strips together along the long sides, pressing seams open as you go.
Trim off the ends of the strips and cut five 8cm strips from the striped patchwork.
Keeping the pattern correct, sew strips end to end to make one long strip. Press seams open.
Count 7 squares from the top, then unpick the next join. Count another 7 squares and unpick the next join. Repeat until you have 7 strips of 7 squares. Press folded edges open.
Place the 7 strips side by side and then stitch the right-hand side of the first strip to the left-hand side of the second strip, matching all joins. Press seam open. In the same way, stitch the right-hand side of strip 2 to the left-hand side of strip 3. Continue until all strips are attached and all seams pressed.
Step 2 - Quilting the Patchwork top:
Cut a 55cm square piece from the Navy Daisy Blender and lay it face down on the table. Place the wadding on top and the patchwork piece right-side up on top of the wadding. Smooth all layers and pin with quilting pins.
Quilt diagonally through all layers in both directions.
Zig zag stitch around the edges of the patchwork, gently rounding each corner as you sew. Trim off excess backing, wadding and corners.
Step 3 - Sides:
Cut 2 strips 4.5cm x 62cm from the Navy Daisy Blender. Place zip face down along the edge of one of the strips and stitch together. Attach the other strip to the other side of the zip. Turn right side up and press carefully (don't melt the zip) and topstitch along each side of the zip 1cm away from the zipper teeth.
Cut 1 strip 8cm x 78cm from the Navy Daisy Blender and attach one end to an end of the zipper piece. Cut another strip 8cm x 50cm from the Navy Daisy Blender and attach one end to the other end of the zipper piece.
Step 4 - Piping and Bias Binding:
Cut a 48cm square piece from the Navy Daisy Blender and fold it in half diagonally. Cut along the diagonal fold to make 2 triangles. Keeping the triangles together, cut 4cm wide strips. Join the strips, end to end at right-angles to make bias binding 2m long.
Place piping rope down the centre of the bias binding and fold the bias over the piping rope. Using a zipper foot, stitch closely beside the rope to secure in place.
Step 5 - Make the Cover:
Pin the prepared piping to one edge of the side/zipper piece and stitch in place. Snip into the edges of the fabric around the corners to ease tension.
Fold under 1cm on the end of the side/zipper piece. Pin the piping edge to the edge of the quilted patchwork top piece and stitch in place. Hand stitch the ends of the side section together. Open the zip.
Cut a 48cm square piece from the Navy Daisy Blender and gently round the corners. Pin this square to the bottom edge of the side/zipper piece and stitch in place. Turn right side out.
Step 6 - Make Cushion Insert:
From the lining, cut 2 x 48cm squares and two 7cm x 66cm strips for the sides. Join the ends of the strips together to form a circle. Gently round off the 4 corners on each square.
Attach one square to one edge of the circle. Attach the other square to the other edge of the circle, leaving a 20cm opening for turning. Clip curves and turn right side out.
Stuff with Hobby fill and hand stitch the opening closed.
Insert cushion into cover and close the zip.


