 | ||
| Your browser is not supported. | ||
|
Please browse our site using any of the following options:
| ||
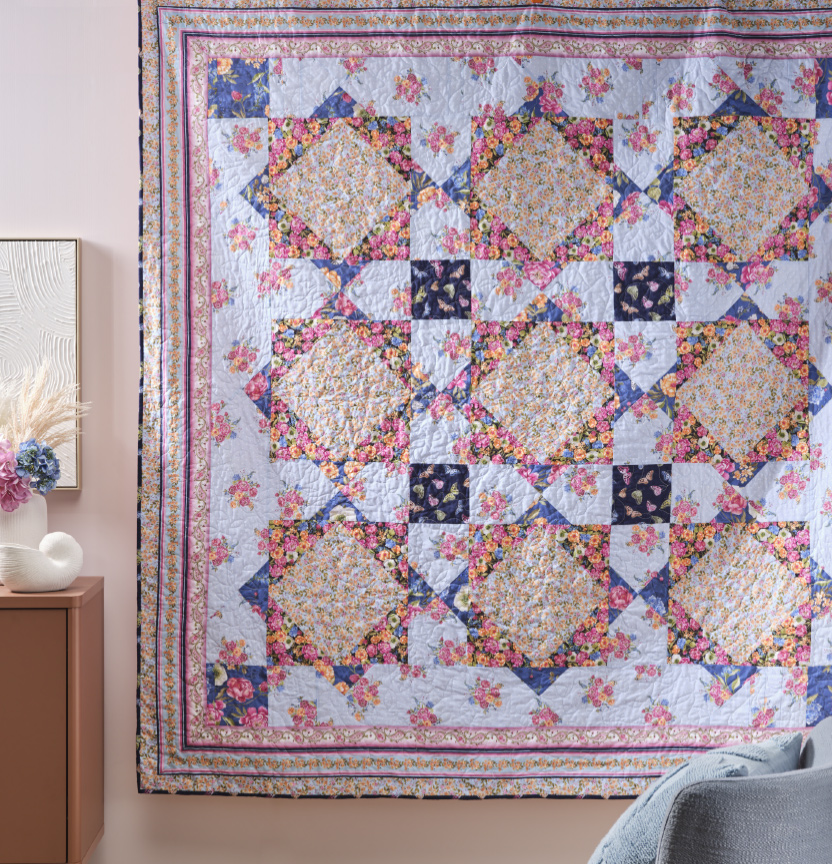
COTTAGE GARDEN QUILT

Level: Intermediate
What you'll need:
- 90cm of fabric for large squares
- 85cm of fabric for large triangles
- 60cm of fabric for small triangles and 4 medium squares (Template B)
- 3m of first light blue angled fabric (templates A, C & D)
- 70cm for 4 dark triangles and binding fabric.
Border Fabric - Please note - Your border fabric will need to have a repeat of 4 of the same border in the 112cm length of your fabric in order for a 240cm cut to work correctly around all edges of your border quilt to enable the mitred corners and all 4 sides to be the same.
If your border fabric only has a repeat of 3, you will need to purchase an additional 240cm length to make certain that your quilt will finish the same on all sides.
A 240cm cut of wide backing fabric for the back of your quilt or the equivalent of a 240 x 240cm square of fabric for your backing fabric.
Instructions:
Step 1- Cut 9 - 11 inch large squares.
Step 2- Cut 18 - 8 inch squares, then crosscut each square to make 36 triangles.
Step 3- Cut 18 - 5 inch squares, then crosscut each square to make 36 triangles.
Step 4- Using the same fabric for templates A, C & D - all are the same width of 6 ¾ inch wide fabric.
Cut - 8 of the same from Template A
Cut - 4 of the same from Template C
Cut - 28 of the same from Template D
Step 5- From your remaining fabric that will be used for the binding and medium squares cut 4 6 ¾ medium squares.
Step 6- Using your quarter inch foot sew your large triangles onto the large square. When sewing the triangles on, assemble them on opposite ends first and then the alternating ends second to give a symmetrical finish to the square.
Step 7- Sew the smaller triangles onto the correct edge of template D fabric. Gently press out, careful not to stretch the fabric too much as it may warp the fabric slightly. Set aside.
Step 8- Sew the smaller triangles onto the correct edge of Template A fabric. Gently press out, careful not to stretch the fabric too much as it may warp the fabric slightly. Set aside.
Step 9- With the triangles now sew onto Template D join them together as shown in the diagram to make a rectangle with the triangle points meeting in the middle.
Trim off carefully at joins of the triangle to make the sewing of the next section easier when using your quarter inch foot.
Step 10- With the larger squares and Template D (rectangles) now assembled join in rows of 3 with 3 larger squares and the two rectangles in between. Press and set aside.
Step 11- Join the Templates D (rectangles) in rows with the darker 6 ¾ inch squares in between as the quilt appears in the template.
Step 12- Join Each row together in order of the pattern to form the main inner part of the quilt.
Step 13- Assemble in rows templates A (should now have the smaller triangle sewn into position), C & D.
Step 14- Sew the rows onto the top and bottom of quilt and then on each end of the remaining part of this border make sure to add your 4 - 6 ¾ inch square to each end of the row to finish off the assemblage of the quilt so far.
Step 15- Sew your final border fabric to the edge of the quilt. Make sure to overlap each end by a generous 7 - 7.5 inches so that you are able to mitre your corners neatly. Sew the border of the fabric on each end and then slowly go around each corner and finish them off neatly with a mitred corner.
Step 16- Once quilt is assembled you can sandwich your quilt in preparation for quilting.


