 | ||
| Your browser is not supported. | ||
|
Please browse our site using any of the following options:
| ||
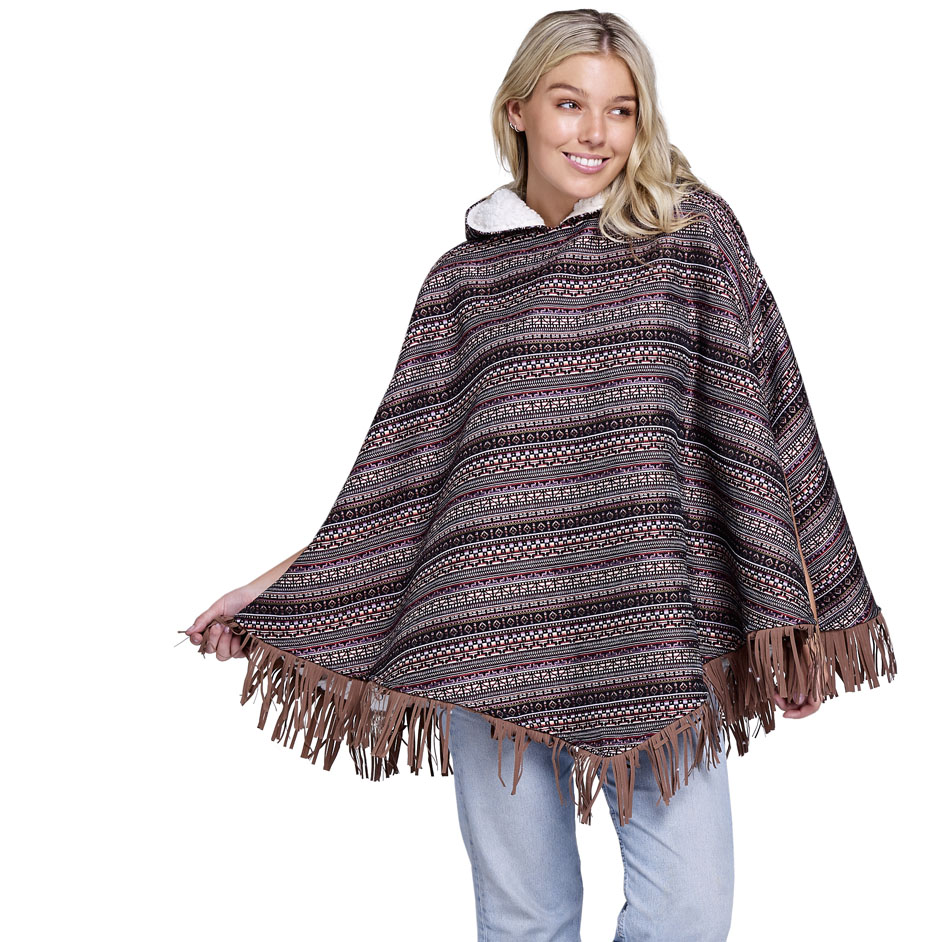
CUDDLES FLEECE PONCHO

LEVEL: EASY
WHAT YOU'LL NEED:
- Tribal Stripes Jacquard 2m
- Cuddles Fleece 2m
- Paper
- Pencil
- Ruler
- Scissors
- Sewing machine, matching thread
SIZES
S/M, M/L
SEAM ALLOWANCE
Pattern instructions and diagrams have 1.5cm seam allowance included on all edges.
INSTRUCTIONS
PATTERN
Starting with a square piece of paper (S/M: 84 x 84cm M/L: 94 x 94cm), the edges will be your guidelines.
A) Draw in neck width (S/M =22cm M/L =23.5cm) at Centre front. Drop 8cm (all sizes) down the Centre front guideline, and curve for neck shape. This will be your front neck opening.
B) Measure down to the desired length (S/M= 75cm M/L= 77cm) *Exclude the hem trim.
C) Draw a curved line to the outer square this will be the 'neck to sleeve cuff ' measurement (Down from top corner: S/M= 44cm M/L= 46cm) * The angle of this side seam can be increased or decreased to adjust Sleeve length and also the fullness of the hem circumference.
D) Mark openings along the Side seam edge for your arm openings (S/M= 24cm M/L= 25.5cm)
E) Trace off this pattern for the Back panel. Raise the neck drop to measure 1.5cm (all sizes) from original edge.
HOOD
F) Starting with a square, Mark out the Hood width (S/M= 31cm M/L= 32cm) Shape the top corner 8cm x 8cm as per diagram.
G) The Front hood length (39cm - all sizes)
H) Raise the back hood seam up 5cm from the Front edge, and shift 2cm towards the front.
*This measurement needs to match the Neck opening circumference (measure your bodice pattern to ensure correct fit) If need to adjustment, alter the width at the base of Hood.
CUTTING AND SEWING
Step 1. Cut out the Front, Back and Hood pieces in both Fabric and Lining.
Step 2. Placing Fabric right sides together sew the Side seams (neck to sleeve cuff), leaving open between the Markings. Repeat for LINING.
Step 3. Stay-stitch the Necklines together, wrong sides together (Fabric and Lining)
Step 4. ARM OPENING - On the inside, stitch the Lining to the Fabric between the Markings (right sides facing). This will create the finished edge on the Arm Opening.
Step 5. HOOD - Stitch Fabric hood seams, right sides together. Repeat for LINING.
Step 6. Place Fabric hood and Lining hood right sides together. Stitch the Front edge together. Turn to the right side. Topstitch on the Outer to finish.
Step 7. Stay-stitch Hood Fabric and Lining together at the base neck edge (Wrong sides together).
Step 8. Pin the Hood around the Bodice neckline, aligning the Hood edges at the Centre Front. Stitch neck seam together. Over-lock or Bind seam to finish.
Step 9. Stay-stitch Fabric and Lining together at the hemline (Wrong sides together).
Step 10. TRIM - Place the Trim on the Fabric side of hemline, matching the seam edge. Stitch along seam allowance. Trim back excess seam at hemline.
Turn trim to underside, and topstitch along hem to secure trim and seam allowance on underside.


