 | ||
| Your browser is not supported. | ||
|
Please browse our site using any of the following options:
| ||
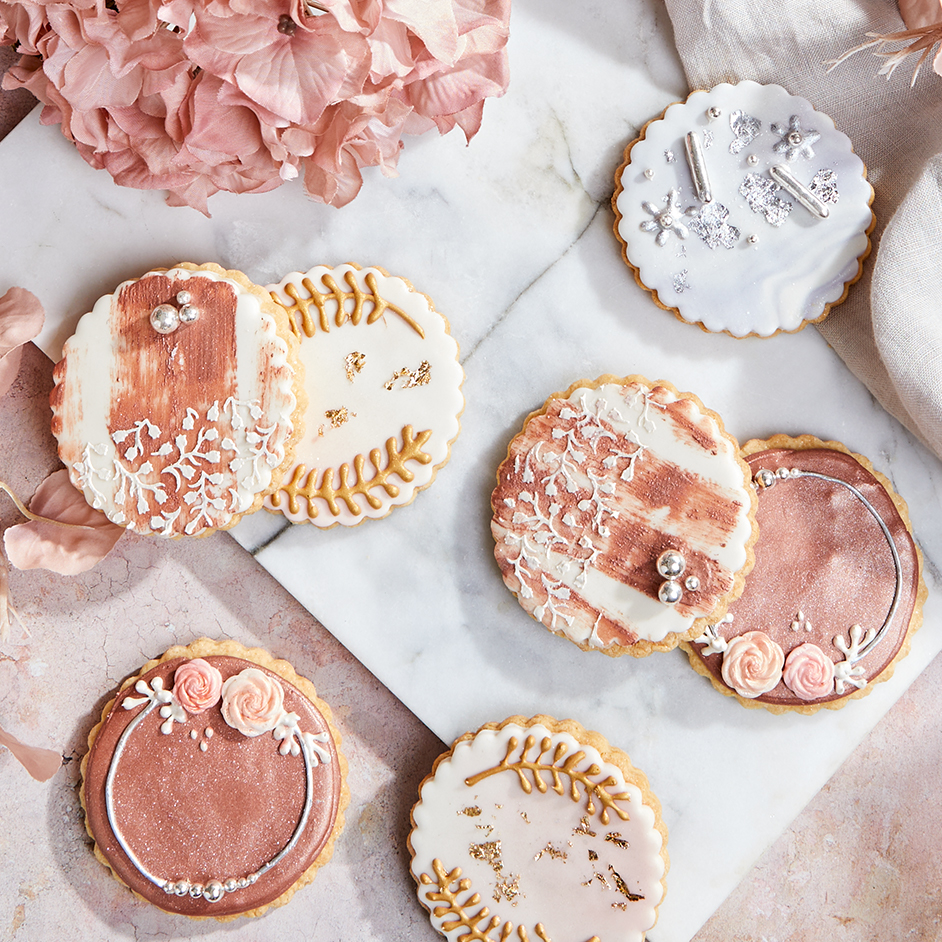
METALLIC COOKIE

Level: Intermediate
What you'll need:
- Mondo double sided crinkle cookie cutter set - we have used the mondo medium sized round crinkle cutter
- 15 cookies baked with Roberts no spread vanilla biscuit mix
- Over the top metallic gold royal, regal gold, rose gold, white royal and classic silver icing classic
- Over the top edible gold and silver leaf
- Chefmaster rose and purple liqua-gel bakers
- chefmaster purple liqua-gel
- Over the top edible glue
- Metallic Sprinkles of your choice, we have used:
- Over the top bling metallic rods silver
- Over the top bling metallic rods gold
- Over the top bling gold pearls
- Over the top bling silver balls medley
- Over the top bling gold balls medley
- Over the top bling gold leaf flakes
- Over the top bling silver leaf flakes
- 250g over the top white premium fondant
- Mondo fondant rolling pin
- Fondtastic fondant mat 2-piece set
- 30cm mondo disposable piping bag pack
- Roberts edible craft silver lustre dust
- Small stencil of your choice x1
- 11.5cm mondo cranked spatula
- Medium flat paintbrush
- Small rose silicone mould
Instructions
Step 1- Split fondant into three and use a small amount of the gel paste in two parts to create a marble effect, leaving the last part white.
Step 2- Roll out all parts of fondant to around 3mm thick and use the same cutter as the cookies to cut out three disks of purple, three disks of pink and seven of white. Use the sugar flower glue to glue fondant disks on top of the cookies.
Step 3- Mix up a small amount of royal icing in each color and put each into a disposable piping bag.
Gold Leaf Design Cookie
Step 1- Press the gold leaf onto the pink marbled cookie in patches by gently rubbing on the back of the transfer sheet.
Step 2- Pipe leaf pattern around the outside of the cookie using the classic gold and dust with lustre dust.
Silver Leaf Design Cookie
Step 1- Press the silver leaf flakes onto the purple marbled cookie by brushing a small amount of glue over the cookie.
Step 2- Pipe some small silver flowers with the silver royal Icing and then use a small amount of glue to add silver rods and silver balls.
Step 3- Dust with lustre dust.
Gold Stenciled Cookie
Step 1- Place stencil of your choice on top of white cookie and use a spatula to spread the regal gold royal Icing through the stencil.
Step 2- Remove stencil and finish off with some different sized gold balls around the outside. Dust with lustre dust.
Rose Gold Paint Effect Cookie
Step 1- Brush rose gold royal Icing over the top of the cookie.
Step 2- Stencil half the cookie in pearl white royal Icing as before in gold stencilled cookie.
Step 3- Finish off with a few silver pearls and lustre dust.
Rose Gold flooded cookie
Step 1- Pipe around the outside of the cookie with thick Rose Gold Royal Icing.
Step 2- Thin the royal icing down slightly with a bit of water and pipe in the inside of the ring of Rose Gold until cookie is covered completely. Allow to dry.
Step 3- Pipe some Silver Royal Icing in a circle around the outside of the cookie. Add some piped leaves in Pearl White Royal Icing on the bottom section of the silver circle. Press some leftover fondant into the rose silicone mould to make two roses and glue on near the leaves. Finish off with a few silver balls then dust with lustre dust.
Tip - These can be prepared for 2 weeks in advance


