 | ||
| Your browser is not supported. | ||
|
Please browse our site using any of the following options:
| ||
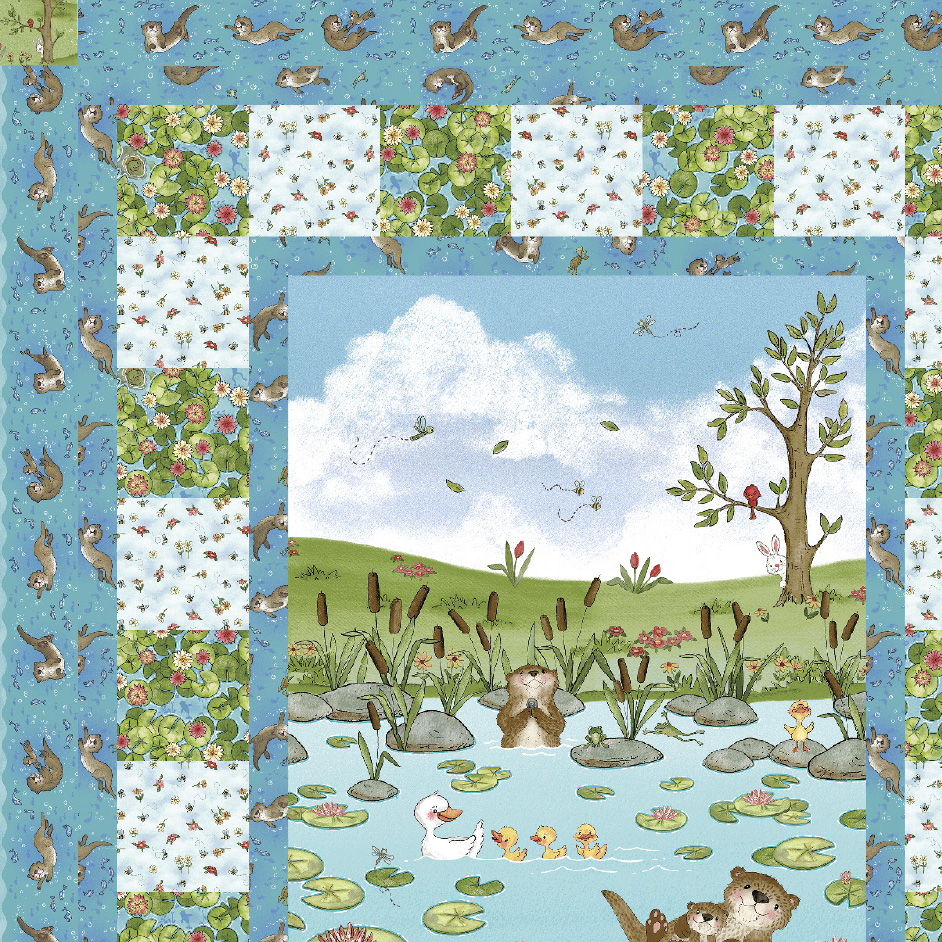
RIVER ROMP QUILT

Level: Beginner
What you'll need:
- 1 panel River Romp 24-inch Panel - Teal (A) 871P-76
- 2 1/8 yards (1.95m) Underwater Otters - Teal (B) 876-77
- 5/8 yard (0.58m) Lily Pads All-over - Green (C) 862-66
- 5/8 yard (0.58m) Bees and Blooms - Light Blue (D) 866-11
- 1/4 yard (0.23m) Ducks in the Meadow - Green (E) 864-66
- 1 3/4 yards (1.60m) River Romp Stripe - Teal (F) 870-76
- 4 ½ yards (4.12m) Otters and Lily Pads - Teal (Backing) 861-76
*Includes binding
Instructions
Cutting Instructions
Please note: All strips are cut across the width of fabric (WOF) from selvage to selvage edge unless otherwise noted.
From the River Romp 24 Inch Panel - Teal (A):
Fussy cut (1) 22 1/2" x 42 1/2" rectangle, centred on the panel.
From the Underwater Otters - Teal (B), cut:
- (7) 2 1/2" x WOF strips for the binding.
- (2) 2 1/2" x 42 1/2" Length of Fabric (LOF) strips.
- (2) 2 1/2" x 55 1/2" LOF strips.
From the remaining fabric, cut:
- (2) 2 1/2" x 26 1/2" WOF strips.
- (2) 2 1/2" x 38 1/2" WOF strips, piece as needed.
From the Lily Pads All-over - Green (C), cut:
(3) 5 1/2" x WOF strips. Sub-cut (16) 5 1/2" squares.
From the Bees and Blooms - Light Blue (D):
Fussy cut (3) 5 1/2" x WOF strips. Sub-cut (16) 5 1/2" squares.
From the Ducks in the Meadow - Green (E), cut:
(1) 7" x WOF strip. Sub-cut (4) 7" squares.
From the River Romp Stripe - Teal (F), cut:
- (2) 7" x 58 1/2" LOF strips.
- (2) 7" x 38 1/2" LOF strips.
From the Otter and Lily Pads - Teal (Backing), cut:
(2) 79" x WOF strips. Sew the strips together and trim to 59" x 79" to make the back.
Block Assembly
Reference the downloadable project sheet for project pattern diagrams.
Note: The arrows in the figures represent the fabric print direction. Pay attention to the fabric and unit orientations when assembling the various components. Use a 1/4" seam allowance with right sides together (RST) unless otherwise noted.
- Sew (1) 2 1/2" x 42 1/2" Fabric B strip to each side of the 22 1/2" x 42 1/2" Fabric A rectangle. Sew (1) 2 1/2" x 26 1/2" Fabric B strip to the top and to the bottom of the Fabric A rectangle to make the Centre Block (Fig. 1). Trim the block to measure 25 1/2" x 45 1/2".
- Sew together (5) 5 1/2" Fabric D squares and (4) 5 1/2" Fabric C squares, alternating them from top to bottom, to make (1) Side Border (Fig. 2). Repeat to make a second Side Border.
- Sew together (4) 5 1/2" Fabric C squares and (3) 5 1/2" Fabric D squares, alternating them from left to right, to make the Top Border (Fig. 3). Repeat to make the Bottom Border.
Quilt Top Assembly
(Follow the Quilt Layout while assembling the quilt top.)
- Sew (1) Side Border to each side of the Centre Block.
- Sew the Top Border and the Bottom Border to the top and to the bottom of the Centre Block.
- Sew (1) 2" x 55 1/2" Fabric B strip to each side of the Centre Block. Sew (1) 2" x 38 1/2" Fabric B strip to the top and to the bottom of the Centre Block.
- Sew (1) 7" x 58 1/2" Fabric F strip to each side of the Centre Block.
- Sew (1) 7" Fabric E square to each end of (1) 7" x 38 1/2" Fabric F strip. Repeat to make a second strip. Sew (1) newly sewn strip to the top and to the bottom of the Centre Block to make the quilt top.
- Layer and quilt as desired.
- Sew the (7) 2 1/2" x WOF Fabric B strips together, end to end with 45-degree seams, to make the binding. Fold this long strip in half lengthwise with wrong sides together and press.
- Bind as desired


