 | ||
| Your browser is not supported. | ||
|
Please browse our site using any of the following options:
| ||
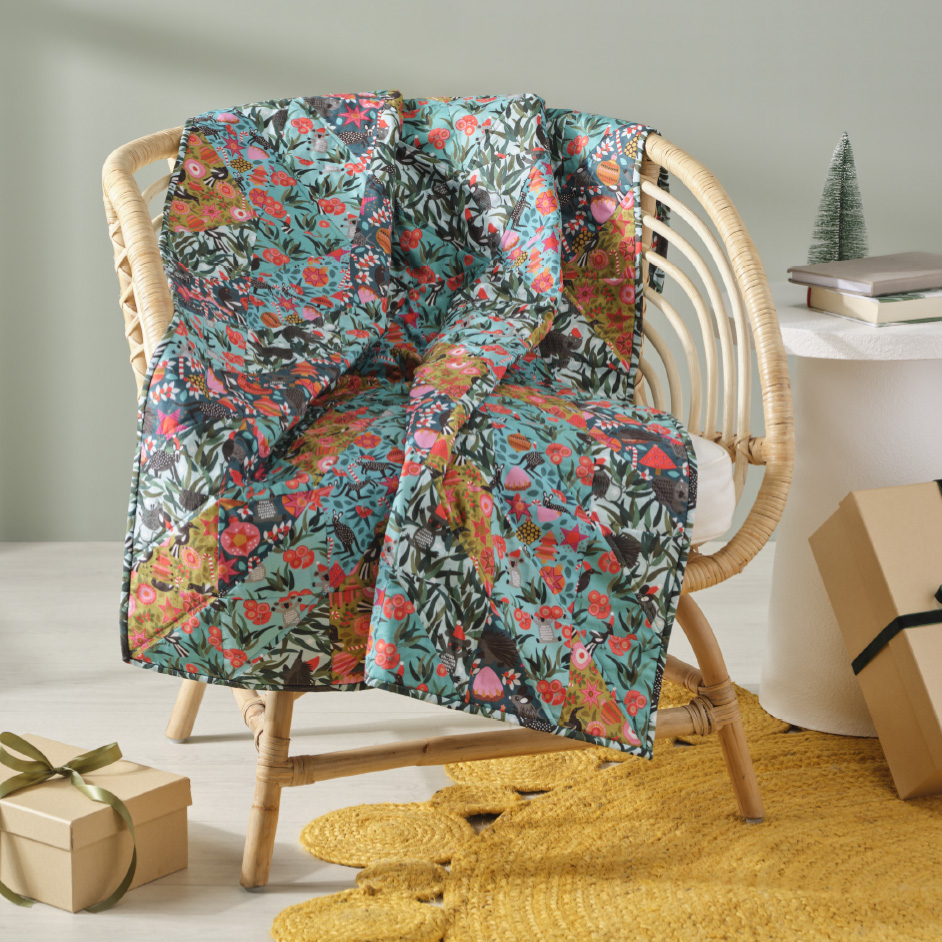
JOCELYN PROUST CHRISTMAS QUILT

Level: Intermediate
What You'll Need:
Fabrics are from 'Jocelyn Proust Christmas' range
- 70cm Fabric A - Santa Animals All Animals, Mint (includes binding)
- 40cm Fabric B - Aussie Animals Kangaroos, Aqua
- 40cm Fabric C - Aussie Animals Aussie Animals All Animals, Navy
- 40cm Fabric D - Santa Animals Koalas, Aqua
- 40cm Fabric E - Santa Animals All Animals, Teal
- 40cm Fabric F - Aussie Animals Magpies, Olive
- 1.2m x 1.4m Backing fabric of choice
- 1.4m Legacy cotton/bamboo batting
- Matching Gutermann 100% cotton thread
- Rotary cutter, mat & quilters rulers
- Quilting pins, tape measure
- Scissors, seam ripper
- Hand needle
- Sewing machine with ¼" foot & walking foot
All fabrics should be 100% cotton, washed & pressed.
¼" seam allowance used throughout unless otherwise indicated.
Read all instructions carefully before commencing the quilt.
Finished Size
40½" x 44½" (103 x 113cm)
INSTRUCTIONS
Cutting
All strips are cut across the width of fabric unless otherwise stated.
- From Fabric A cut 6 x 2½" strips and set aside for binding, cut 3 x 4 7/8" strips, crosscut into 20 x 4 7/8" squares then cut each square once on the diagonal to make 40 half-square triangles.
- From each of Fabrics B, C, D, E & F cut 3 x 4 7/8" strips, crosscut each fabric into 20 x 4 7/8" squares then cut each square once on the diagonal to make 40 half-square triangles in each fabric.
Sewing
Step 1 - Design Layout triangles into 11 rows with 20 triangles in each row as shown in diagram taking note of the direction of the diagonal. There will be some triangles left over to allow for fabric design and colour placement. Refer to the quilt image for ideas for design and colour placement if desired.
Step 2 - Blocks Working on one row at a time, sew triangles together into squares pressing seams open and placing each square back into the layout.
Step 3 - Rows Rearrange any blocks if desired, when happy with layout, sew blocks in each row together, pressing seams in one direction alternating the direction in each row.
Step 4 - Quilt Top Sew rows together matching seams. Press seams in one direction.
Step 5 - Quilting Layer the backing, batting and quilt top and baste together. Quilt as desired.
Step 6 - Binding Join the 6 x 2½" binding strips on the bias to make one long strip. Press in half lengthwise and bind mitering corners. Attach a label or sign and date your quilt.


