 | ||
| Your browser is not supported. | ||
|
Please browse our site using any of the following options:
| ||
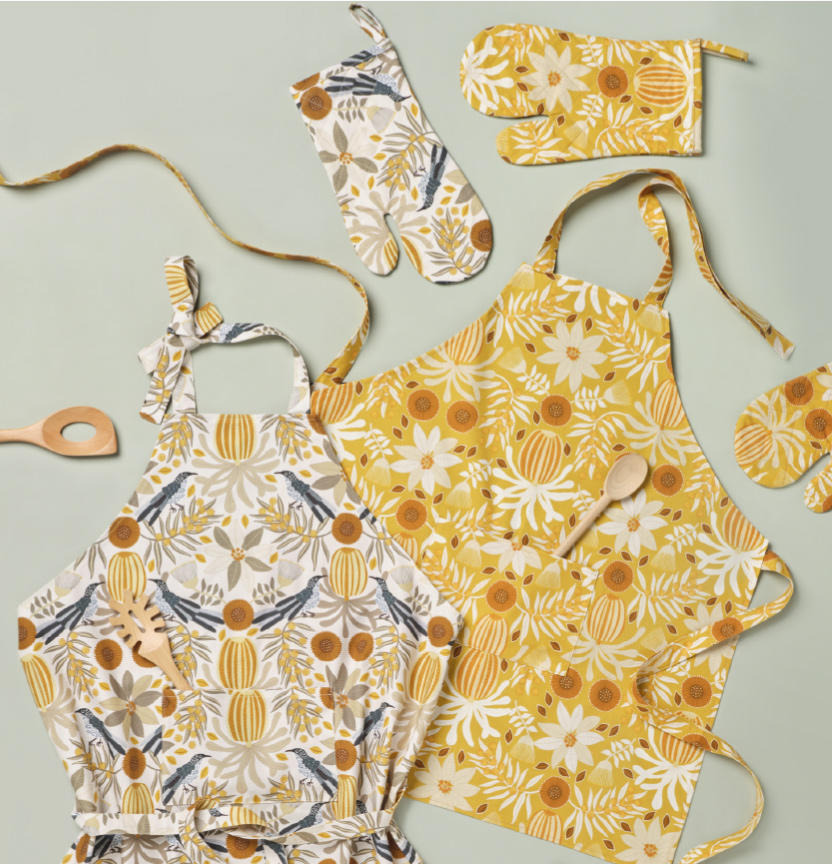
JOCELYN PROUST APRON & OVEN MITTS

Level: Easy
What you'll need:
- Fabrics are from Jocelyn Proust 'Wattlebird' range
- 1m Jocelyn Proust fabric - Wattlebird, Mustard or Honeyeater Wattlebird, Natural
- 30cm Legacy cotton/bamboo batting for oven mitts
- 60cm Trace & Toile Interfacing for oven mitts
- Matching Gutermann 100% cotton thread
- Pins
- Tape measure
- Scissors
- Seam ripper
- Pilot frixion marker
- Sewing machine & walking foot for oven mitts
- Optional - Rotary cutter, mat & quilters rulers
Instructions
Read all instructions carefully before commencing the project.
APRON
Step 1 - Fold Jocelyn Proust fabric over lengthways into the centre until one selvedge edge is 40cm from the fold with right sides together and press.
Step 2 - Refer to the diagram and with A being the folded edge, use the following measurements - A = 80cm, B = 12cm, C = 55cm, D = 35cm to draw the pattern on the wrong side of the fabric. Carefully cut out the apron. Fold edges of apron under 1cm and press, then a further 1cm and press well.
Step 3 - For the straps, cut 2 x 8cm wide strips across the width of the fabric and cut off selvedges. Fold each strip in half lengthways with right sides facing and press. Sew together lengthways using a 1cm seam allowance. Turn right side out and press with seam along one long edge. Topstitch down each long edge 3mm in from edge. Cut each strap into one 88cm length for waist ties and one 55cm length for neck ties. Zigzag or overlock one end of each tie to neaten.
Step 4 - Cut out one 25cm x 19cm rectangle for the pocket. Press side and bottom edges in 1cm. Press top edge over 1cm then a further 1cm and press well. Topstitch along top edge.
Step 5 - To attach waist strap, place raw end 1cm down from corner on wrong side of apron and with strap facing inward, tuck under pressed edge. Baste in place. Fold strap back so it faces outward and raw end is underneath. Stitch a square with diagonals for extra strength. Repeat for the other waist strap.
Step 6 - Pin the raw end of each neck tie to the top edge of the apron 1cm in from the side edge, on wrong side of apron and with strap facing inward, tuck under pressed edge. Baste in place. Fold strap back so it faces outward and raw end is underneath. Stitch a square with diagonals for extra strength.
Step 7 - With right side of apron right side up and ties facing outwards topstitch around apron 1cm in from the edge. Press well.
Step 8 - Centre pocket on apron front pocket 22cm up from the bottom edge of apron and pin on three sides with topstitched edge at the top. Pin in place then sew to apron across bottom and sides leaving top edge open. Press.
OVEN MITTS
Step 9 - For one mitt Cut two 26cm wide x 48cm rectangles from each of the following - Fabric, Batting and Trace & Toile Interfacing. Layer one of each as follows - interfacing, batting, then Fabric on top right side up. Pin layers together and quilt using diagonal lines. Note - use Frixion pen to mark lines. Remember Frixion pen lines can be removed with a quick press. Repeat to create a second quilted sandwich.
Step 10 - Place one quilted sandwich face down and with bottom of fabric design at the bottom. Position template provided on top with straight edge towards the bottom and trace around the edge. Place right sides together with the other quilted sandwich and pin around the edges.
Step 11 - Starting on one side of the bottom edge sew together along the line stopping at the bottom edge of the other side leaving straight edge unstitched. Trim seam allowance to 3mm. Clip into corner of thumb but not through stitching. Zigzag around stitched edges to neaten. Leave mitt wrong side out.
Step 12 - To create binding strip cut a 4cm x 50cm strip of fabric. Starting at outer seam (away from thumb) align with raw edge of mitt and sew strip around top edge but do not cut off excess strip. Press strip away from seam and turn mitt right side out. Fold edge of strip over 5mm and press. Fold strip over raw edge of mitt and topstitch. Use excess strip to create a hanging loop.
Repeat Steps 9-12 to create a second oven mitt.


