 | ||
| Your browser is not supported. | ||
|
Please browse our site using any of the following options:
| ||
PAPER PARTY CROWN

LEVEL: EASY
WHAT YOU'LL NEED:
- Silhouette Cameo 4, or similar cutting machine such as Cricut Maker or Explore
- Crafters Choice 30CMx30CM pastel papers
- Crafter's choice metallic cardstock
- Scissors
- Hot glue gun
- Glue stick
- Ribbon for fastening
- Hole punch
INSTRUCTIONS
- In your cutting machine's software, create a rectangle shape, measuring 30x6cm.
- On the same canvass, create 5 equilateral tringles with sides that measure 5cm.
- Arrange these triangles so that their bases connect with one of the long sides of your rectangle shape. There should be 2.5cm of the rectangle extending beyond either end of your row of triangles.
- Merge these shapes so you are left with a single outline.
- Place your chosen pastel paper on the cutting mat, and run it through your machine. Remove the shape from the mat and set it aside.
- Back in your cutting machine software, copy the shape you made in steps 1 to 4, and paste it into a new canvass. Shrink it by approximately 5-10%. The more you shrink it, the more of your pastel paper will be visible on the finished crown.
- Place your chosen glitter paper on the cutting mat, and run it through your machine. You may need check your machine's settings to ensure the blade is set to cut through this thicker, more textured paper. Remove the shape from the mat and set it aside.
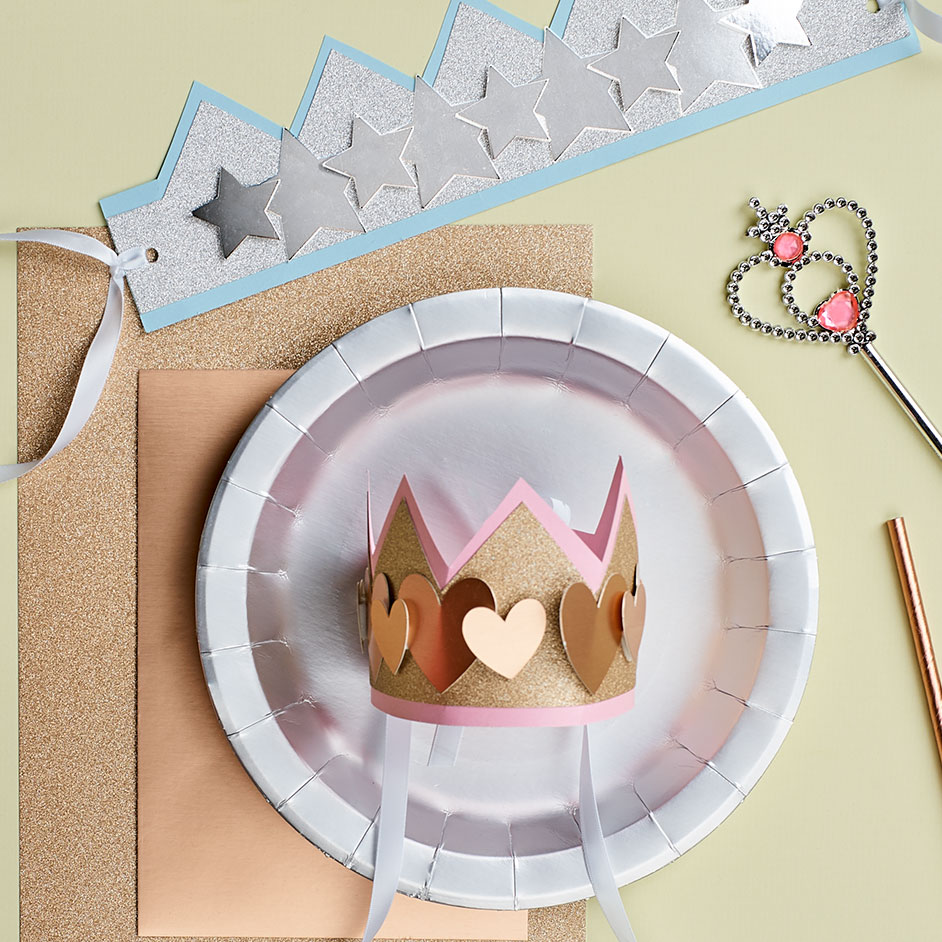
- On a third canvass in your cutting machine's software, create your decorative shapes. We used hearts and stars, but you can do any shape you choose to match the theme of your event. You can even cut letters to make names or other words. Your software will allow you to draw shapes using it's drawing tools or import them as cut files. Vary the size of your shapes to create depth and interest, but ensure that they are no taller than 6cm so they fit on your crown.
- Place your chosen metallic paper on the cutting mat, and run it through your machine. Remove the shapes from the mat and set them aside.
- Lay the smaller crown piece on top of the larger one and align it so it is centred. You should have an even pastel border surrounding your glittered piece. Glue in place with the glue stick.
- Arrange your decorative shapes on top of the glittered piece. Once you are satisfied with their position, glue them in place with the glue gun. You can use extra glue to pop some of the shapes up, giving them more dimension than others and adding to the layered look. Allow the glue to dry before moving on.
- Take your hole punch and punch a single hole at either end of the rectangular section of your crown.
- Thread a 30-60cm length of ribbon through the hole and secure with a knot.
Note: The above instructions are for a single crown. If you are making multiple crowns, you will be able to cut more than one at a time by duplicating the shapes on your cutting machine's canvass.


