 | ||
| Your browser is not supported. | ||
|
Please browse our site using any of the following options:
| ||
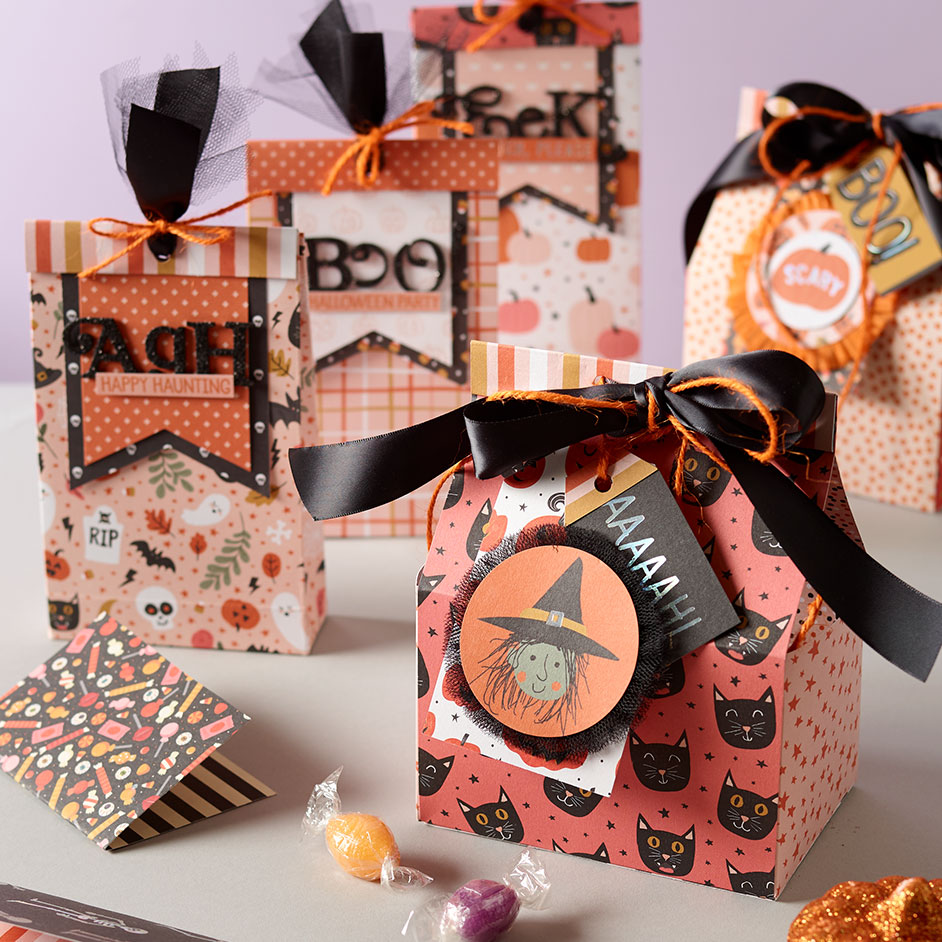
HALLOWEEN TREAT BAG & BOX

LEVEL: INTERMEDIATE
WHAT YOU'LL NEED:
- Halloween themed scrapbook paper pad
- Scissors and/or paper trimmer
- Scoring board
- Ruler
- Pencil
- Hole punch
- Wide satin ribbon
- Black tulle
- Narrower ribbon, raffia, and/or twine
- Double sided tape
- Alphabet stickers
INSTRUCTIONS
TREAT BAG
Step 1 - Cut a piece of patterned paper measuring 24.5 x 30.5cm.
Step 2 - Measuring from the left, score your paper vertically at 6.5cm, 8.5cm, 10.5cm, 21cm, 23cm, and 25cm, as shown on diagram A. These score lines will be called A, B, C, D, E, and F.
Step 3 - Measuring from the bottom, score your paper horizontally at 5cm and 3cm. These score lines will be called 1, and 2.
Step 4 - Using your pencil and ruler, and starting at the point where score line B intersects with score line 1, draw a diagonal line that passes through the point where Score line A intersects with score line 2, and continues on to the bottom edge of the paper. Mirror this on the other side of score line B, then follow the same steps to create identical diagonal score lines using lines D, E, and F.
Step 5 - Fold and open along all of your score lines so the paper is easy to work with as you proceed.
Step 6 - Apply adhesive down the left edge of the 'wrong' side of your paper (i.e. the side that will be the inside of your bag.
Step 7 - Fold down score lines A, C, D, and F to create an open-ended box, and secure with the adhesive you applied in step 6.
Step 8 - 'Squash' the box flat by folding score lined B, and E outwards.
Step 9 - Fold upwards along score line 1, then unfold again halfway, so that you have created a 90 degree angle with the top of your bag and work surface.
Step 10 - Open this bottom section out while pushing the sides inwards so you create two triangles pointing in opposite directions.
Step 11 - Fold along the top and bottom score lines so that the two flaps overlap and create a closed base for the bag. Adhere at the overlap with double sided tape.
Step 12 - Carefully open your bag up, pushing the sides inwards along score lines B, and E. Fill the bag with your chosen treats and fold the top at just under 2cm from the opening.
Step 13 - Choose a contrasting but complimentary paper from your pad and cut a piece measuring 6.2 x 8cm.
Step 14 - Score this piece at 2cm intervals running parallel to the long edge of the paper.
Step 15 - Fold each side in along the outer score lines, and then in half along the centre score line. Place this on top of your bag to conceal the folded top.
Step 16 - Choose two more papers from your pad. From one, cut a piece measuring 8.5 x 10.5cm from one of these, and 6.5 x 8.5 from the other.
Step 17 - Cut a shallow 'v' shape in the bottom of each of these pieces to create a banner shape. Layer them on top of each other, and decorate using phrases and motifs cut from your papers, as well as alphabet stickers and other embellishments.
Step 18 - Tuck your banners up under the piece of contrasting card at the top of your bag. While holding all pieces in place, punch a hole in the top of your bag, being sure to punch through all layers, including the banners.
Step 19 - Cut 5-7 strips of tulle, approx. 2 x 10 cm, and thread these through the punched hole, along with some black ribbon cut to the same length. Bundle them together and pinch them tightly to fit them through the hole. Pull these through to half way, then gather them together at the top of the bag, and tie them in a bunch with twine or raffia.
Step 20 - To make your banners more dimensional, add a piece of foam tape between the top and bottom banner, and the bottom banner and the bag.
TREAT BOX
Step 1 - Cut and score two pieces of patterned paper according to diagram B.
Step 2 - Cut and score two pieces of patterned paper according to diagram C.
Step 3 - Cut two pieces of patterned paper measuring 9cm x 13cm.
Step 4 - Using the flaps on the bottom and sides, adhere the pieces cut from diagrams B & C to one of the two rectangular pieces. Ensure that they are adhered to the under side of the rectangular piece, and the inside of the side pieces.
Step 5 - Take your second rectangular piece and adhere it to the bottom of your box, covering the tabs you used to construct the box.
Step 6 - Choose a piece of complimentary paper and cut a piece measuring 13 x 8cm. Score this piece at 2cm intervals running parallel to the long edge of the paper.
Step 7 - Fold each side in along the outer score lines, and then in half along the centre score line.
Step 8 - Bring the top pieces of your treat bag together, and place this folded piece over the top of them to conceal where they meet.
Step 9 - Punch two holes in the top, and thread ribbon, twine, and/or raffia through them to secure in place.
Step 10 - Create decorative tags for your boxes using papers from the cut-apart pages in your paper pad. Embellish with coordinating crepe paper, tulle, stickers, and other supplies, then tie to the front of your box.


