 | ||
| Your browser is not supported. | ||
|
Please browse our site using any of the following options:
| ||
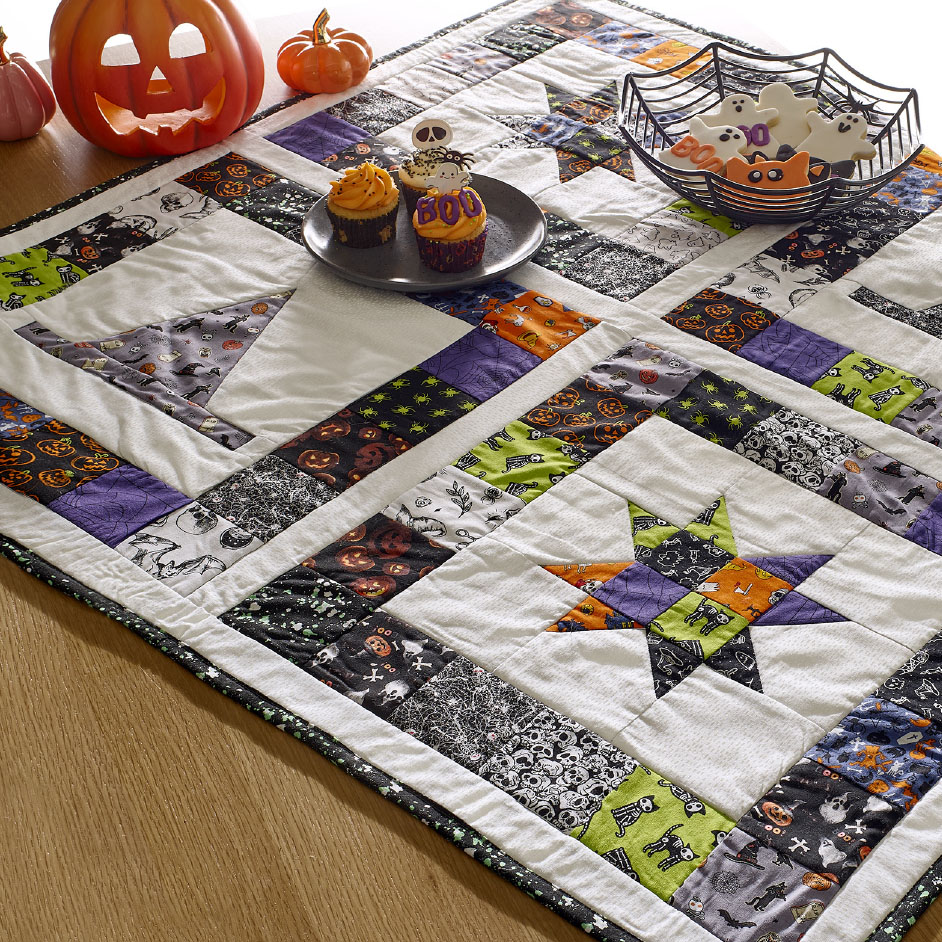
HALLOWEEN TABLETOP QUILT

LEVEL: INTERMEDIATE
WHAT YOU'LL NEED:
- 0.25 - 0.5 metre cuts of different Halloween prints (you will need at least a 0.3m piece for each of the Hat blocks)
- 0.75m of white tone on tone (or a low volume blender fabric) (referred to as background fabric in this pattern)
- 1.5m of backing fabric
- 1.2m of quilt wadding
- 0.4m of fabric for binding
- General sewing tools
- Sewing machine
INSTRUCTIONS
Step 1 - Star Blocks (blocks measure 12.5” unfinished)
Cut the following:
- From 4 different Halloween prints cut three 2.5” squares (12 total)
- From background fabric cut eight 4.5” squares
Step 2 - Sew the four 2.5” squares together to make the centre section (use one square of each print). Draw a diagonal line across the back of the rest of the 2.5” squares.
Step 3 - Take one background square right side up and place a print square right side down so the bottom left corners match up (see fig 1) Sew along the line you have drawn.
Step 4 - Trim fabric ¼ inch from the sew line and press open. Take another 3.5” square and place this right side down onto the square unit you have just sewn, this time in the right-hand bottom corner (figure 2). Sew, trim and press open.
Step 5 - Repeat this with another 3 of the background squares, until you have 4 blocks that look like figure 3. Arrange your star points around the middle section so that you’re pleased with the colours and layout.
Step 6 - Place a 4.5” background square in each corner so you have a 9-patch layout. Sew the top row together, pressing seams as you go. Repeat with middle and bottom row.
Step 7 - Sew top row to the middle row, use pins to hold the fabric where the seams meet. Repeat with bottom row
Step 8 - Repeat all these steps to make a second star block.
Witch hat blocks
Step 1 - Cut the following:
- One 12.5” x 3” rectangle of background fabric
- Two 1.5” squares of background fabric
- Two 8” x 10” rectangles of background fabric
- One 10.5“ x 1.5” rectangle of Halloween print fabric
- 1 x triangle of Halloween fabric (using template)
Step 2 - Using the 10” x 8” background fabric (position so the 8” side is at the top), using a ruler and a pen mark 3.5” in from the left side on the bottom edge. Draw a diagonal line from this mark, to the top right corner. (figure 4) Cut along this line.
Step 3 - Repeat this for the other 10” x 8” rectangle piece, however this time mark 3.5” from the bottom right corner. You should end up with two mirror image pieces
Step 4 - Sew one background piece to one of long sides of the triangle piece. Align the bottom edge of the triangle with the background pieces, there will be overlap at the top of the triangle. Press your seams and trim the overhang at the top of the triangle so you have a straight side to attach the next background piece.
Step 5 - Take the 10.5 x 1.5” piece of Halloween print and sew a 1.5” background square to each side. Press seams Sew this strip piece to the bottom of the completed triangle piece. Sew the 12.5” x 3” background piece to the bottom of the block. Trim block to 12.5” square.
Step 6 - Repeat all these steps to make a second star block.
Block Borders
Step 1 - Cut the following:
- 20 x 3.5” squares of different Halloween prints
Step 2 - Sew 4 squares together to make a 12.5” strip (repeat this so you have two strips)
Step 3 - Sew one strip to the top of one of your finished 12.5” blocks, and another strip to the bottom. Press open
Step 4 - Sew 6 squares together to make a strip 18.5” long (repeat so you have two strips)
Step 5 - Sew each strip to the sides of the block. Press seams. Repeat these steps with the other remaining blocks.
Sashing
Step 1 - Cut the following:
- Three 2” x WOF strips of background fabric
- 6 x 18.5x2” strips of background fabric
Step 2 - Arrange the star and hat blocks in two rows of two, in a pleasing layout.
Step 3 - Sew sashing in between each of the blocks in the rows. Press seams open
Step 4 - Join rows using a WOF strip of background fabric. Sew another WOF to the top and bottom of the quilt. Press seams and trim off any excess from the WOF strips.
Step 5 - Square up quilt
FINISHING
Step 1 - Baste the backing, wadding and quilt top together and quilt as desired.
Step 2 - Create quilt binding by cutting four 2.5” by WOF strips of your binding fabric and joining at the ends.
Note – This template has been scaled. You will need to print this template at actual size and blow it up by 200% to make it full size.


