 | ||
| Your browser is not supported. | ||
|
Please browse our site using any of the following options:
| ||
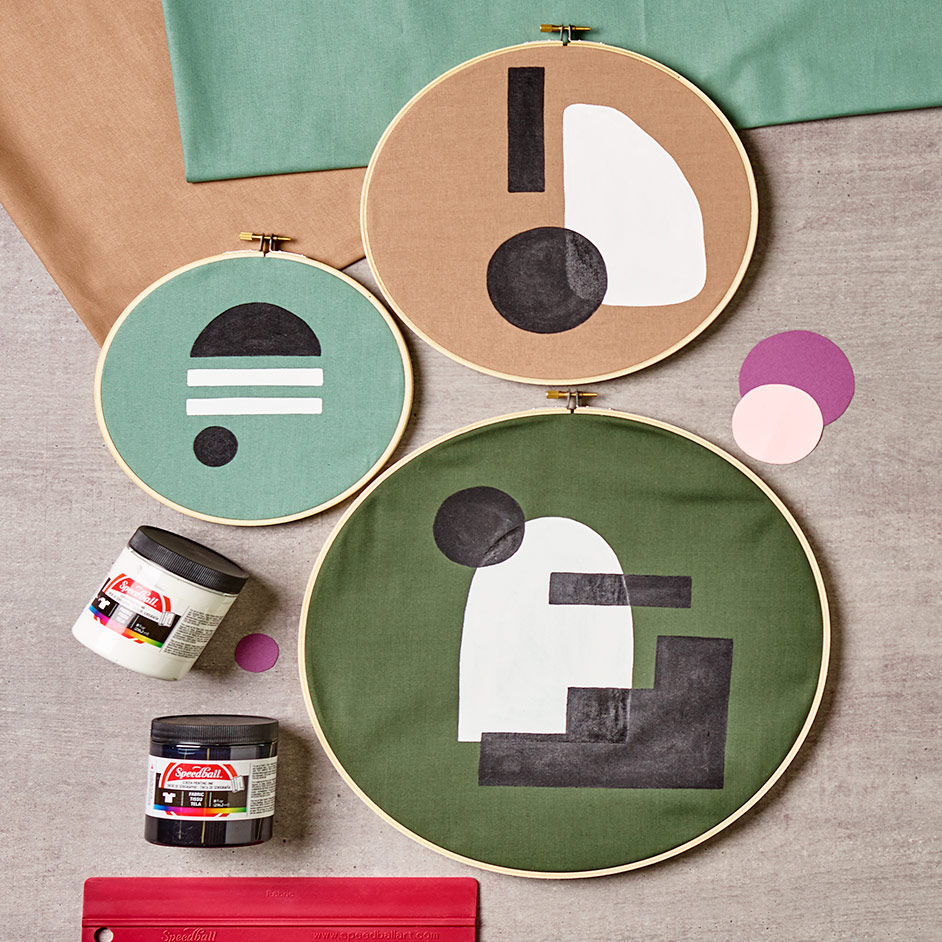
URBAN SANCTUARY SPEEDBALL HOOPS

LEVEL: INTERMEDIATE
WHAT YOU'LL NEED:
- Cricut Air 2 Machine
- Cricut Vinyl Transfer Tape
- Cricut Vinyl
- Speedball Screen Printing Frame
- Speedball 9" Red Barron Squeegee
- Speedball 8oz Fabric Ink White
- Speedball 8oz Fabric Ink Black
- Palette knife
- Cardboard
- Weeding tool - optional
- Masking tape
- Scissors
- Plate to mix paint
- 3 x Cotton or linen fabrics (enough for your chosen size embroidery hoop)
- 3 x different sized embroidery hoops
Tips - We cut 1m of fabric for colour, this ensures you have ample space to work with. You can always cut the fabric to size to fit in the hoops. Wash your screen and squeegee after you have finished using it to prevent the paint from drying and staining your tools. It's important to use the right amount of ink, too much will cause the fabric to stiffen and this may crack the ink. Too little and the design will look faded.
INSTRUCTIONS
CREATE YOUR DESIGN
Step 1 - Use the Cricut Design Space app to find a design you like, or you can upload your own. Once you have chosen one, reposition the design so there is an inch of space around the design. This is to ensure you have space to apply masking tape later. Do not select mirror, then send the design to print.
Step 2 - Load the vinyl onto the Cricut mat and into the machine to cut out your design.
Step 3 - Once the cut is complete, use the weeding or a tool with a sharp end such as a scalpel to weed your design the opposite way you would normally. You want to remove the areas that have been cut so when you place it on your screen-printing screen, the ink will transfer through the stencil.
Step 4 - To adhere the stencil to the screen, apply the transfer tape so it covers the whole design. Apply the tape to the vinyl side that does not have the backing paper. Use your squeegee to smooth out any bubbles or wrinkles.
Step 5 - Transfer your design to the screen by removing the backing paper and placing it in the centre of the frame. Make sure the vinyl stencil is still stuck to the transfer tape. Use the squeegee to smooth the vinyl a few times so it adheres to the screen. Carefully remove the transfer tape by peeling the tape back as flat as possible to prevent the vinyl sticking to the tape. Use masking tape to fill the gaps so the paint does not transfer through.
SCREEN PRINTING
Step 1 - Lay your fabric flat onto a table, to prevent paint from bleeding through and staining the table place a large mat or paper underneath.
Step 2 - You can use the fabric inks as is or create different colours by mixing the inks. Place the ink inside the well of the frame along the top using the palette knife. Take your squeegee and apply enough pressure so that it drags the ink across the stencil and transfers onto the fabric. Too much pressure and ink will result in the ink going sides beyond the stencil. This will take some practice to get right.
Step 3 - If you are adding layers of colour, use a hair dryer to speed up the drying process. Just make sure to wash your tools in between with soap, so it's easier to remove the ink.
Step 4 - Repeat this process for each of your designs. If you have many layers of paint, it may take a few days for the ink to completely dry before heat-setting. Otherwise it should be dried after 6 hours.
Step 5 - Heat-set the ink according to Speedball's instructions to ensure a longlasting application even with washing.
Step 6 - Once your fabric has been heatset you can place the fabrics inside the embroidery hoops and cut off any excess fabric with scissors. Hang together on a wall to finish!


