 | ||
| Your browser is not supported. | ||
|
Please browse our site using any of the following options:
| ||
KAISERCRAFT ADVENT CALENDAR

LEVEL: INTERMEDIATE
WHAT YOU'LL NEED:
- Craft Glue
- Double sided foam tape
- Box Advent Calendar
- Mint & Mistletoe 6.5" Paper Pad
- Mint & Mistletoe collectables
- 12x12 Mint & Mistletoe Paper Pack
- File Set
- Alpha sticker set
- Navy Kaisercolour paint
- Paisley Flourish Pack
INSTRUCTIONS
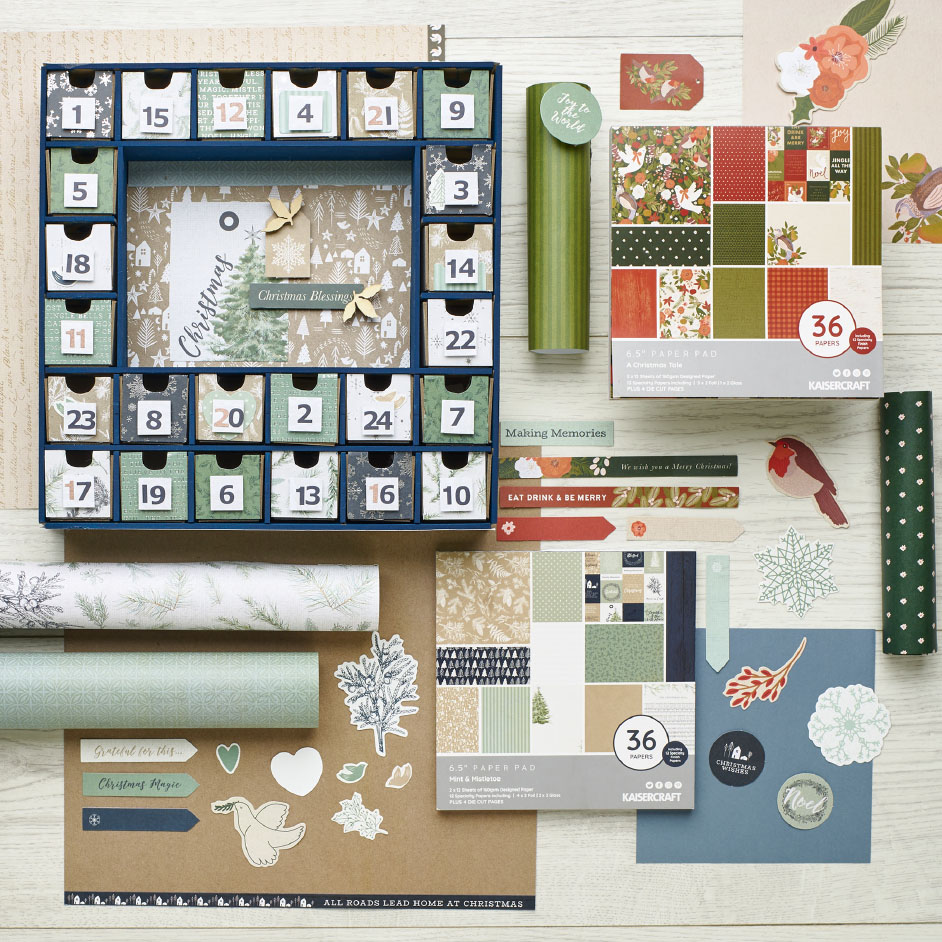
Step 1 - Following the included instructions, construct your Box Advent Calendar. Once constructed, paint the entire frame using the Navy Kaisercolour paint.
Step 2 - While the paint is drying let's focus on the drawers. Start by outlining the face of the drawers on your chosen papers from the 6.5" Mint & Mistletoe Paper Pad. Cut out and adhere to the carboard drawers using craft glue.
The papers we used were:
- Christmas Holly x4 drawers
- Snowflakes x4 drawers
- Pine Springs x4 drawers
- Village side 1 x4 drawers
- Village side 2 x4 drawers
- Christmas Song x4 drawers
Step 3 - Add some dimension by using the collectables of your choice, decorate a handful of drawers (as seen on number 20 and 24)
Step 4 - Lets begin the Christmas countdown and cut 24, 2x2cm squares from the Christmas Holly Paper. Number each box from 1 - 24 using the sticker sheet in the paper pack and alpha stickers and slot into each shelf
Step 5 - To create the centrepiece, cut a rectangle from the "Village" paper measuring 180 x 135mm and stick it down with craft glue.
Step 6 - Cut a strip of "Christmas song" 2cm thick and adhere to the top of the centrepiece.
Step 7 - Cut out the "Christmas tag" from the "Blessings" paper and place it slightly left of centre.
Step 8 - Let's add some dimension by adding the 2 collectables pictured (Snowflake and Christmas Blessing) with double sided foam tape.
Step 9 - Add the final touch of the wooden flourish to add some texture.


