 | ||
| Your browser is not supported. | ||
|
Please browse our site using any of the following options:
| ||
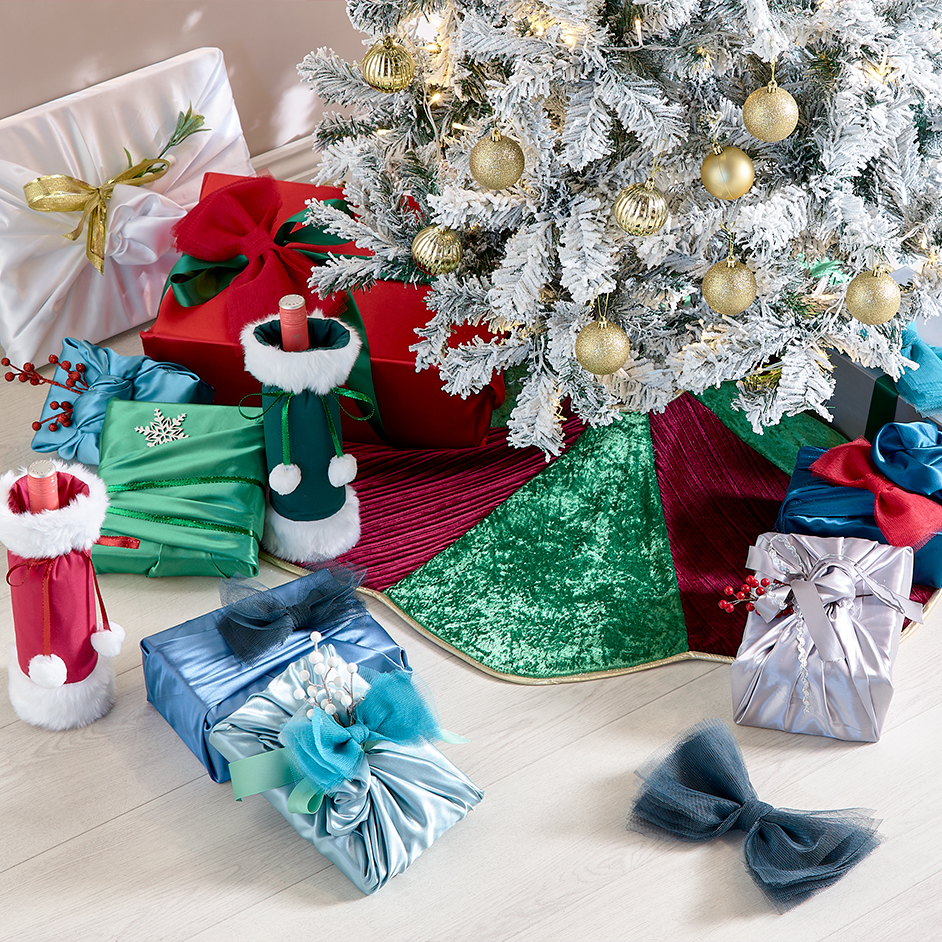
CHRISTMAS TREE SKIRT 2

LEVEL: EASY
WHAT YOU'LL NEED:
- 1.0m each of two alternate colours for main top fabric
- 1.1m of cotton fabric for underside lining
- 1.1 m of cotton quilt batting
- 5.5m bias binding
- 2.5cm (approx.) buttons of choice x 2
- Sewing machine
- Matching thread
- Scissors
- Measuring tape
- Pins
- Large piece of paper to draft the pattern at least 1.1m in width and length. You could tape up multiple pieces of paper to achieve this if required
- Pencil/Pen
INSTRUCTIONS
Create Your Pattern
Step 1 - Using your large piece of paper, fold it in half evenly, then fold it in half again, resulting in a quarter fold. Ensure all edges line up evenly. Keeping the paper folded, starting from the corner fold of the paper, measure along and mark 55cm on one long edge. Now from the same corner in an arc mark 55cm at regular intervals all the way to the other edge side. You will end up with ¼ of a circle marked.
Step 2 - At the fold, repeat the above with an arc marked at 6cm - this will result in a 12cm width hole at the middle for the tree trunk, this can be adjusted if required.
Step 3 - Cut out along both arc lines at 6cm and 55cm (when cutting you may find it helps to pin the layers of paper together for an even cut).
Step 4 - Prior to unfolding, fold the cut piece in half again matching long sides, sharp crease all edges with your ruler. Open the folds and you will have a circle with a whole in the middle with eight even sections.
Optional - You can also create different patterns along the arc (edge of circle) to create different edge effects. In this instance we created a scallop edge by drawing a rounded edge at the arc and cutting this out on all layers prior to unfolding.
Cut Your Fabric Pieces
Step 5 - Using your pattern piece, cut one of each cotton quilt batting and underside lining. Place aside.
Step 6 - Now get your paper pattern and cut along all previous creased lines in the circle, this should result in eight equal pieces of the circle (like a pie).
Step 7 - Cut out four pieces each of the two different velvet fabrics using the cut pattern pieces. Ensure you add a 1cm seam allowance to each long side of the pieces for when they are sewn together
Stitch the Skirt
Step 8 - Pin and sew each piece together along long sides, alternating colours using a 1cm seam, do this seven times, therefore leaving one seam open for the opening. Press seams flat.
Step 9 - In the following order, lay all the prepared pieces together - underside lining right side down, batting layer and sewn piece facing up. Cut the underside and batting layer opening to match the unsewn seam for the opening. Trim away the 1cm seam allowances on these top layer raw edges.
Step 10 - Pin and baste all layers together to stop them from moving. Top stich along straight seams to keep all layers together, use a long stitch.
Step 11 - Trim edges, using underlayer as a guide.
Step 12 - Using bias binding, bind all top, bottom and opening edges. To do this, unfold one edge of bias tape and press open. With pressed open bias edge and top layer right sides together sew 1cm from raw edge. Once all edges are completed, press open and fold over remainder of bias to underside of skirt, pin and top stitch in place via stitching in the ditch. Ensure you catch the bias tape on the wrong side.
Step 13 - Cut 2 x 10cm strips of bias. Fold wrong sides together and stitch along long open edges to create a strip. Fold each in half, match and fold under raw edges 1cm twice. Pin and stitch in place underneath left open edge of skirt - one 2cm from top, the next 10cm from the last.
Step 14 - Sew buttons on right hand side of tree skirt opposite button loops just created.
Step 15 - Press for a neat finish and your tree skirt is complete.


