 | ||
| Your browser is not supported. | ||
|
Please browse our site using any of the following options:
| ||
VALENTINES DAY CARDS

Level: Easy
WHAT YOU'LL NEED
Stamp Cards:
- Card stock in Pink, Red and White
- American Crafts Vicki Boutin So Fun Stamps Set
- Versa colour stamp pad
Seed Card:
- Seed set
- Card stock in Pink, Red and White
- Bowl of water
- Stick blender and small container
- Tea towel or paper towel
- Papercraft Clear Cling Modern Alphabet Stamps Set
INSTRUCTIONS
Stamp Cards:
Step 1 - Lay out all your materials and stamps in front of you on a clear work surface so you can easily see what you have to work with. You can use a pen and paper to roughly plan your cards or just go for it and see what you come up with!
Step 2 - Fold the card stock in half to create portrait or landscape cards depending on the style you wish to create.
Step 3 - Take the stamps you wish to use and stick it onto the stamp plate. Use the ink dabbers to apply ink evenly all of the stamp design.
Step 4 - Gently and carefully press the stamp onto your card in the position you wish it be. Press firmly and then remove to see your design come to life. You can play with using a mixture of ink colours on the one stamp or overlaying your stamps to create interesting designs.
Step 5 - Continue this process until you have created a bunch of unique cards for your loved ones!
Seed Card:
Step 1 - To make the paper pulp, shred the coloured paper by tearing it into small strips. We used a combination of coloured paper and white copier paper. Once you have finished shredding the paper, soak it in a bowl of warm water for at least an hour.
Step 2 - After an hour, take some of the soaked paper out and place it into a container with some more water and pulp it with a stick blender. Continue you this process in batches until all your paper is pulped.
Step 3 - Now it's time to add the seeds! You can choose any seed mix that you like, but we recommend checking with your local nursey on which flowers will grow best at this time of year. Mix the seeds through the pulp so they are evenly distributed.
Step 4 - Lay some paper towel or a tea towel on a clean work surface and turn out the pulp mixture on top. Spread it out to the thickness you wish your paper to have - the more pulp you add the thicker the finished paper will be. Then lay another tea towel or paper towel over the top and press down to remove as much excess water as possible. Wring out any water and repeat this process until you feel all the excess water has been removed.
Step 5 - Now gently remove the paper from the towels and place it somewhere clean and flat to dry for at least 24 hours.
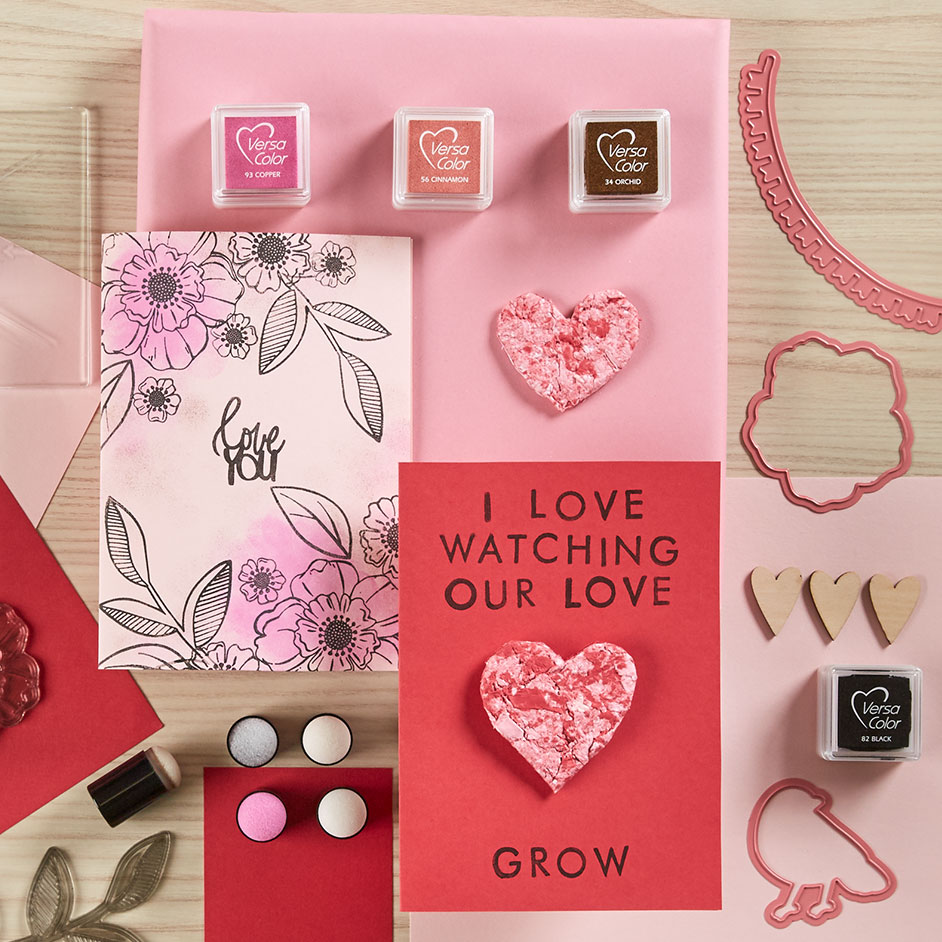
Step 6 - While the paper is drying you can work on creating the card. We used card stock and the letter stamps to spell out a cut pun "I love watching our love grow" but be creative and make see what designs you come up with.
Step 7 - Once the seed paper is dry you can cut out whatever shapes you like. We cut out a love heart for the front of our card and used double sided tape to attach it to the front of the card. You can also punch a hole and create gift tags, the ideas are endless!
Step 8 - Gift your card to your loved one and when the person is ready to plant the seed paper, they simply need to tear it up and plant it where they wish the flowers to grow!


