 | ||
| Your browser is not supported. | ||
|
Please browse our site using any of the following options:
| ||
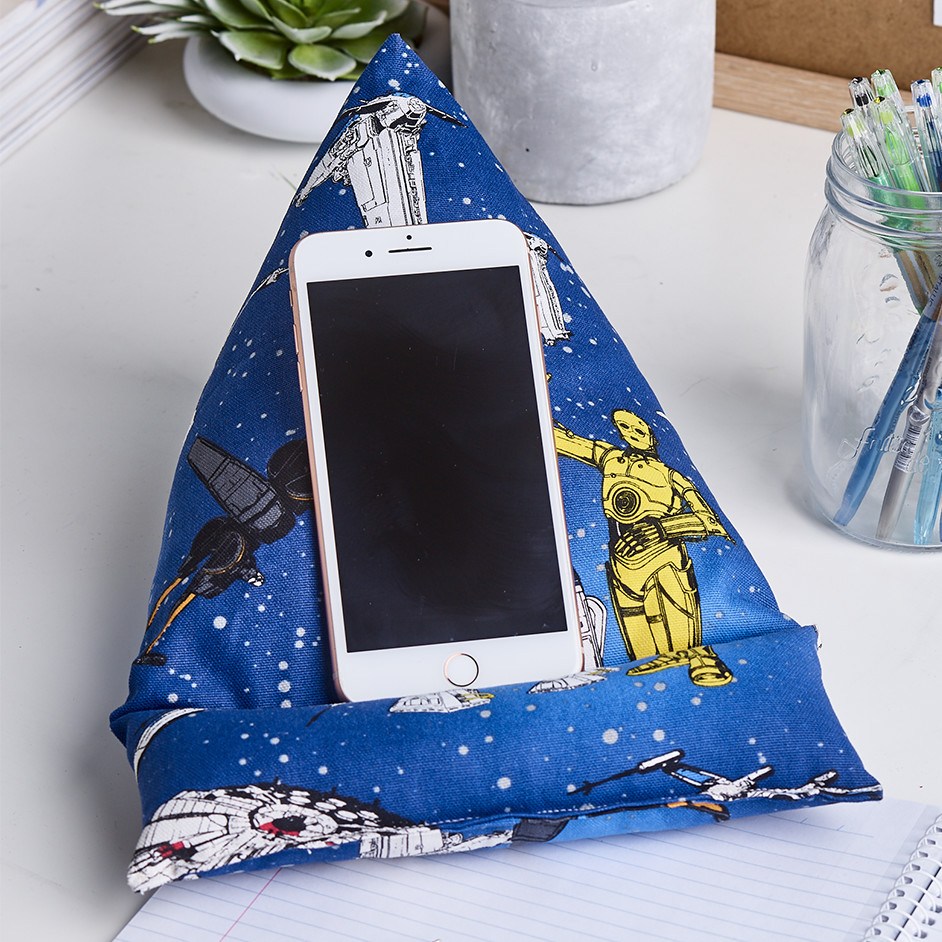
STAR WARS TABLET & PHONE HOLDER

LEVEL: INTERMEDIATE
WHAT YOU'LL NEED:
- 50cm 'Star Wars Spaceship' decorator fabric
- Matching Gutermann Step 100% cotton thread
- Pins, tape measure
- Scissors, seam ripper
- Sewing machine
- 50cm Medium Weight Woven Interfacing
- Stuffing Pellets
- Crafters Choice stuffing
- 20cm Legacy Fuse-N-Shape 1-Sided Fusible stabilizer or cardboard
- Optional - Self-cover button
Note - Read all instructions carefully before commencing the project.
INSTRUCTIONS
Step 1 - Cut a rectangle 47cm wide x 41cm in length from Star Wars fabric and interfacing. Fuse interfacing to wrong side of the rectangle.
Step 2 - Fold rectangle in half with right sides together (23.5cm x 41cm) and pin.
Using 1cm seam allowance, sew around 2 sides leaving one narrow end open. Clip corners, press seams open and turn right side out.
Step 3 - Place bag with long seam flat on the table, insert your hand into, open out then flatten with seam in the centre as in diagram 1.
Step 4 - Fold top point A over to the centre (red dot) as in diagram 2 and pin in place. Put your hand in and open out and ready for stitching on the button.
Step 5 - Optional - Make a self-cover button and stitch through the base to hold point in place. Alternatively, use any button or just sew in place.
Step 6 - Cut a piece of Legacy Fuse- N-Shape 1-Sided Fusible stabilizer or cardboard for the base 20cm along the base, 15cm high and 9.5cm across the top as in diagram 3.
Diagram 3 -
This template has been scaled. You will need to blow it up by 500% to make it full size.
Or alternatively you can draft the pattern yourself using the measurements provided.
- 15cm
- 20cm
- 9.5cm
Step 7 - With holder right way up insert base into bag with fusible side down. Fuse in place from fabric side.
Step 8 - Half fill base with stuffing pellets to give the holder stability then fill with Crafters Choice Stuffing. Use as much filling as you like, enough to take the weight of the tablet but not too hard.
Step 9 - Pin bag together along the front edge of the insert then stitch across. Fold the front edge of the fabric half way to the inside, pin along the edge and press. Stitch together 3mm from the edge leaving a small opening at one end for filling. Using the stuffing fill until it is hard. Hand stitch opening closed.


