 | ||
| Your browser is not supported. | ||
|
Please browse our site using any of the following options:
| ||
LIQUITEX POURING ACRYLIC SKINS

Level: Beginner
What you'll need:
- Liquitex gloss pouring medium
- Liquitex acrylic colours of choice - Liquitex Basics Acrylic, Liquitex Acrylic Inks or Liquitex Heavy Body Acrylics can be used
- Liquitex matte gel medium (used to bind the acrylic pouring skins onto the surface)
- Stretched canvas or canvas board - size of your preference
- 12 x 16 Reeves tear off palettes
- Plastic cups
- Scissors
- Plastic tablecloth
- Brush/sponge
Liquitex Acrylic Inks easily mix with pouring medium without a lot of mixing. Liquitex Inks may make the Gloss Pouring mediums highly fluid. For Gloss Pouring medium to be at a medium viscosity, Liquitex Basics Acrylics or Liquitex Heavy Body Acrylic colour is recommended.
Instructions:
Create Acrylic Pouring Skins
Colour Mixing Tip - we suggest adding a small amount of White to any colour you wish to brighten. To keep colour mixing clean, we recommended using a limited colour palette for each pouring skin.
Step 1 - Use Liquitex Gloss Pouring Medium and pour various amounts into small cups, gradually adding Liquitex Acrylic colour/s of your choice and mixing them carefully to reduce bubbles. Liquitex acrylic paint is highly pigmented, use a larger ratio of medium to a small ratio of paint.
Step 2 - Cover the cups with clingwrap and secure with a rubber band and allow to stand for at least an hour. This allows the mix to settle any bubbles.
Tip: If using Liquitex Heavy Body Colour, add the Liquitex Pouring Medium to the paint gradually, mixing in well.
Step 3 - Prepare your table with a plastic tablecloth and lay out Reeves Tear Off Palettes, shiny side up, ready to pour onto. Gently pour your premixed pouring medium with your colour/s of choice. You can do this in a variety of ways:
- pour colours onto the Tear Off palette and then swirl to mix
- take a separate larger clean cup and add layers of your mixed pouring medium and paint together. Then tip this onto the Tear Off palette in a fast, slow, staggered or zig-zag movement to create various pouring patterned effects. This is called a "Dirty Pour".
Tip: If you place the Tear Off Palettes on some cardboard for stability, this allows you to move the pour around to further "marble" the colours together.
Step 4 - Once you like the poured results, lay it flat on a level surface to dry in a dust and draught free environment for at least 48 hours.
Tip: To further protect your acrylic pours, cover them with a large box whilst drying.
Plan your collaged acrylic skins design
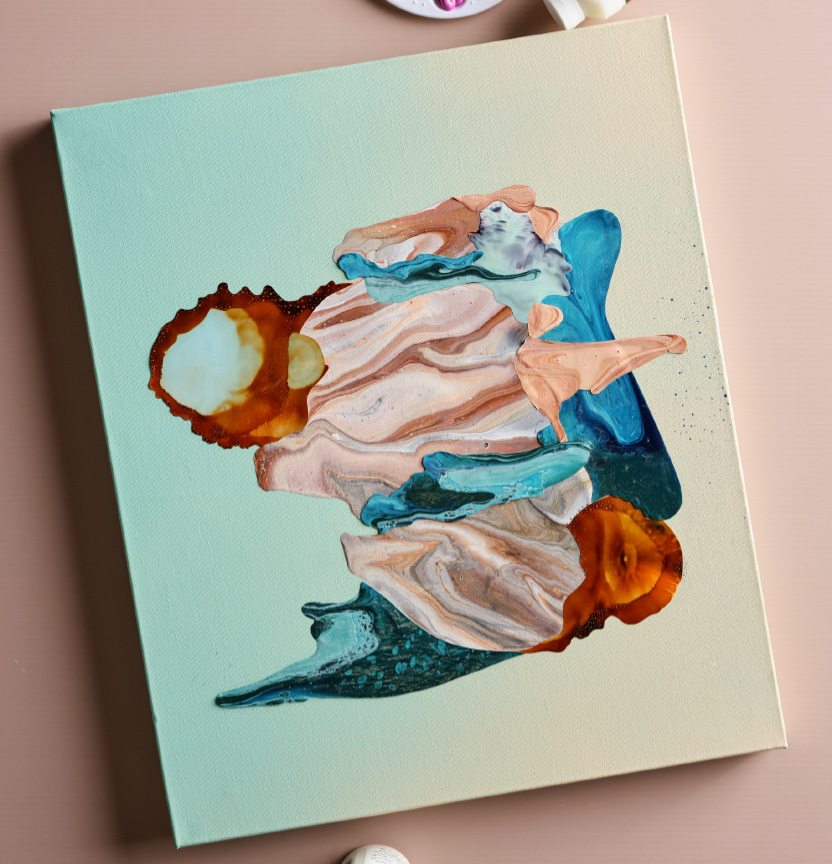
Step 1 - Select your favourite created acrylic skins and consider how you would like to arrange them in a collaged manner to create your artwork. Experiment with various placement arrangements until you are satisfied with your design.
Tip - once completely dry, acrylic skins can be peeled off the Tear Off Palette and trimmed to any shape of choice with a pair of scissors.
Step 2 - Pouring Skins can be stored in a sealed plastic container with a Tear Off Palette sheet, shiny side facing the skin on each side of the skin, to ensure they are not damaged.
Background colours
Step 1 - Thinly paint your canvas or board with a background design, using your colour/s of choice.
Step 2 - Paint can be applied with a brush or sponge. Allow to dry.
Adhere the Acrylic Pouring Skins to the artwork.
Step 1 - Use Liquitex Matte Gel and brush onto the back of your pouring skins and place the skins, one at a time, onto your selected position on the surface. Burnish them onto your surface with your hands or using the back of a spoon, to press out any air pockets and ensure a smooth and even finish.
Optional - to ensure the skins are fully adhered, pressure can be applied by first covering the skins with the tear off palette shiny side facing skins. Place the canvas face down onto a hard, even surface and place heavy books on top of the canvas (behind the wooden frame cross bar if you are using a large canvas). Allow to dry for a few hours in this position.
Finishing touches
Step 1 - View your almost completed work and decide if you wish to add any details to your piece with paint.
Step 2 - Further elements of paint and mediums can be used to build a more complex artwork, or you may wish to only add a few small highlights.
Step 3 - The types of acrylic skins that can be created are limitless and visually incredible. Enjoy exploring the possibilities!


