 | ||
| Your browser is not supported. | ||
|
Please browse our site using any of the following options:
| ||
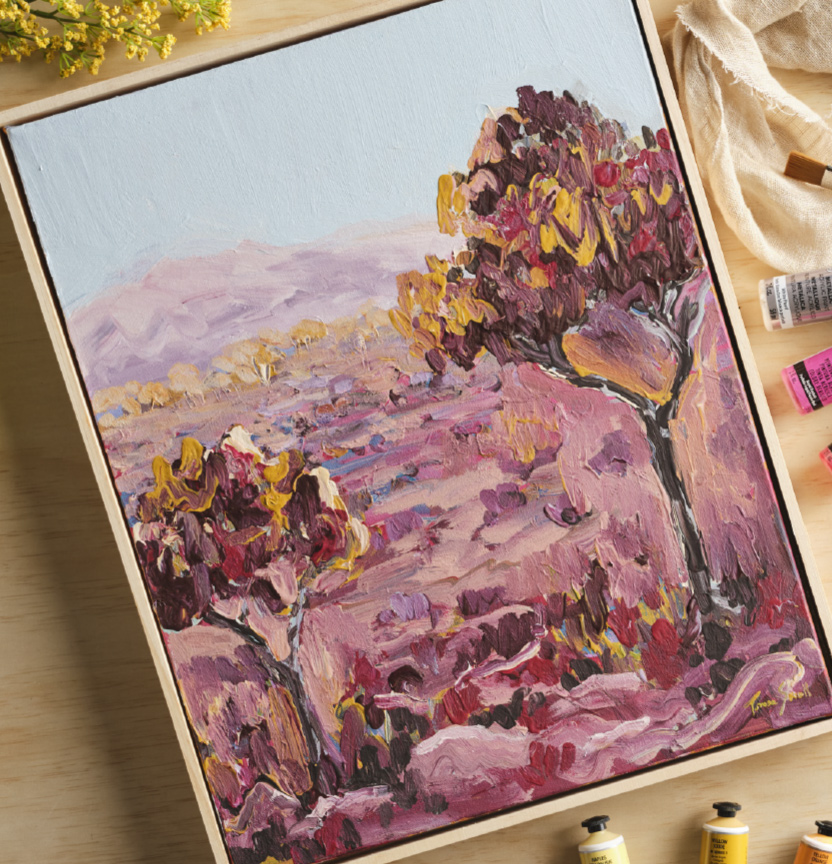
WARM AUSTRALIAN LANDSCAPE PAINTING

What you'll need:
- Jo Sonja acrylic paint:
- Unbleached Titanium White
- Titanium White
- Raw Sienna
- Yellow Oxide
- Amethyst
- Sapphire
- Amethyst
- Permanent Aliziane
- Burnt Umber
- Stretched canvas
- Large flat paint brush
- Medium flat paint brust
- Palette Knife
- Palette or Paper plate
- Paper towel/ Rag
- Print out/ reference of your favourite Outback Australian Landscape
Enjoy the creation of a warm abstract painting using the matt, fluid and brightly pigmented Jo Sonja acrylic paints. This project encourages the use of thick, loose and expressive applications of paint. In true abstract fashion, each artwork will be unique, and the following steps are a guide rather than an exact set of steps/rules to follow. For best results use a variety of reference images of Outback Australian landscape, do not use images that contain water.
Read all instructions before starting.
Instructions:
Step 1 - Cover the entire canvas and edges with Jo Sonja Raw Sienna paint in even strokes using the large flat brush. Let Dry.
Step 2 - Using a medium sized flat brush, draw a stylised outline of all the objects in the selected landscape. Keep your marks loose, abstract and free. The outcome is NOT realism so the more you can stray from the accurate shapes and proportions the better!
Step 3 - Squeeze out a grape sized amount of both Jo Sonja Unbleached Titanium and Jo Sonja Sapphire to your palette. Using the large flat brush paint in the sky area using a mixture of both colours.
Step 4 - Squeeze out a grape sized amount of both Jo Sonja Unbleached Titanium and Jo Sonja Amethyst to your palette. Using the large flat brush paint in the far mountains using a mixture of both colours.
Step 5 - Squeeze out a grape sized amount of both Jo Sonja Unbleached Titanium and Jo Sonja Sapphire to your palette. Using the large flat brush paint in the middle mountains using a mixture of both colours.
Step 6 - Squeeze out a grape sized amount of both Jo Sonja Unbleached Permanent Alizarine. Using the large flat brush paint in the exposed ground. For more sense of depth mix in the Jo Sonja Unbleached Titanium to lighten the colour next to the mountains. Having brighter/darker colour at the front and lighter softer colours at the back.
Step 7 - Squeeze out a grape sized amount of Jo Sonja Sapphire to your palette. Using the large flat brush paint in the bushes/shrubs.
Step 8 - squeeze out a grape sized amount of Jo Sonja Yellow Oxide and a pea sized amount of Phthalo Green to your palette. Using the large flat brush paint in the foliage of the trees using a mixture of both colours.
Step 9 - Mix together a small amount of Jo Sonja Burnt Umber with Jo Sonja Unbleached Titanium. Using a small round brush dot on small tree shapes at the base of the mountains. While you have the colour on the brush also draw on the trunks for the trees. Let dry.
Step 10 - Now that every part of your painting is filled in its time to let your creativity run wild! Begin to overlap sections with patterns of dots and dashes. Get experimental with colour combinations based of the paint we have used so far! It should become messy, abstracted and a little chaotic. Keep in mind the chaos is important for this layer, but this painting is not finished yet! Trust the process!
Once you have filled all parts except the sky and faraway mountains with patterns set aside to dry. Take a 10-15 break.
Step 11 - Looking at your painting with fresh eyes, consider the following:
- What parts would you like to "Push Back"
- What parts would you like to "Emphasize"
To "Push Back" sections you should reduce the contrast - the difference in light and dark in colours. To do this paint on very light versions of the coloured used by mixing in more Jo Sonja Unbleached Titanium.
In Abstract painting there will be many layers and your painting with evolve through many personalities
Don't be afraid of a little trial and error!
Step 12 - After looking at your painting and now having sections that have been "Pushed Back". That is parts that fade away into the background.
Step 13 - Now it time to bring "Emphasis" onto the part of your painting you want to bring forward and focus on! To do this you need to increase the difference between the light and dark colours on those sections. Rich, strong colours with dark shadows and super light bright highlights pop and draw attention.
Step 14 - Once satisfied with the "Emphasis", step back and take a good look at what you have made. Are you happy with it? Do you need to repeat the steps of "Push-Back" and "Emphasis"? If you are unsure, leave the painting for now and revisit it another day.
Otherwise, give yourself a pat on the back! You are FINISHED!


