 | ||
| Your browser is not supported. | ||
|
Please browse our site using any of the following options:
| ||
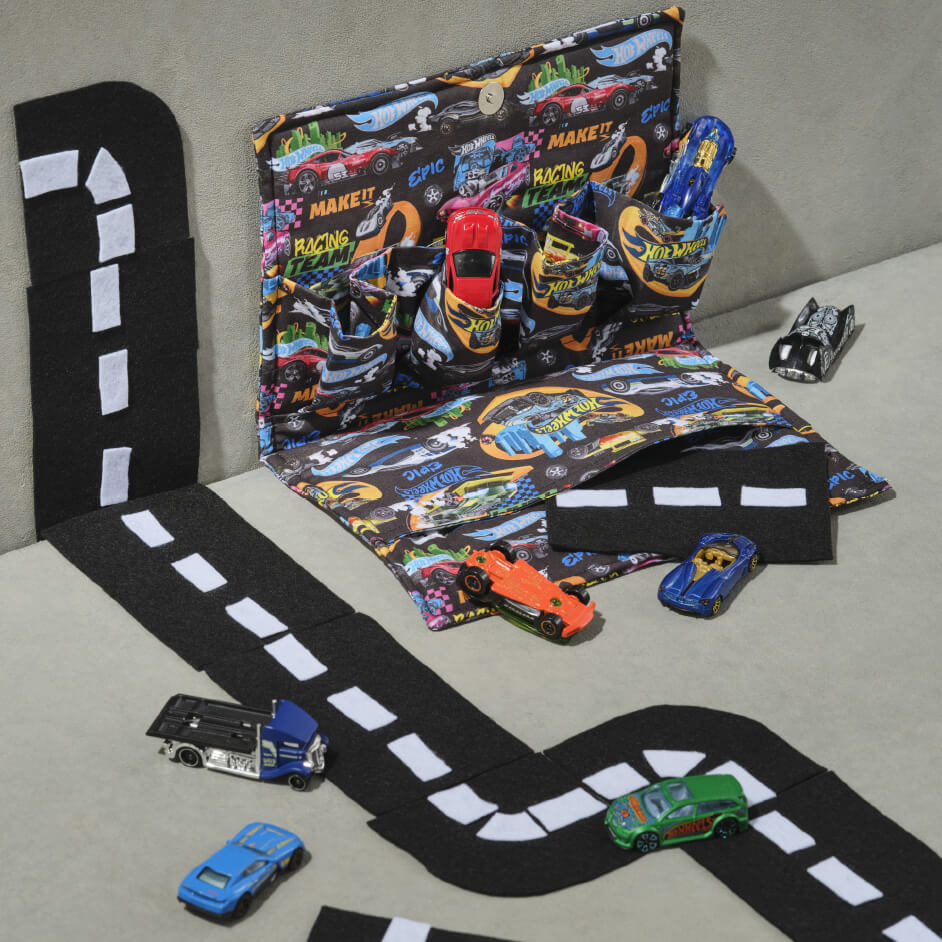
HOT WHEELS ORGANISER & CARRY CASE

Level: Intermediate
What You'll Need:
- 1m Hot Wheels fabric
- Birch Magnetic Handbag Buttons Black
- Legacy L-FF78F1 Flex Foam Stabilizer Fusible Wadding Multicoloured 50 cm
- Thread
- Machine, scissors, iron etc
- Template provided
Optional:
INSTRUCTIONS
Step 1 - Using the template provided, cut all pieces out of the Hot Wheel fabric. When cutting the wadding, ensure it is cut slightly smaller (0.5mm smaller all around) to allow for turning over.
Step 2 - Starting with "Road pocket" - lay the fabric right sides facing and sew along the top long edge. Open the joined fabrics, press with an iron and top stitch across the top.
Step 3 - Being to create the "car park" section of the carrier. Take the two long strips of fabric and repeat step 2.
Step 4 - Using the template as a guide, fold the fabric into an accordion to create parking bays. Using a hot iron press and pin
ensuring your folds are even. Pin to the main body of the pouch using the template as a position guide.
Step 5 - Sew between each pocket to secure it to the body. Taking the "road pocket", fold a small 1cm hem and lay it over the bottom of the "car park". Top stitch to secure.
Step 6 - Following the instructions on the Birch Magnetic Handbag Button packet, add the magnet closure to the bag. One side should be attached to the top of the pouch and the other side should be attached to the outside piece of the carrier.
Tip: Lay the layers of fabric in order of sewing to visualize where the magnet must sit to be able to close. Ensure that the magnet won't interfere with the pockets but is not too close to the edge of the fabric.
Step 7 - With right sides facing, lay the pieces so that the "car park" and the "road pocket" match the position on the template. Lay the foam stabilizer on top and sew around the edge of the body of the carrier. Keep a small opening at the bottom near the pocket open for turning.
Step 8 - Turn out the carrier and top stitch around the edge. Ensure to fold the opening closed before sewing it shut.
Optional
Using felt create road pieces to use when out and about.


