 | ||
| Your browser is not supported. | ||
|
Please browse our site using any of the following options:
| ||
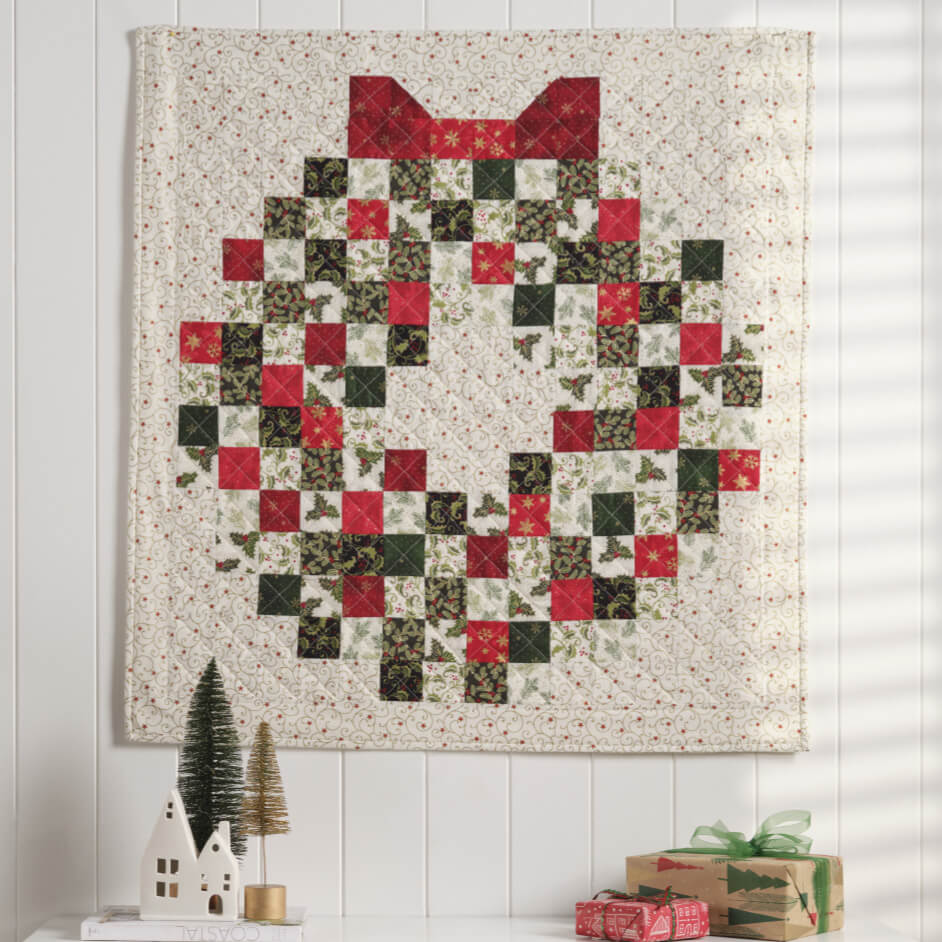
CHRISTMAS WREATH QUILTED WALL HANGING

Level: Beginner
What You'll Need:
- Fabrics are from 'Christmas Metallics' range:
- 90cm Fabric A - Swirls Stars, natural/red/gold (includes binding)
- 20cm Fabric B - Snowflake Mottle, red/gold
- 1.2m Fabric C - Pine Leaves, natural/green (includes backing fabric)
- 20cm Fabric D - Swirl Holly, black
- 20cm Fabric E - Swirl Holly, natural
- 20cm Fabric F - Holly Vines, green
- 20cm Fabric G - Pine Leaves, red/gold
- 20cm Fabric H - Xmas Holly, natural
- 20cm Fabric I - Snowflake Mottle, green/gold
- 20cm Fabric J - Snowflake, red/gold
- 1m x 1.1m Legacy cotton/bamboo batting
- Matching Gutermann 100% cotton thread
- Rotary cutter, mat & quilters rulers
- Quilting pins, tape measure
- Scissors, seam ripper
- Hand needle
- Frixion marker
- Sewing machine with ¼" foot & walking foot
Quilt measures: 32½" x 34½" (83cm x 88cm)
All fabrics should be 100% cotton, washed & pressed. ¼" seam allowance used throughout unless otherwise indicated. Read all instructions carefully before commencing the quilt.
INSTRUCTIONS
Cutting
All strips are cut across the width of fabric unless otherwise stated.
- From Fabric A cut 12 x 2½" strips, set aside 4 strips for binding and 4 strips for borders. Crosscut remaining strips into 68 x 2½" squares. From remaining fabric cut 1 x 3½" square for half-square triangles.
- From Fabric B cut 1 x 3½" square for half-square triangles - cut remaining fabric into 2½" strips, crosscut into 2½" squares.
- From each of Fabrics C, D, E, F, G H, I & J cut 2 x 2½" strips, crosscut strips into 2½" squares.
Note: a total of 140 x 2½" assorted squares is required from Fabrics B, C, D, E, F, G, H & I.
Step 1 - Half-square triangles Take the 3½" Fabric A and Fabric B squares. Rule a line across the diagonal on the wrong side of the 3½" Fabric A square. Place Fabric A and Fabric B squares together with right sides facing and pin together at edges. Sew together ¼" from the line on both sides. Cut along the line to create two half-square triangles. Press seams open.
Step 2 - Layout Refer to diagram and image to arrange squares into 15 rows with 14 x 2½" squares in each row. The Fabric A squares are shown by white squares in the diagram and must be in positions as shown. The half-square triangle units will be 6th and 9th squares in the top row. The patterned squares on the diagram are for all other Fabric B, C, D, E, F, G H, I & J coloured squares which can be arranged as desired.
Step 3 - Rows When happy with your layout sew blocks in each row together, pressing seams in one direction alternating the direction in each row.
Step 4 - Quilt Top Sew rows together matching seams. Press seams in one direction.
Step 5 - Borders Sew one 2½" Fabric A border strip to each side of the quilt. Press seams towards border and trim off any excess fabric. Sew remaining 2 x 2½" border strips to the top and bottom of the quilt, press and trim off any excess fabric.
Step 6 - Backing From remaining Fabric C cut a piece 40" x 42" for backing.
Step 7 - Quilting Layer the backing, batting and quilt top and baste together. Quilt as desired.
Step 8 - Binding Join the 6 x 2½" binding strips on the bias to make one long strip. Press in half lengthwise and bind mitering corners. Attach a label or sign and date your quilt.


