 | ||
| Your browser is not supported. | ||
|
Please browse our site using any of the following options:
| ||
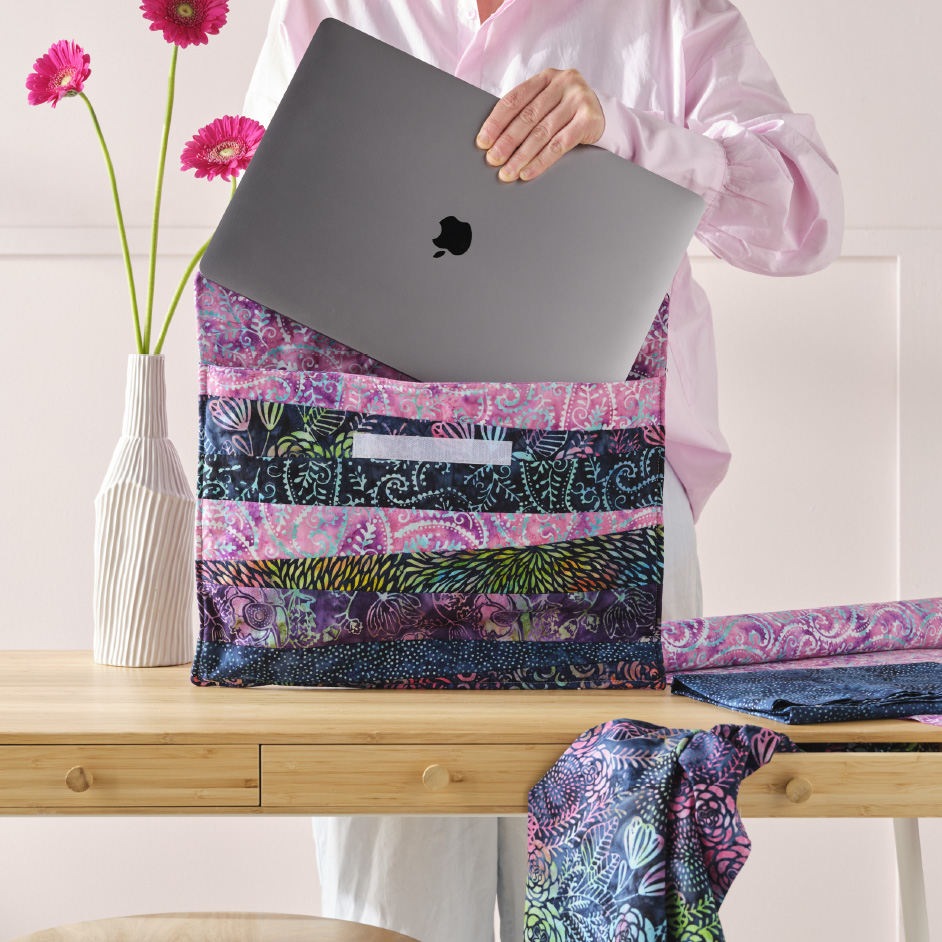
BATIK LAPTOP BAG

Level: Beginner
What you'll need:
- 50 cm of Outer fabric
- 50 cm Lining fabric
- Hook and loop fastener
- Quilt batting or fusible fleece
Instructions
Read all instructions carefully before commencing the project.
Note
- Always press seams after sewing for a neat and accurate finish.
- Use a 1/4 inch seam allowance unless stated otherwise
- Finished size will fit a laptop 14" x 10" laptop.
Cut Fabric & Batting
Front Side: Cut lining fabric (16.5" x 12") and batting (16.5" x 12").
Back (Flat) Side: Cut lining fabric (21" x 12") and batting (21" x 12").
Cut hook and loop fastener into a 5-inch strip.
- Put the outer fabric and the lining fabric together with the right side facing each other and then place the batting on top. Sew one shorter side with a 1/4 inch seam allowance. Open out the fabrics and fold so the batting is now in the middle. Press and topstitch the stitched side. Attach the hook fastener 2 inches from the edge, centred horizontally.
- For the flap side, create triangles by measuring 2 inches left/right and 2 inches down from each corner on one shorter side. Connect and trim.
- Layer flap materials with batting, placing pouch side on top with lining facing each other. Add outer fabric for the flap on top with the wrong side facing up.
- Sew straight along the edges with a 0.25-inch seam allowance, leaving a 4-inch opening on the flap side.
- Trim corners on the pocket side to reduce bulk.
- On the flap side, cut off excess fabric from the corners to create a fringe-like edge, being careful not to cut stitches.
- Turn the sleeve right side out using a chopstick to push corners.
- Topstitch along the edge, closing the opening.
- Attach the loop fastener on the flap, 2.5 inches from the pocket edge.
Patchwork Outer Fabric
To create the patchwork outer fabric
- 5" strips x WOF of an assortment of Batik prints
- Outer fabric pieces (as per measurements above
- Layer one 2.5" strip face side up aligned with one of the long edges of your outer fabric.
- Using a second strip, place this on top of the first one, with right sides together, line up the edges at the right side, but for the left, this should sit 1/2 - 1 inch in from the outer edge of the bottom strip.
- Using the edge of the topmost strip of fabric, sew 1/4 seam allowance to join the strips.
- Press and fold out the top strip. You should see that there is starting to be a wonky pattern.
- Repeat these steps, altering between left and right sides until you reach the end of the outer piece.
- Press, turn over and trim outer pieces back to size.
- Repeat for second outer piece.


