| ||
| Your browser is not supported. | ||
|
Please browse our site using any of the following options:
| ||


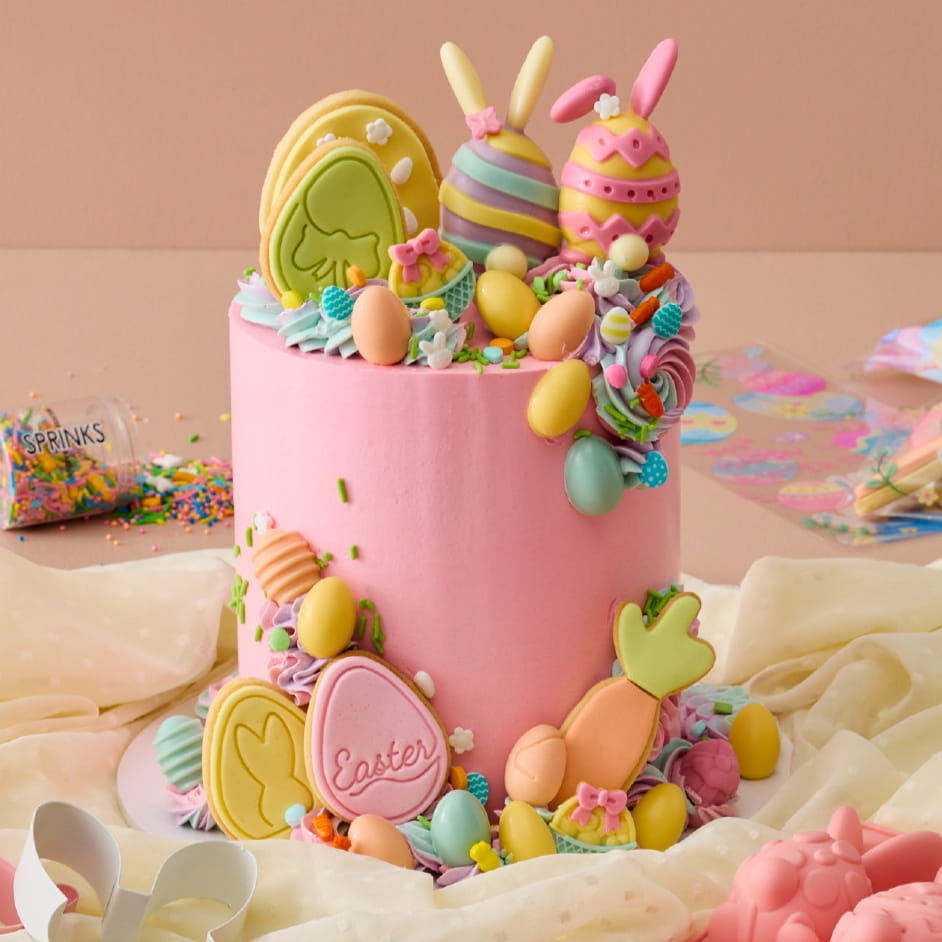
HOPPY EASTER CAKE
Level: Intermediate
What you'll need:
- Happy Easter Chocolate Mould
- Happy Easter Eggs Silicone Moulds
- Happy Easter Cookie Cutters
- Frosted cake— We used a 6 inch round plus extra frosting for piping
- Sprinks Easter Favourites Box Sprinkles
- Creative Kitchen Sprinkles Easter Egg Decorating Ki
- Melted White chocolate
- Colour Mill Oil Food Colours
- Piping Bag
- Star Tip S/C7
- Skewers & Cling Film
- Coloured Fondant
Instructions
Reference the downloadable project sheet for project pattern diagrams.
Step 1
Colour melted chocolate into chosen shades, and using a teaspoon fill the easter egg moulds. (Use oil-based food colour in chocolate only. Gel food colour will cause chocolate to seize)
Pro tip: Tap the mould on the bench to help remove air bubbles. Repeat for all required colours.
Step 2
Using coloured melted chocolate, fill the silicone easter mould.
Pro tip: These moulds are flexible, a gentle squeeze of the mould will help the chocolate to fill any small spaces. Tap the mould on the bench to remove trapped air bubbles.
Step 3
Demould the easter eggs when completely set by tapping on the bench.
To release chocolate from the silicone mould, pull and stretch the silicone and push out of the mould, paying particular attention to any areas that might be fragile.
Step 4
Fill the large silicone Easter mould with chocolate, demold once completely set, paying careful attention to the ears. Add a small skewer to the back of the eggs to help secure on the cake when styling.
Pro tip: If you would like to fill these with caramel or cookie dough. Let the chocolate set a little and then pour out the excess melted chocolate. The cavity can be filled when cold. Then spread melted chocolate over the filling to create a seal, pop in the fridge to make sure the chocolate is set and filling is firm before demoulding.
Step 5
Cover your pre-baked sugar cookies with coloured fondant. Roll out your coloured fondant, and stamp the fondant with the easter egg embosser. Cut out and secure to the cookie with a little water.
Pro tip: Mix up the style of your sugar cookies by adding some Sprinks Easter blend sprinkles, attach to the fondant with a little water
Step 6
Lay the cling film on the table and add your coloured frosting. Roll up the cling film into a sausage shape and twist the ends. Cut one end off using scissors and place into the piping bag with your piping tip. This will allow you to pipe a rainbow onto your cake by using one bag.
Step 7
Add piping rosettes on the top of the cake, and on the bottom at both the left and right sides. Leaving space in the middle at the bottom. Practice with the template provided. Start at the centre with the dot and follow the line, easing the pressure at the end. Begin adding your Easter egg cookies and the chocolates on skewers.
Pro tip: Add some squiggles or star piping for extra design flair.
Step 8
Scatter the coloured chocolate eggs around the cake and fill in any spaces. The addition of the Sprinks Easter Egg Blend will help fill in spaces and provide extra pops of colour. Sprinkle the Easter egg blend sprinkles around the cake.
Pro tip: Flick some of the sprinkles onto the side of the cake so it looks like the sprinkles are cascading down.