 | ||
| Your browser is not supported. | ||
|
Please browse our site using any of the following options:
| ||
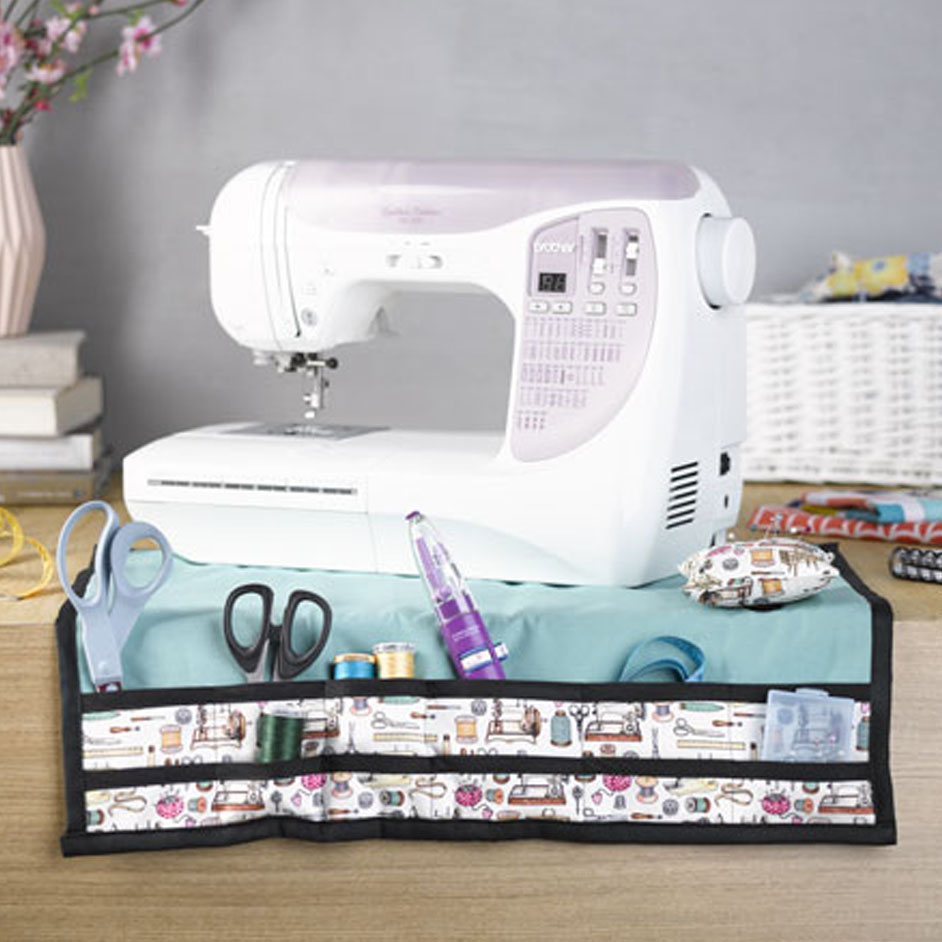
SEWING MACHINE ORGANISER

LEVEL: EASY
WHAT YOU'LL NEED
- 1x flat fat or 0.5m of 112cm wide cotton fabric (top)
- 1x flat fat or 0.3m of 112cm wide printed cotton fabric (pockets)
- 0.55m high by 60cm wide of cotton fabric/drill (backing)
- 1.1m of 23cm wide bias binding
- 50cm of thin fusible pellon
- 0.3m of lightweight fusible interfacing
- 4cm of hook and look tape
- Small amount of Hobby fill
- Scissors, Pins, Tape measure/ruler
- Sewing machine & matching thread
- Iron
INSTRUCTIONS
STEP 1
Cut a piece measuring 55cm wide by 20cm high from printed cotton fabric. With right side out, press fabric in half height wise. Cut a piece of fusible interfacing measuring 55cm wide by 10cm high. Open fabric back out and fuse interfacing to the back of the top pressed half of fabric. Repress fabric back in half. Repeat method to make the second pocket with a 55cm wide by 10cm high piece of fabric. Press in half and then fuse a piece of interfacing 55cm wide by 5cm high to the inside of the top pressed half, repress in half. Cut bias binding into two 55cm long strips. Press in half to make a narrower binding.Pin bias strips to the top pressed folded edge of each pocket. Top stitch binding in place. Place the smaller pocket on top of the larger pocket aligning side and base raw edges. Baste side and base edges 5mm in from outer edges.
STEP 2
Cut a 55cm wide by 50cm high piece from both the top cotton fabric and the pellon. Fuse pellon to the back of the fabric. Pin pockets to top fabric piece aligning base and side edges. Baste side and base edges to top piece along previous basting. Sew vertical dividers through the thickness of all pockets as desired to suit what the pockets will be used for.
STEP 3
Cut two 13cm squares from printed cotton fabric. Sew one sideof the hook and loop tape to the middle of one of the fabricpieces on the right side. With right sides together pin fabric squares together and using
a 1cm seam allowance sew the sides and base edges together, leaving the top edges open. Turn the fabric right way out and press flat with the seam allowance on the top edges pressed inside. Fill square with filling and sew the top edges closed. Pin the other side of the hook and loop tape to the top of the organiser mat, 7cm in from side raw edge and 6.5cm up from the top edge of the top pocket. Sew in place.
STEP 4
Press under 1cm, then another 1.5cm along all the edges of the backing fabric. Place fabric wrong side up on table. With right side up of the top of the organizer place on top in the centre. Pin each of the pressed side edges of the backing fabric over the raw sides edges of the top fabric to bind. Top stitch in place. Pin the pressed top and base edges of the backing fabric of the raw top and base edges of the top fabric and top stitch in place.


