 | ||
| Your browser is not supported. | ||
|
Please browse our site using any of the following options:
| ||
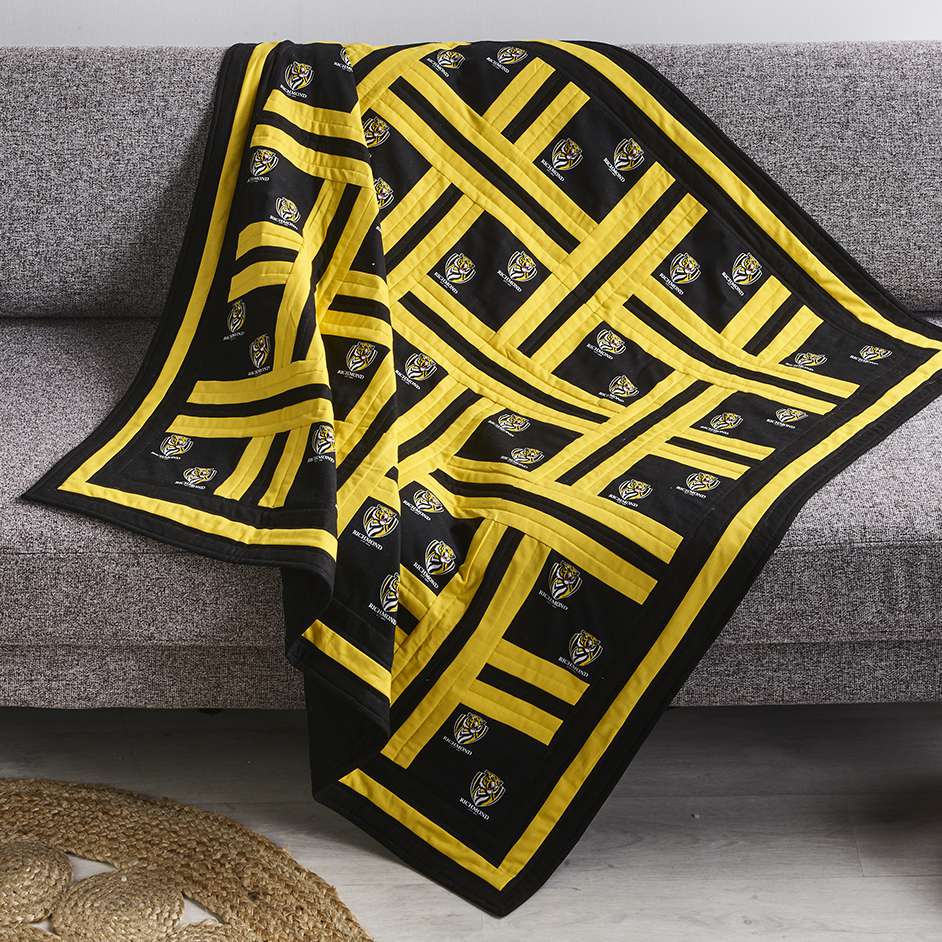
AFL RICHMOND QUILT

Level: Intermediate
WHAT YOU'LL NEED:
- 1m Fabric A - AFL Homespun Richmond Tigers, black
- 1m Fabric B - Prima Homespun, Lemon Chrome
- 1.2m Fabric C - Prima Homespun, Black (includes binding)
- 1.4m x 250cm wide Prima Homespun Backing fabric, Black
- 1.4m Legacy cotton/bamboo batting
- Matching Gutermann 100% cotton thread
- Rotary cutter, mat & quilters rulers
- Template plastic
- Sandpaper board
- Optional - rotating cutting mat
- Quilters white marking pen
- Quilting pins, tape measure
- Scissors, seam ripper
- Hand needle
- Sewing machine with 1/4" foot & walking foot
All fabrics should be 100% cotton, washed & pressed.
1/4" seam allowance used throughout unless otherwise indicated.
MEASUREMENTS | |
Finished size (cm) | 126 x 126 (49 1/2" x 49 1/2" ) |
INSTRUCTIONS
CUTTING
All strips are cut across the width of fabric unless otherwise stated.
- Cut a 5 1/2" square from template plastic. Place Fabric A on sandpaper board, centre template over two logos and trace around the edge. Repeat using the template to trace 25 x 5 1/2" squares. Cut out the squares using ruler, rotary cutter and rotating cutting mat.
- From Fabric B cut 14 x 2" strips and 5 x 1 1/2" strips.
- From Fabric C cut 9 x 2" strips, 7 x 1 1/2" strips and 5 x 2 1/2" strips for binding.
STRIP UNITS
Step 1 - Sew a 2" Fabric B strip to each side of a 1 1/2" Fabric C strip. Press seams towards Fabric C. Repeat to make 7 strip units.
Crosscut strip units into 11 x 14 1/2" lengths, 5 x 9 1/2" lengths and 13 x 5 1/2" lengths.
Step 2 - Unit 1 - make 7
Sew a 5 1/2" length from step 1 to the bottom edge of a 51/2" Fabric A square. Press seam towards square. Sew the top edge of a second 51/2" Fabric A square to the opposite side of the striped unit. Press seam towards square.
Step 3 - Unit 2 - make 5
Sew a 5 1/2" length from step 1 to the right-hand edge of a 51/2" Fabric A square. Press seam towards square. Sew the left-hand edge of a second 5 1/2" Fabric A square to the opposite side of the striped unit. Press seam towards square.
BLOCKS
Step 4 - Block A - make 3
Sew a 14 1/2" length from step 1 to the right-hand edge of a Unit 1. Press seam towards strip unit.
Step 5 - Block B - make 3
Sew a 14 1/2" length from step 1 to the left-hand edge of a Unit 1. Press seam towards strip unit.
Step 6 - Block C - make 2
Sew a 14 1/2" length from step 1 to the bottom edge of a Unit 2. Press seam towards strip unit.
Step 7 - Block D - make 3
Sew a 14 1/2" length from step 1 to the top edge of a Unit 2. Press seam towards strip unit.
Step 8. Block E - make 1
This is a Unit 1.
Step 9 - Block F - make 1
Sew a 5 1/2" length from step 1 to the left-hand edge of a 5 1/2" Fabric A square. Press seam towards square. Sew a 91/2" length from step 1 to the bottom edge. Press seam towards strip unit.
QUILT TOP
Step 10 - Layout the blocks as shown in diagram below. The white spaces are 9 1/2" lengths from step 1 used to join blocks together. Sew blocks together in order below then place back into position in the layout.
Step 11 - Sew blocks together in following order - two A blocks (AA), two C blocks (CC), two B blocks (BB), two D blocks (DD).
Step 12 - Sew A block to E block then sew D block to bottom edge to make AED block - sew F block to top of B block to make FB block. Sew FB block to right-hand edge of the AED block to create large centre block.
Step 13 - Sew BB block to right-hand edge of stopping 1/2"before the end of the centre block - sew CC to the top edge, then sew AA to the left-hand edge. Sew DD to the bottom edge. Starting 1/2" before the bottom of the centre block finish sewing BB block to DD.
Step 14 - Layer the backing, batting and quilt top and baste together. Quilt as desired.
Step 15 - Join the 5 x 2 1/2" binding strips together on the bias to make one long strip. Press in half lengthwise and bind mitering corners. Attach a label or sign and date your quilt.


