 | ||
| Your browser is not supported. | ||
|
Please browse our site using any of the following options:
| ||
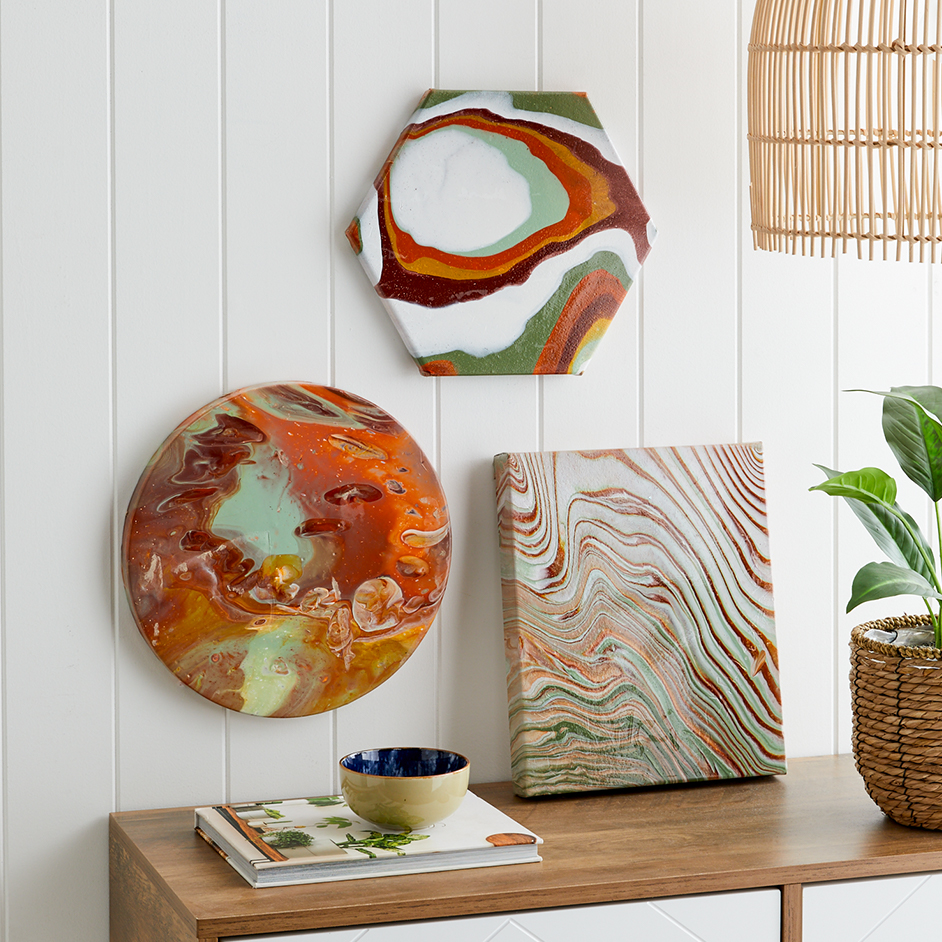
PAINT POURING

LEVEL: EASY
What you'll need:
- 500ml reeves pouring medium
- 75ml reeves fine acrylic paint in burnt sienna, deep madder, pale olive, cadmium yellow, chromium oxide green, titanium white & orange
- 6in francheville hexagon canvas
- 8in crafters choice round canvas
- 8x10in crafters choice canvas
- Mixing stick
- Plastic cup, tray and gloves
INSTRUCTIONS
Step 1 - Cover table and floor with a disposable tablecloth or newspaper to protect it from paint splashes or spills. For this project, we will be using a different technique for each canvas.
Step 2 - Place the mold on protected work surface and pour clear resin to almost fill the mold. Let sit for five minutes.
Step 3 - Set out plastic cups to mix the paint and medium. Prop your canvas onto something that can catch the paint, we recommend a big cardboard box or baking tray. You also want the canvas to be lifted from the surface so the paint can drip off. We prefer using push pins, insert one behind each corner of the canvas to make little raised 'feet'.
Step 4 - You can use one of the paints pouring techniques listed or get creative and try your own style.
Step 5 - Let the canvas dry completely, do not lean against a wall. You want it to dry flat on a stable surface. Most canvasses will dry in 2-3 days, if you pour a thick layer it may take longer.
BASIC STRAIGHT POUR
A straight pour means pouring one colour at a time to layer it. You can tilt and roll your surface to swirl the colours together and create new patterns or you can leave it as is if. Basic pours are great for creating colour block effects as you have more control over your pouring and colours are less likely to get muddled. You can also swirl the colours together using a brush or blow on it with a straw to create ripples.
DIRTY POUR
The process of a dirty pour technique starts with layering colours in a cup, then place your canvas on top of the cup. Holding it securely, flip it over. The suction will keep the cup in place until you pull it off. Before lifting the cup let it settle for a few seconds before pulling the cup. Tilt the canvas to let the paint swirl and mix.
It is a great beginner technique as each pour will give you unique and varied effects. Be careful to not to layer too many colours at once as it can give a muddled pour.
TREE RING POUR
This method starts off similar to the Dirty pour. Start by layering the colours in a cup, when you are ready to, start slowly pouring in the middle of the canvas and keep the stream of paint steady so the tree rings expand slowly. You can also start in one corner and use slow circular motions to pour the paint. The slower you pour, the closer the rings will be to one another. Once you're finished pouring, slowly tilt the canvas in a circular motion for the paint to cover the entire surface.
Tips & Tricks
If you don't want paint drips on the sides of the painting, tape the back and sides of the canvas to create a cleaner look. This will also reduce any possibility of paint staining walls or surfaces. Peel off tape when the painting has fully dried after 2-5 days.
Add silicone oil to the paint to create cells, you can use a strawer or hair dryer to activate the cells.


