 | ||
| Your browser is not supported. | ||
|
Please browse our site using any of the following options:
| ||
JO SONJA WINTER LANDSCAPE PAINTING

LEVEL: INTERMEDIATE
WHAT YOU'LL NEED:
- Semco Single Stretch Canvas 10x12in
- Jo Sonja Paints in Titanium White, Transparent Magenta, Nimbus Grey, Carbon Black, Amethyst, Red Violet, Burnt Umber, Brown Madder & Fawn
- Paint Brushes
INSTRUCTIONS
Step 1 - We will start by painting the background and the sky. Set up your palette by squeezing a small amount of the following colours: Titanium White, Nimbus Grey, Amethyst & Transparent Magenta
Step 2 - To paint the sky, create three shades of pink on your palette first.
a. mix Titanium White with a touch of Transparent Magenta to create a pastel pink
b. mix Titanium White with Transparent Magenta to create a light pink.
c. mix Titanium White with a touch of Transparent Magenta and keep adding Nimbus Grey until it creates more of a grey/ lilac hue.
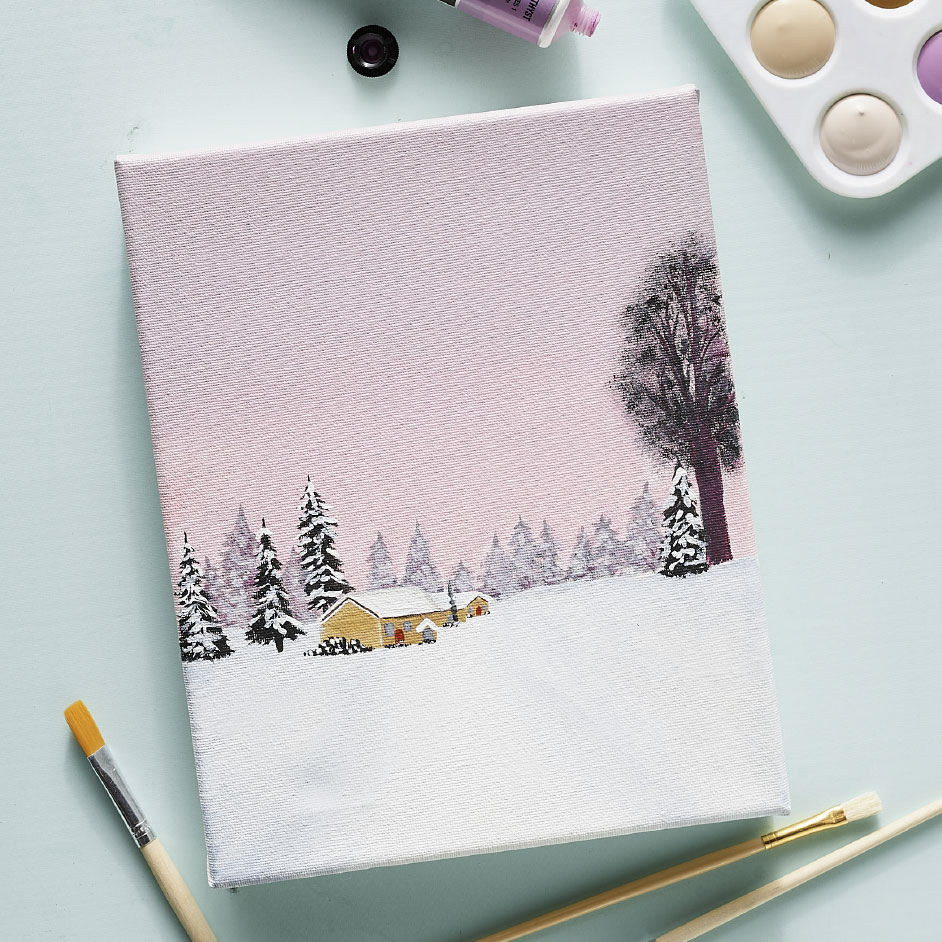
Step 3 - Paint 2/3 of the canvas with the grey/lilac paint and transition to light pink then pastel pink to create an ombre effect for the sky. The remaining 1/3 of the canvas will be for the snow, cottage house and trees.
Step 4 - For the snow, mix Titanium White with a touch of Nimbus Grey and paint the remaining 1/3 of the canvas. The horizon should not be completely straight but should have some bends in the line to mimic hills.
Step 5 - Mix in more Nimbus Grey to the paint to create a light grey hue, this will be used to add shadow to areas where we will paint other objects such as the trees and the cottage house. Let the canvas dry completely.
Step 6 - To paint the background trees, create three shades of purple.
a. mix Titanium White and Nimbus Grey and add a touch of Red Violet to create a pastel grey lilac hue.
b. mix Titanium White and Nimbus Grey and add a touch of Red Violet to create a grey lilac hue.
c. mix Titanium White and a tiny amount of Red Violet and Nimbus Grey to create muted purple.
You can roughly paint in the pine trees to start with, as we will be layering paint to add dimension. For the first layer we will use the darkest paint, go in with the medium paint, and use the lightest to add snow details.
Step 7 - To paint the middle ground trees, we used Black for the pine trees. For the big tree, we used Red Violet and for the leaves we used Black. A stencil brush is great for adding in the leaf details. Go back in with Titanium White to add snow.
Step 8 - For the cottage house, we used Fawn for the exterior. For the snowy roof, we used Titanium White, then used Burnt Umber to line the roof. For the door, we used Brown Madder. For the windows, we used left over grey paint. grey paint. You could also make grey by mixing Titanium White with Black.
Step 9 - For the final touch we will paint a pathway to the cottage. For this, we mixed Nimbus Grey and Titanium White to create a light grey hue. TIP: imagine a triangle under the cottage (the tip of the triangle pointing up), paint the two lines of the triangle on either side. Don't paint the bottom of the imaginary triangle. Blend the edges so the lines aren't harsh.
Step 10 - We recommend going back with more paint to add more depth or to add more snow.


