 | ||
| Your browser is not supported. | ||
|
Please browse our site using any of the following options:
| ||
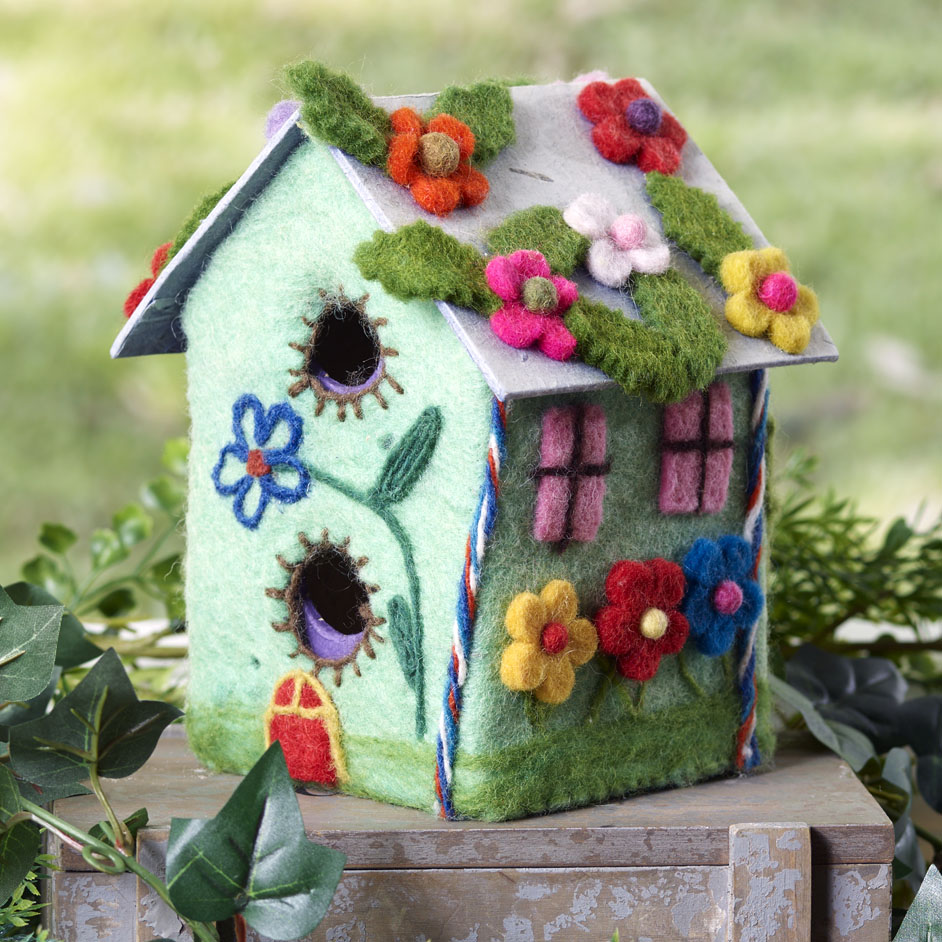
ARBEE WOOL FELTED FAIRY HOUSE

LEVEL: EASY
WHAT YOU'LL NEED:
- Cardboard Box with lid, extra cardboard may be needed.
- Wool for felting
- Felting Needle Tool with Cover (7 Needles)
- Foam Block
- Wool Felt Sheets (color of your choice)
- Embellishments of your choice (Flowers, Leaf, Heart)
- Glue
- Wool
- Scissors/ cutting blade
INSTRUCTIONS
House
- Cut cardboard piece 130mm W x 220mm L. Fold the cut cardboard in half and shape it at the desired angle to form a roof.
- Paint the roof the colour of your choice or glue a felt piece cut to similar size to card board.
- For side wall of house (A, cut 2 equal pieces of cardboard to following dimensions 170mm L x 110mm W. Mark at 110mm L (or desired height of house) and cut at equal angle to fit the roof (between 111mm to 170mm L).
- For the other walls (B1), cut 1 piece cardboard 310mm L x 110mm W. Measure to 90mm L from one end and fold to fit the folded section under the roof.
- Measure cardboard the 90mm mark, 110mm to form a wall.
- Fold at 200mm mark at right angle to form the base.
- For wall B2, cut cardboard 200mm and repeat process for B1 (except for the base).
- As an exception you can cut a separate piece of cardboard for the base, 110mm x 110mm or larger square piece.
- Cut holes on cardboard for windows or doors using a blade.
- Glue both the folded cardboard sections (A & B) to roof.
Leave the glued cardboard house to dry before attempting to embellish it.
Optional: Paint the cardboard piece if desired or leave it as is.
Felting
- Cut felt sheet into 6 pieces that will cover front back, base, sides and roof of box cottage.
- Cut holes in one piece of felt that will line up with the windows that have been cut out in the cardboard.
- To create grass effect by dry felting 1.5cm around the bottom of each piece of felt.
- Cut a small length of felting wool. Separate and tease out the felting wool fibres in your chosen pattern on the wool felt. You can use random patterns to create your design.
Place the felt sheet and wool fibres on a foam block, hold the fibres firmly on the wool felt between your fingers and begin to needle in a continuous up and down motion through the wool fibres and wool felt. Be careful to only use the needle in a continuous vertical motion because if you change direction you risk breaking the tip of the needle.
You will see the fibres begin to lock into the wool felt. Lift and move the wool felt until all the fibres have been needled in place. If you want to add extra dimension with textured fibres, position and needle them in place now. Glue your completed design onto the sides of the house.
Felting Embellishments (Options)
- Purchase pre-made felted embellishments from your local Spotlight store. Glue or sew the embellishments on to the wool felt sheet before gluing the wool felt sheets on to the prepared walls of cottage.
- Alternatively, you can make your own embellishments by cutting pieces of felt out in the shape of flowers, windows and door. Glue or sew the embellishments on to the wool felt sheet before gluing the wool felt sheets on to the prepared walls of cottage.
- Create texture, take small pieces of felting wool fibres and drape across your petals. Fuse the fibres together by repetitively jabbing your barbed felting needle so it goes through the wool top fibre and flat felt. Repeat instructions provided earlier.
- Glue or sew the wool threads to make flower stems and outline the windows and door.
When embellishments are completed glue or sew on to the felt sheets, the embellished felt sheets are ready to be glued onto house.
Decorate your project to personalise the final outcome. Colours in images are only a guide. You may change the colour of felt sheets or felting fibres, and embellishments used. The size of the Cottage is only a guide.


