 | ||
| Your browser is not supported. | ||
|
Please browse our site using any of the following options:
| ||
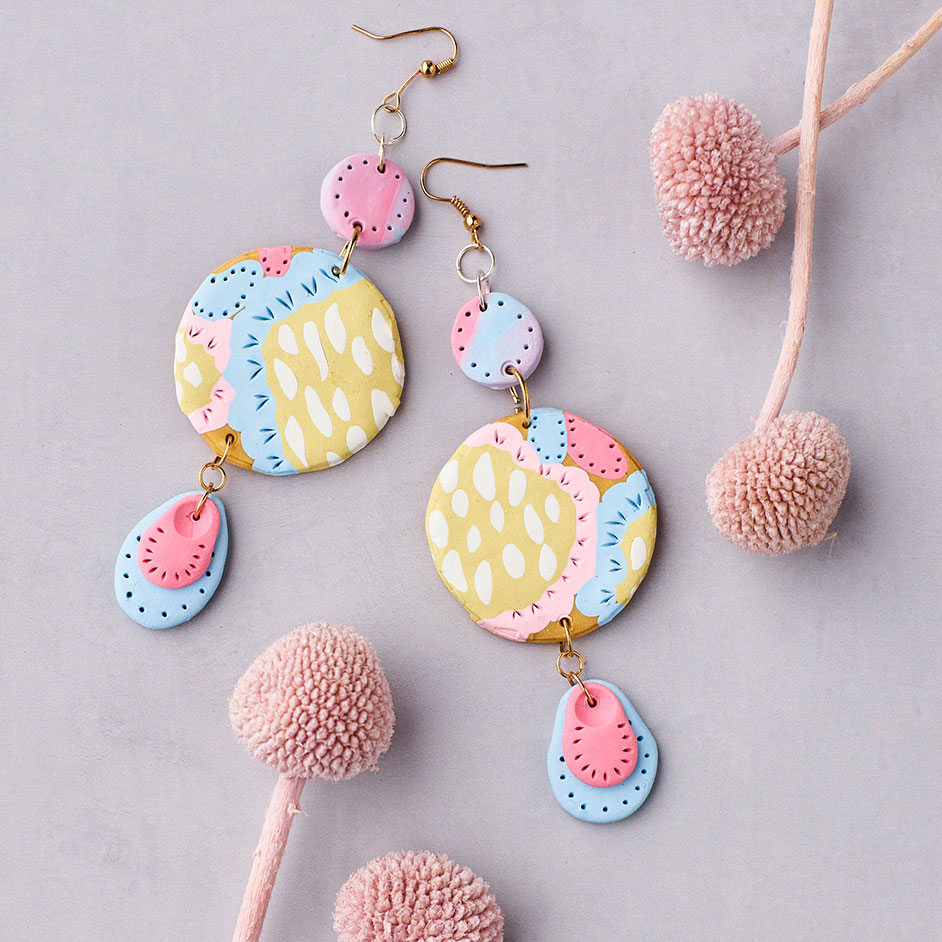
TUSCAN SUN EARRINGS

Level: Easy
WHAT YOU'LL NEED
- Sculpey Clay Tool Starter Set
- Sculpey III Multipack in Pastel
- Oven
- Baking paper
- Jewellery pliers
- Ribtex Earring hooks
- Ribtex Jump rings in 4mm & 7mm
INSTRUCTIONS
Step 1 - Preparation is key, have you seen any style of earrings you've been inspired by? Draw up a rough sketch of your idea or reference our simple drop style earrings. If you're creating earrings with separate pieces like we did, make sure there is space for the jump rings to be placed later on.
Step 2 - To create marble effects, roll the colours into a long snake shape and then wrap them around each other and then roll up into a ball. Continue mixing the colours until you are happy with the results and then roll out flat to 2mm thick and cut out your shapes from this.
Step 3 - To make the floral pattern, we used the slab technique to attach pieces of clay to the surface to create patterns. For a small slab, roll it out to be 8x8cm in size. Choose what you want the base colour to be and roll out the clay to about 2mm thick. For the pattern you'll be placing on the slab, roll out to 1.5mm thickness. Place small bits of other colours over the top to create the petals and flowers and gently tap into place. To create texture, use your tools to make imprints.
Step 4 - You can cut the clay free hand using the sculpey cutting tools or for precision, use cutter tools. Don't forget to create holes for the jump rings, we used a toothpick. Once you bake the clay, it will be very hard to drill holes into the pieces.
Step 5 - Once you're done with your pieces, you're ready to bake your sculpey in the oven. For best results, preheat your oven for at least 15 minutes. We recommend baking a test piece first to ensure you know the optimal time for curing your clay as every oven will heat differently. A good rule of thumb for curing Sculpey III clay is to bake at 130C for 15 minutes for every 6mm thickness. For our 2mm thickness, it will be about 5 minutes - do not leave longer than 9 minutes.
Step 6 - Now using the pliers and jewellery accessories you can assemble your earrings. The possibilities are endless so let your creativity go wild and see what creations you come up with.
Step 7 - Place the pieces between 2 sheets of baking paper and put in the oven. Keep a sharp eye on the pieces to ensure they're not overbaked as this will cause yellowing on the surface. They will harden as they cool so don't be alarmed if they appear soft.
Step 8 - Now using the pliers and jewellery accessories you can assemble your earrings. The possibilities are endless so let your creativity go wild and see what creations you come up with.


