 | ||
| Your browser is not supported. | ||
|
Please browse our site using any of the following options:
| ||
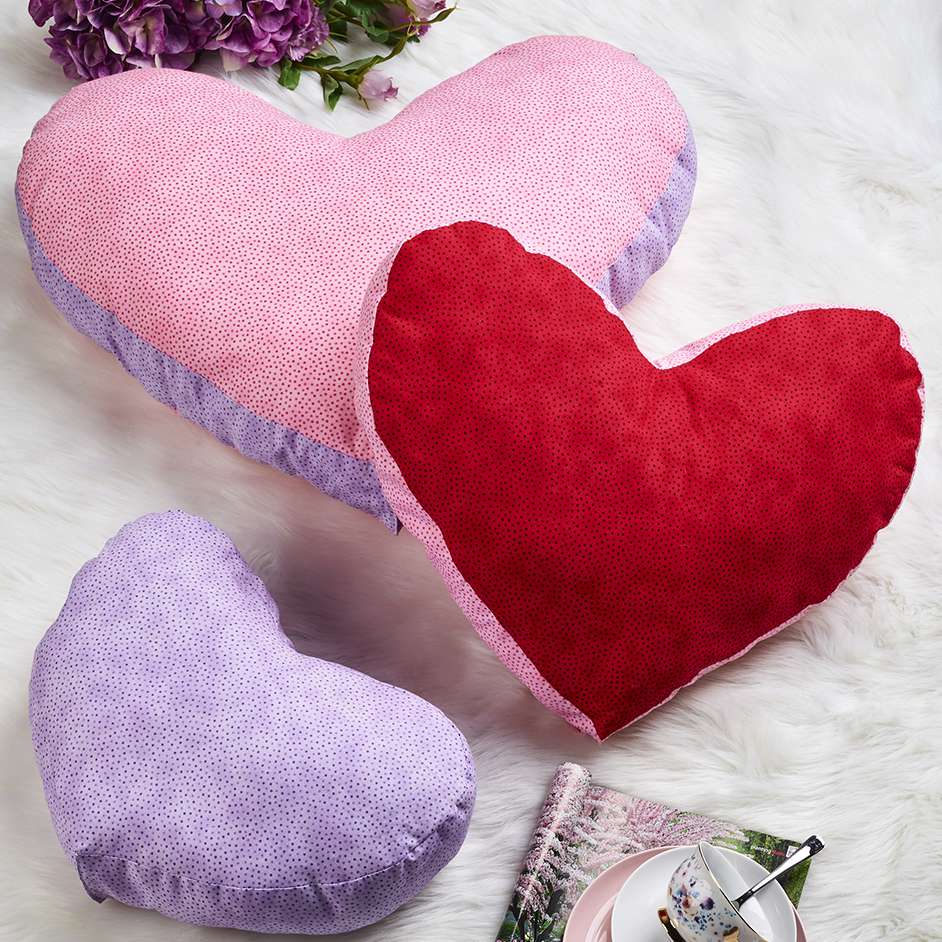
LOVE HEART CUSHIONS

Level: Easy
Project Name: Love Heart Cushions
WHAT YOU'LL NEED
- 3 x quilting fabrics (multi splot blender. Red, lavender & rose. 112cm wide.)
- Paper for pattern making
- Ruler and tape measure
- Pencil
- Scissors
- Sewing machine and matching thread
- Hand sewing needle and thread
- 3 x bags of Hobby Fill
INSTRUCTIONS
Step 1 - Start by creating your pattern. Using a pencil draw half a love heart shape onto the paper, fold your paper in half down the center of the love heart and trace through one side of the shape to the other so your shape is perfectly symmetrical. If you are no confident in free hand drawing you can print off a template from the internet. Repeat this step for 2 more love heart shapes so you have 3 different sizes. You will cut 2 of each love heart shape for each cushion (a front and back).
Step 2 - To create the sides of the cushions decide on the width you would like your gusset to be, we chose 10cm for our cushions gusset. Then use a tape measure to measure around the circumference of each love heart shape starting and finishing at the bottom point. Record this measurement and add 2cm to it and the gusset measurement for seam allowance. Use a pencil and ruler to draw a long rectangle shape the recorded circumference length of each heart shape (+the 2cm SA) and 12cm wide for the gusset (10cm + 2cm SA).
Step 3 - You should have 3 pieces per cushion, a front and back love heart pattern and a long rectangle gusset piece. Once you have all your pattern pieces cut out you are ready to assemble your cushions. With right sides together, start by pinning the gusset strip all the way around the front of your heart cushion piece. Take note of where the ends of your gusset piece meet and sew the ends of the strip together with a 1cm seam allowance before sewing the gusset onto the front piece. Finish pinning the gusset in place one it is one continuous piece.
Step 4 - Then sew around the entire heart shape using a 1cm seam allowance to attach the gusset.
Step 5 - Repeat this process with the back panels, pinning the gusset the entire way around the back but this time leave a 10cm gap in the seam for turning through later and stuffing.
Step 6 - Snip slits into the seam allowance of the fabric along the curved edges and also at the pointy end of the heart. This will help ensure your seams are smooth when turned out but be careful not to snip through the seam allowance.
Step 7 - Once you have finished snipping the seams turn the cushion right side out.
Use hobby fill to stuff the pillow to the firmness you desire. We used roughly 3 bags of hobby fill to fill our 3 cushions.
Step 8 - To finish use a needle and thread to blind stitch the gap you left in step 5 closed.
Step 9 - Repeat steps 1 to 8 for each cushion shape.


