 | ||
| Your browser is not supported. | ||
|
Please browse our site using any of the following options:
| ||
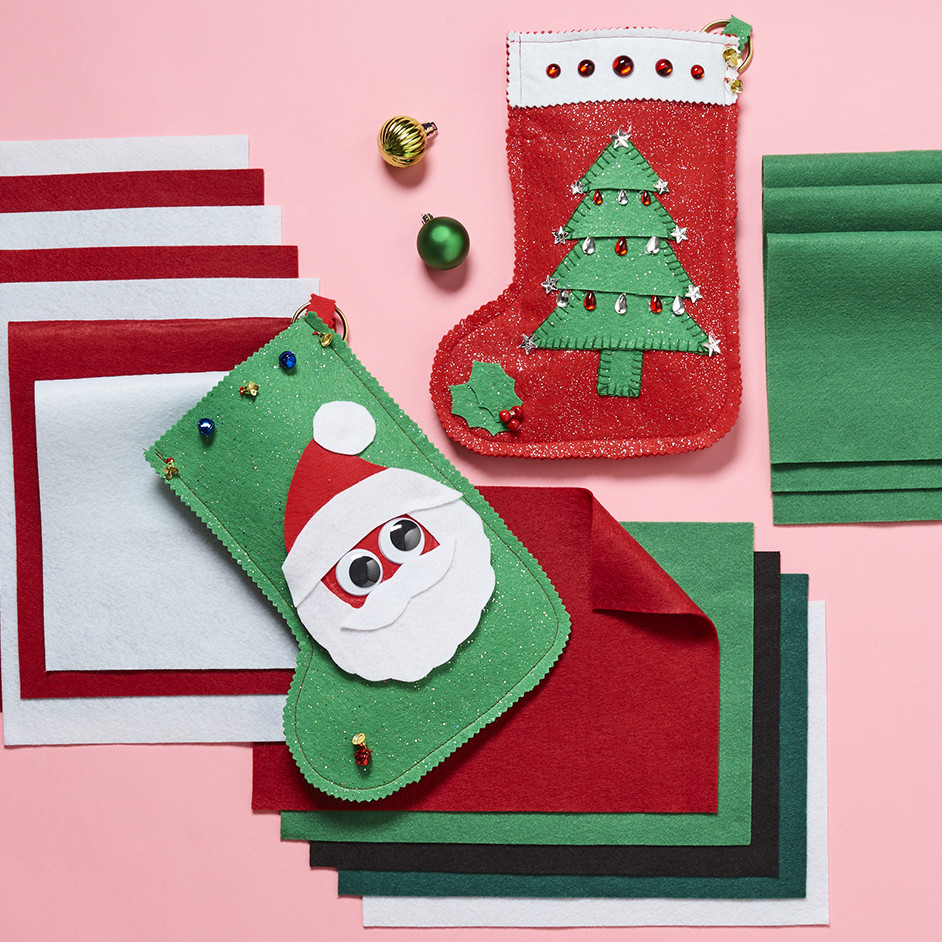
FELT CHRISTMAS STOCKINGS

LEVEL: EASY
WHAT YOU'LL NEED:
SANTA FACE STOCKING
- Stocking template
- Santa Face templates
- Hot Glue Gun and glue sticks
- Sewing machine or hand sew (if hand sewing, use embroidery thread, 3strands thickness and everyday sewing needle with eye size to thread the 3 strand thickness and sharp point to penetrate the felt)
- Embroidery thread to sew on bells
- Good fabric scissors and pinking shears (optional) for felt cutting
- Paper scissors for template cutting
- Glitter Felt sheet green x 2
- Plain Felt sheet red x 1
- Plain Felt sheet white x 1
- Joggle eyes Sew on 30mm 1pkt
- Folley Bells 12mm Asst 1pkt
- True Bells 10mm Gold 1pkt
- Rings Mac 38mm Gold 1pkt
CHRISTMAS TREE STOCKING
- Stocking template
- Christmas Tree Sections
- Holly leaves 1
- Stocking Cuff
- Hot Glue Gun and glue sticks
- Machine or hand sew ((if hand sewing, use embroidery thread, 3strands thickness and everyday sewing needle with eye size to thread the 3 strand thickness and sharp point to penetrate the felt)
- Embroidery Thread for attaching bells
- Good fabric scissors and pinking shears (optional) for felt cutting and paper scissors for template cutting
- Glitter Felt sheet Red x 2
- Glitter Felt sheet green x 1
- Plain Felt sheet white x 1
- True Bells 10mm Gold 1pkt
- Wooden Beads for holly seeds Red x 1pkt
- Jewel Stars Clear
- Jewel Drops -Clear & Ruby
- Jewel Rounds
- Rings Mac 38mm Gold 1pkt
Note: Before starting read all instructions first.
INSTRUCTIONS
SANTA FACE STOCKING
Step 1 - Cut out templates, one of each.
Step 2 - Using green felt place two pieces together with right sides facing outward, position boot template and cut out of felt using fabric scissors.
Step 3 - Using red felt pin full Santa face template and cut out using fabric scissors.
Step 4 - Using white felt cut out templates for beard, moustache, hat trim & pom pom.
Step 5 - Prepare Santa face for stocking. Using hot glue gun, glue into place onto the red felt face - we used this sequence - Beard, Hat brim, Moustache, Hat Pompom, Joggle eyes. The hat brim should be placed slightly over the beard ends. Set aside (if any red felt is showing under the white edges trim the red back a little)
ASSEMBLING THE STOCKING
Step 1 - Sew the bells into place in the toe area of the front piece of the boot (about 4cm from the base) then pin both sides of boot together right side out.
Step 2 - Prepare a tab and loop the ring into the tab - pin into the top side of the boot - see completed image
Step 3 - Machine sew seams, starting at hanging loop edge (include the hanging loop into your sewing), continue until complete (Do not stitch top opening). If hand embroidering the seams, proceed same ensuring you secure the hanging loop into your stitching.
Step 4- Place completed Santa face onto front of boot, we positioned lowest bottom edge 5cm from base and highest edge 5cm from top. Use the hot glue gun to glue into place.
Step 5 - Complete the stitching of the bells on the front boot opening edge.
Your stocking is now ready to hang!
CHRISTMAS TREE STOCKING
Step 1 - Cut out templates - Stocking x 1, Tree pieces x 1each, Holly x 1
Step 2 - Using red felt place two pieces together with right sides facing outward, position stocking template and cut
Step 3 - Using green felt pin tree pieces and cut one of each, cut two holly pieces
Step 4 - Using the white felt cut two pieces for the boot cuff front and back
Step 5 - On front piece of stocking, position your tree then sew or glue in order from trunk upwards - trunk, base tree piece, lower tree piece, upper tree piece then top piece keeping the overlap portion free of stitching or glue (when you add your decorations in this overlap area it will give the appearance of hanging from branches)
Step 6 - Fix the holly leaves and beads into place in the toe area
Step 7 - Attach the cuff to both sides of the stocking (hand or machine sew)
ASSEMBLING THE STOCKING
Step 1 - Pin both sides of the boot together with right sides facing outward
Step 2 - Prepare the tab and loop the ring into the tab - pin into the top side of the boot - see completed image
Step 3 - Machine sew seams starting at hanging loop edge (include the hanging loop into your sewing), continue until complete (Do not stitch closed the top opening). If hand embroidering the seams, proceed same ensuring you secure the hanging loop into your stitching.
Step 4 - Using hot glue gun decorate tree and front cuff with your selection of jewels
Step 5 - Complete the stitching of the bells on the front boot side edge.
Your stocking is now ready to hang!


